Showing posts with label pink. Show all posts

Friday, January 24, 2014

Oops, I did it again.

     Rearranged my bedroom furniture, that is. And ok, it wasn't really an oops. I meant to do it. Anything for a Brit-Brit reference though. 

     This time around, the rearranging bug struck for practical reasons rather than a random whim. See, as much as I loved having my bed by the window where I could enjoy a breeze when the weather was good and sit there looking out at the field across the way like a Jane Austen character...it was freaking FREEZING. Not as bad as in my old apartment or anything (no curtains visibly blowing in the wind from the closed window), but noticeably, uncomfortably cold. Especially with all these polar vortexes (vorteces? It's late, I'm so tired) we keep having to deal with, it was just too much. I don't handle cold too well; I already have a slight blue cast at all times from my veins trying to say hello through my ghostly pallor, I don't need cold temperatures to accentuate that. 

     So I decided I'd move my bed back to the opposite (interior!) wall. The added bonus is that without a window there I can line the whole wall there with pillows for a daybed-type feel, which I have a strange fondness for. I dunno, I like to feel cozy and snug. I'm the weirdo that used to like to hang out under my desk as a child, so at least I've stopped doing that. But if I can completely encircle two of the four sides of my bed with squishy pillows, hells yeah I'm gonna. Anyway, enough jibber-jabber, here's some pictures!


     It doesn't even look like it's that far from the window, but it's actually a good...seven feet (I just got up and laid down in the floor to use my height as a guesstimation measure. Only the highest standards of accuracy shall be used in my reporting, thank you) away now and OH MY GOD IT'S SO MUCH WARMER. It's not even that my windows are drafty or anything, really, I think it's just that it's been colder than a dementor's nipple these past few weeks and it's seeping in everywhere like walls and windows and physical barriers of all sorts ain't even a thing.  


     Just for funsies, here's a different angle: this is what I see when I wake up in the morning, delightful glaring sunlight and all. That sounded like sarcasm, but wasn't. I genuinely enjoy waking up to the sun being like "HEY GIRL I'M HERE WHATCHU DOIN TODAY, I LIKE THEM JIMJAMS." Yeah, me and the sun get along great as long as I stay indoors. 


      Once I had moved my wreath from the interior wall to over the rocking chair between the windows, I had a big blank space over my bed that I felt needed to be filled with whimsy and delight. So I combed through the folder on my computer of pictures that make me happy and printed out my favorites on my mom's little photo-printer doojig, then arranged them (read: struggled in vain to lay them out on the floor in some sort of moderately pleasing pattern until Amanda got too disgusted by how pitiful I am and said "Stop, let me help you) nicely and stuck 'em on the wall. Originally I was using double sided tape, but it was failing miserably at actually adhering to anything, so I switched to little loops of regular tape on the back, elementary school art-show style. I was worried it would make the pictures stick out too much from the wall, but they actually sit surprisingly flat. Yay happy surprises!  


     There were a couple little odd gaps that I filled with glittery heart stickers (what up inner middle-schooler), but there are still a couple places I'd like to fill out a bit at some point. The beauty is that if I get tired of any of the pictures I can always swap them out to keep it fresh, or expand outwards if I feel so inclined. 

     So that's the state of my room this very minute. I'd like to say I'll stick with it for good, but I can't be tied down like that. I have to change things up every once in a while to keep from getting bored -- or for actual practical reasons, on occasion! 

Wednesday, September 25, 2013

Quick Fixes: Musical Lamps?

     Not literally, of course (I say "of course," but what do I know, you can probably buy a lamp that sings you Justin Bieber songs. If a toothbrush, why not a lamp, after all?). No, I mean in a musical chairs style. Lamp swap! You all know by now that it's important to me that my bed is the comfiest, best place that it can be, because I spent a lot of my time there. Not just sleeping, I do a lot of my writing, editing, and general lounging on my bed. There's some fuel for your Millenial Hatred, free of charge! Anyway, since I've been spending so much time lately amping up my pillow cred, I noticed that one thing in that area was still really bothering me. Namely, the reading lamp that I've had precariously balanced on my headboard for months and months and months. 


     It really needed to be swapped out for something more functional because not only did it occasionally topple off there and onto my sleeping head, but it was also kind of useless as a reading lamp because I couldn't actually reach it to turn it off without getting completely out of my nice warm covers (Where do I collect my trophy for biggest case of "First World Problems?"). So! A few hours after I had been complaining about this setup to my mom, she appeared before me magically holding a clip-on type lamp that she'd found in the attic. All my problems solved! Aren't moms the best? The only drawback was that the lamp was black. Booooo. All black clothes, no black in my bedroom decor, that's the rule, for I am a woman of mystery. But that was nothing some spray paint couldn't fix! 

Before, creatively taped to keep the cord, the bendy spine-thing (technical term), and the inside of the lamp shade from getting gunked up with paint, and after.
     I painted a coat of white spray paint on first, just so that if the pink paint didn't totally cover every single area flawlessly it would be white peeking through and it wouldn't be noticeable, as opposed to glaringly obvious black patches. Do you like how the quality of the photos degrades through each step? That's because I started nice and early and took a pretty, naturally lit picture, then moved to the shade to paint, then....completely forgot about it until 11:30 last night. Oops. 

     Once I got it clipped up there, I sighed in relief. It looks so much more intentional, and now I can actually reach it to turn it off when I'm getting sleepy without having to exit my blanket cocoon! 


     Aaah, I do love how little things can make such big improvements.

Wednesday, September 18, 2013

Cat Toy Apocalypse

     (Dibs on Cat Toy Apocalypse as a heavy metal/traditional yodeling fusion band name.)

     Bessie's cat toys have been driving me nuts. For lack of a better solution, they've just been sitting around in something of a disorganized pile. I can't put them in a box or basket, you see, because Bessie, problem-child that she is, will chew on anything that has corners. Not with enough intention to actually damage anything or leave bite marks, just enough to make loud noises with her teeth that wake me up when she's gnawing on some bit of furniture at 4:00 AM to get my attention so I can wake up and feed her because SWEET MERCY HER BOWL IS HALF EMPTY, CALL FEMA, THIS IS AN EMERGENCY (I cannot emphasize enough to you that although she is my cat and I'm her person and I love her and all, she is a right pain in the ass most of the time). So that rules out most easily found storage solutions. Time to get creative. I decided that if I made a little box out of flexible foam it would keep the toys corralled but not be enticing to the Beast, since it wouldn't make any noise when chewed upon.


THE SUPPLIES

 
     A glue gun, glue sticks, flexible foam sheets, spray adhesive, and cute fabric. 


THE METHOD

     First I decided on the size I wanted the little  box to be. I ended up going with one and a half widths of the foam, because that would make it square, and squares are nicer than rectangles (to work with, I mean, not in terms of personality. This ain't no Flatlands reference). I just hot glued the piece-and-a-half together to make the square base. I also cut two more sheets in half to make the sides of the box. 


     Next I hot-glued the sides onto the base, trying to keep things nicely aligned and straightened but not worrying too much about it because a) I knew I was going to cover it in fabric anyway, which hides a lot of sins and b) it's a cat toy box, it doesn't need to be perfect. Perspective, folks. 


     Once the basic construction of the box was done, it was time to cover its hideousness with fabric. I traced around the base, then added a bit on each side so I could fold the extra on the sides over and glue them down to make nice edges. That way when I stuck all the pieces on the sides of the box down, extending the raw edges slightly onto the base, I could cover the raw edges with this one nice bottom piece. I also made a piece the same way to go on the bottom of the outside, just cuz. 
 

     For the side pieces I cut rectangles twice the height of the sides so that I could cover both the inside and outside of each side with one sheet, and I added a little extra on each side of the rectangle for wiggle room, and so that I could wrap it underneath the inside and outside bottom pieces, concealing all the raw edges underneath the bottom pieces that I gave nice edges to earlier. Does that make sense? I hope it does. Anyway, once I had all the pieces prepared I stuck them on with spray adhesive, sticking the two sides opposite each other on first, then the other two sides on, folding the edges under so everything looks nice and finished. I came back in with the glue gun to fix any places that didn't fully adhere with just spray adhesive, like the folded corners. I burned myself quite badly on this part, so do be careful with hot glue, people. It's hot.


THE FINISHED PRODUCT

 
     Finally all that was left was to pile in all the toys and slip the whole thing somewhere discreet. Next to my desk ended up being the winning location. 


     Aaaahh, much less messy. The one organized bone in my body breathes a sigh of relief (bones breathe and have personality traits, right? Is that a thing? That's a thing). 


Friday, September 13, 2013

Upgrading the Cloud Situation

     I realize that title sounds like code for some sort of horrible top secret operation, but don't get out your conspiracy theorist hats just yet. All it means is I spent some time working on fixing up my bedding (aka the Puffy Pink Cloud; the memory foam and fluffy pink duvet combine to create a rather convincing cloud effect). I decided I needed a different accent pillow after my mom pointed out that the one I had been throwing on there wasn't quite right. I also thought I should go ahead and make a cover for a second body pillow while I was at it, because since I recently removed my boxspring to fix a bunch of weird height alignment issues with the windowsill and various outlets and junk (turns out you totally don't need a boxspring if you have a bed frame that has slats and stuff to support your mattress -- unless you just really like the extra support of a wooden box under there. I do not. I wish to sink so far into my bed that there is almost a suffocation hazard. Almost.) it's had the side effect of my pillows getting sucked back behind the mattress at the top. So a second body pillow was in order to combat the pillow suck. So off to the sewing machine I went, and a couple hours and under ten bucks later (all I had to buy was the white polka dotted fabric and the ruffled trim -- the blue striped fabric is the same stuff I used to cover my bookcase to keep Bessie the Destroyer out of it, and it was from my Grandma when she was clearing her fabric stash a bit so it was freeeee!), this change had occurred:


     I realize that makes it look like it also got dark outside, but the first picture is actually from a few days ago, because I'm a cheat like that. I should mention that I didn't actually cover the pillow that wasn't quite right, it's sitting in my glider now and it looks nice there. The new pillow is made from a pillow form I found in the attic.

     Anyway, I took some process pictures and was going to write out some basic instructions but now that I'm looking at them, I realize that the whole process is basically, "Rectangles. Sew a bunch of them. In various sizes. At some point, add some trim if you like." 

     Seriously. I shan't patronize you by showing you pictures of what it looks like to sew a rectangle. Instead I'll just leave you with another picture of how pretty that accent pillow turned out, and how adding the second body pillow makes everything a bit more structured and less "I just rolled out of this bed three minutes ago." 


Monday, September 9, 2013

Quick Fix: Another chair makeover?

     Can you spot the difference and figure out what I've been up to over the weekend? 


     I don't know what it is that sparked my apparent dissatisfaction with all the chairs in my bedroom this past week, but here we are. This weekend I decided it was time to tackle my desk chair. It badly needed a coat of paint, you see. The chair I call my desk chair actually started life as a kitchen chair about...eight million years ago. Okay, maybe more like 15 years ago, but the three different paint colors showing through various chips and scuffs were making it look older. You can't really tell in the picture, but in real life it was pretty sad-looking. There was also a different cushion on the chair before, but it was in such bad shape (all squashed and flat and ripped open where the ties had pulled away) that I threw it out before I took the picture out of shame.

     As far as furniture renovations go, this was a pretty easy and quick update. I decided to go with pink because a) my room is pretty heavily pink-weighted on one side, what with my pink duvet, pink pillow shams, pink roses above the window, etc., and it needed some balancing out on the other side of the room, and b) I had a can of pink spray paint that I'd picked up at a craft store because I just liked the color, and I'd been itching to use it on something. 

You can see some of the chips and scuffs I was talking about in these close-ups, as well. Like in picture 2, where you can tell this chair was purple in a previous life.

     All I did was take out two screws to remove the seat of the chair, then sand it down, wipe off any dust, and spray away, forcing myself to use thin coats (against my instinct to do one thick gloopy coat that will never dry and which I will regret forever -- I don't know why I am the way I am).

     Once it was nice and evenly coated, I just had to let it dry for a while in the nice breezy sunshine, then bring it in and plop a new cushion down on it; this one was $3.99 at the Christmas Tree Shops. 

     So much better! And here's a shot of the whole room, so you can see what I'm babbling about when I say it needed some pink over by the desk to balance things out. 

 
      The room just feels so much more evenly pinkified now. It's amazing what a quick coat of paint will do! 


Friday, August 16, 2013

This post is a sham!

     Ahh, nothing like starting a post with a good old fashioned pun. Because, you see, this post is about making pillow shams! Wakka wakka! Ok, sorry. Anyway, I've been wanting to change out my pillow shams for a while now. The ones I had were from a set of blue striped sheets that I'm not actually using anymore, and they didn't clash, but they didn't thrill me either. I wanted something that would better suit my "fluffy cozy unicorn cottage on a pink cloud" motif (yes, really. I have the design sense of a six year old girl. That's where I'm at in my life right now). I guess you could also feasibly call it shabby chic, but that's way less evocative. I actually had my eye on some ruffly shams from the Shabby Chic range at Target, but they were $20 per sham, and I knew I could make my own version that was A) more personalized to my taste, and B) cheaper. And I was right! My version ended up being exactly what I wanted, and I spent $12 to make two of them (of course, only one of them is in these pictures because I didn't finish the second one before the time to write this post came creeping up on me, but that's neither here nor there). So I saved 28 bucks whipping these babies up myself!


      So let me show you how to make them! 


      First up, you'll need to cut out some pieces. 


      Front piece: The easiest way to do this is to use an existing pillowcase as a guide; lay it flat on top of your fabric and trace around it, making sure to leave room for your seam allowances. 

     Ruffle strips: The length of these would depend on the amount of ruffle action you want going on, but you'll probably want the strips to be at least twice the length of the front so you can get a respectable amount of frilliness goin'. To get them this long, I cut these strips out on folded fabric so I had two identical pieces for each ruffle strip, then sewed them together at one of the short sides to make looooong strips. At this point I also sewed down the long sides about 1/4 inch from each edge so that when I wash the shams the ruffles won't unravel too far, but will still get the frayed edge that is so popular in shabby chic styles (unfortunately in a lot of the stuff you can buy, they don't finish the edge at all, so if you wash it you might just pull a ball of fluff out of the dryer). 

     Back pieces: To get that overlap in the back of the sham that lets you fit the actual pillow inside, the back pieces will need to be a bit longer than the front piece. First, measure your front piece and divide its length in half. Then you can either add 3 inches to both sides OR, if you feel like making things complicated like I did, you can add 2 inches to one side and 4 to the other (which, to be fair, is how most shams are made: one side longer than the other to make cramming your pillows in easier). Either way, once you've found the right length, cut out your back pieces and hem the edges that will form the sham opening.

     Next up comes the ruffling! I know some people are intimidated by the idea of ruffling, thinking you need a special foot for your sewing machine or something, but nah, screw that noise. We're doing this old school. All you need to do is set your sewing machine to a nice long stitch length and sew right down the middle of each ruffle. Then grab the bobbin thread (I actually used a white bobbin and pink thread on top, which made it easy) and gradually work the fabric down the thread until you achieve your desired level of ruffle-tude. It's kind of a pain at first, but once you get into a groove it goes quickly. Just don't get too handsy and break your thread.


     Then sew the ruffles onto the front piece in whatever configuration your heart desires. All you need to do for this is pin them in place, then hold the ruffles flat on each side of the presser foot as you sew straight down the middle of the ruffle. 


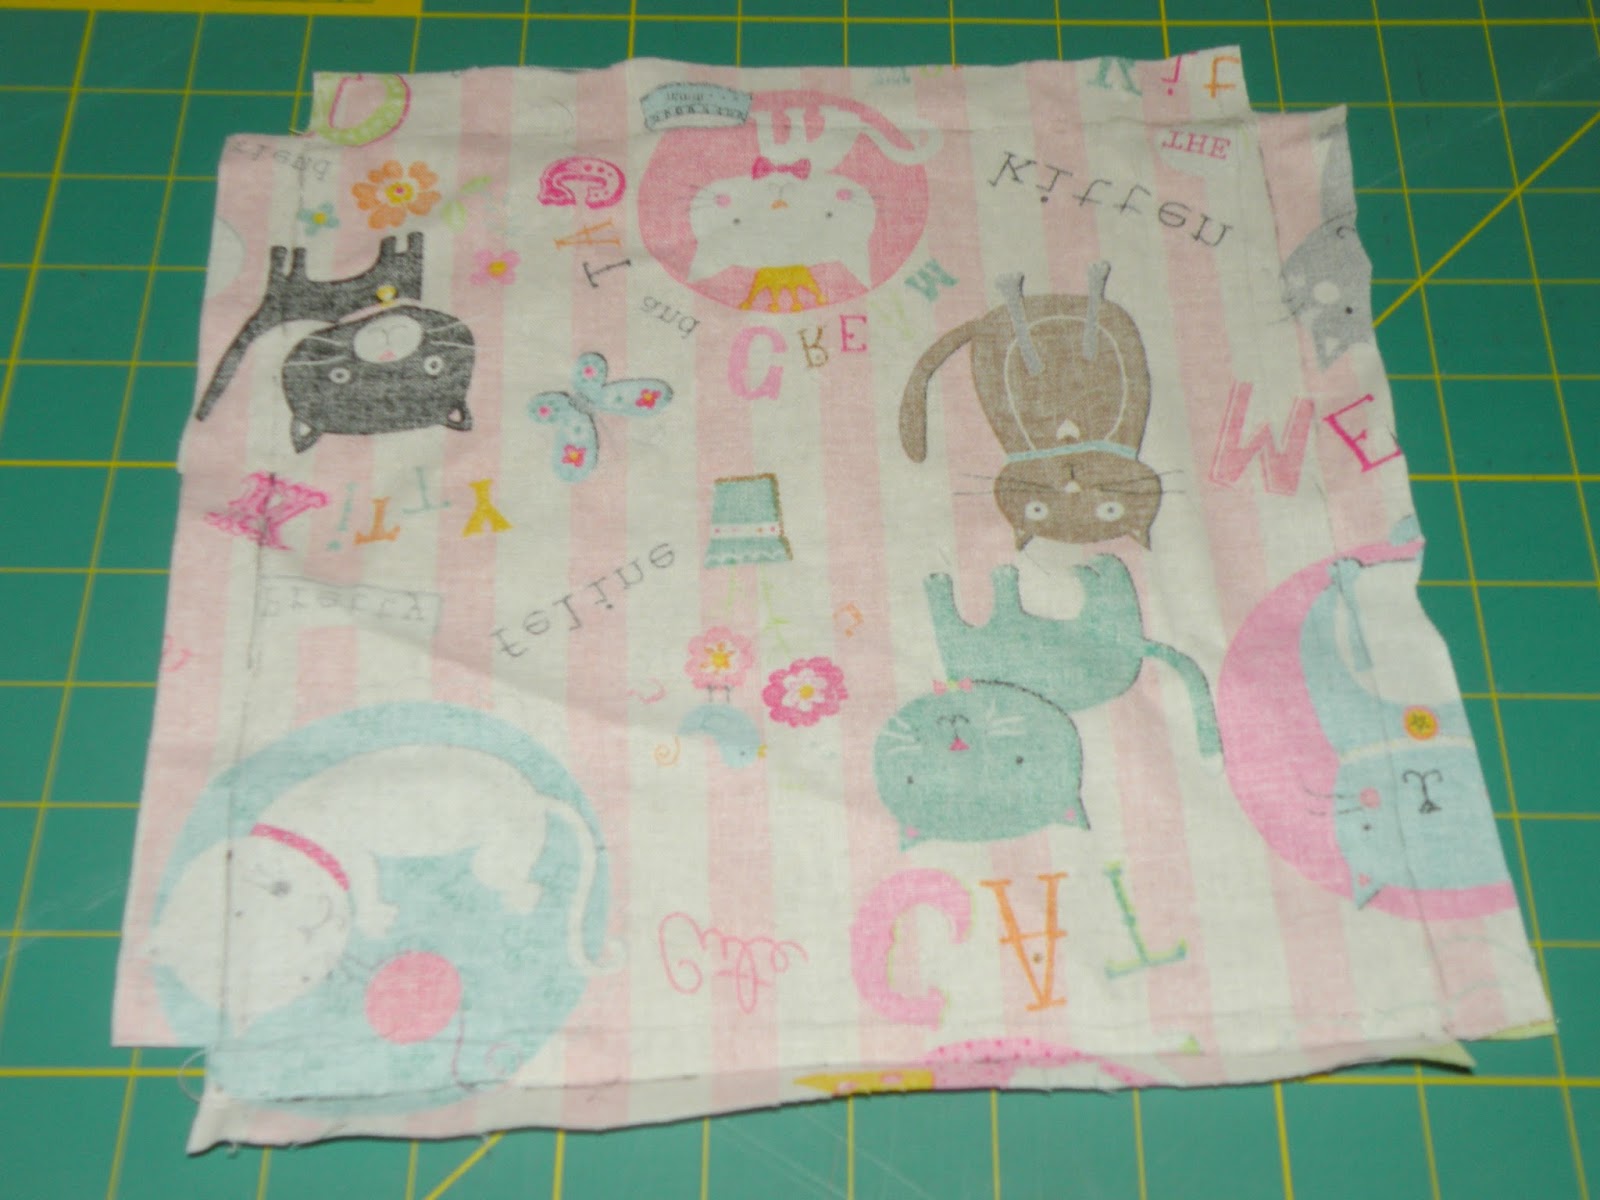
Always a cat in my process pictures, never the same cat twice.

     Then it's time to sew the back pieces to the front! This is my favorite part of any project: the part where it starts to look like the object it's supposed to look like. My least favorite part is the bit about 20 minutes in where I start to second-guess myself and want to cry because surely I have somehow ALREADY RUINED EVERYTHING. I have sewing anxiety. I'm working on it. Anyway, pin the pieces in their proper configuration, right sides together...

Not sure what my excuse is for the quality of these pictures today. They were taken at night, so that accounts for the less-than-stellar lighting, but I'm not sure why this one, for example, is making me seasick right now. I started to try to straighten it a bit in photoshop, but I think this thing was taken by M.C. Escher or some shit. And I think he was drunk.

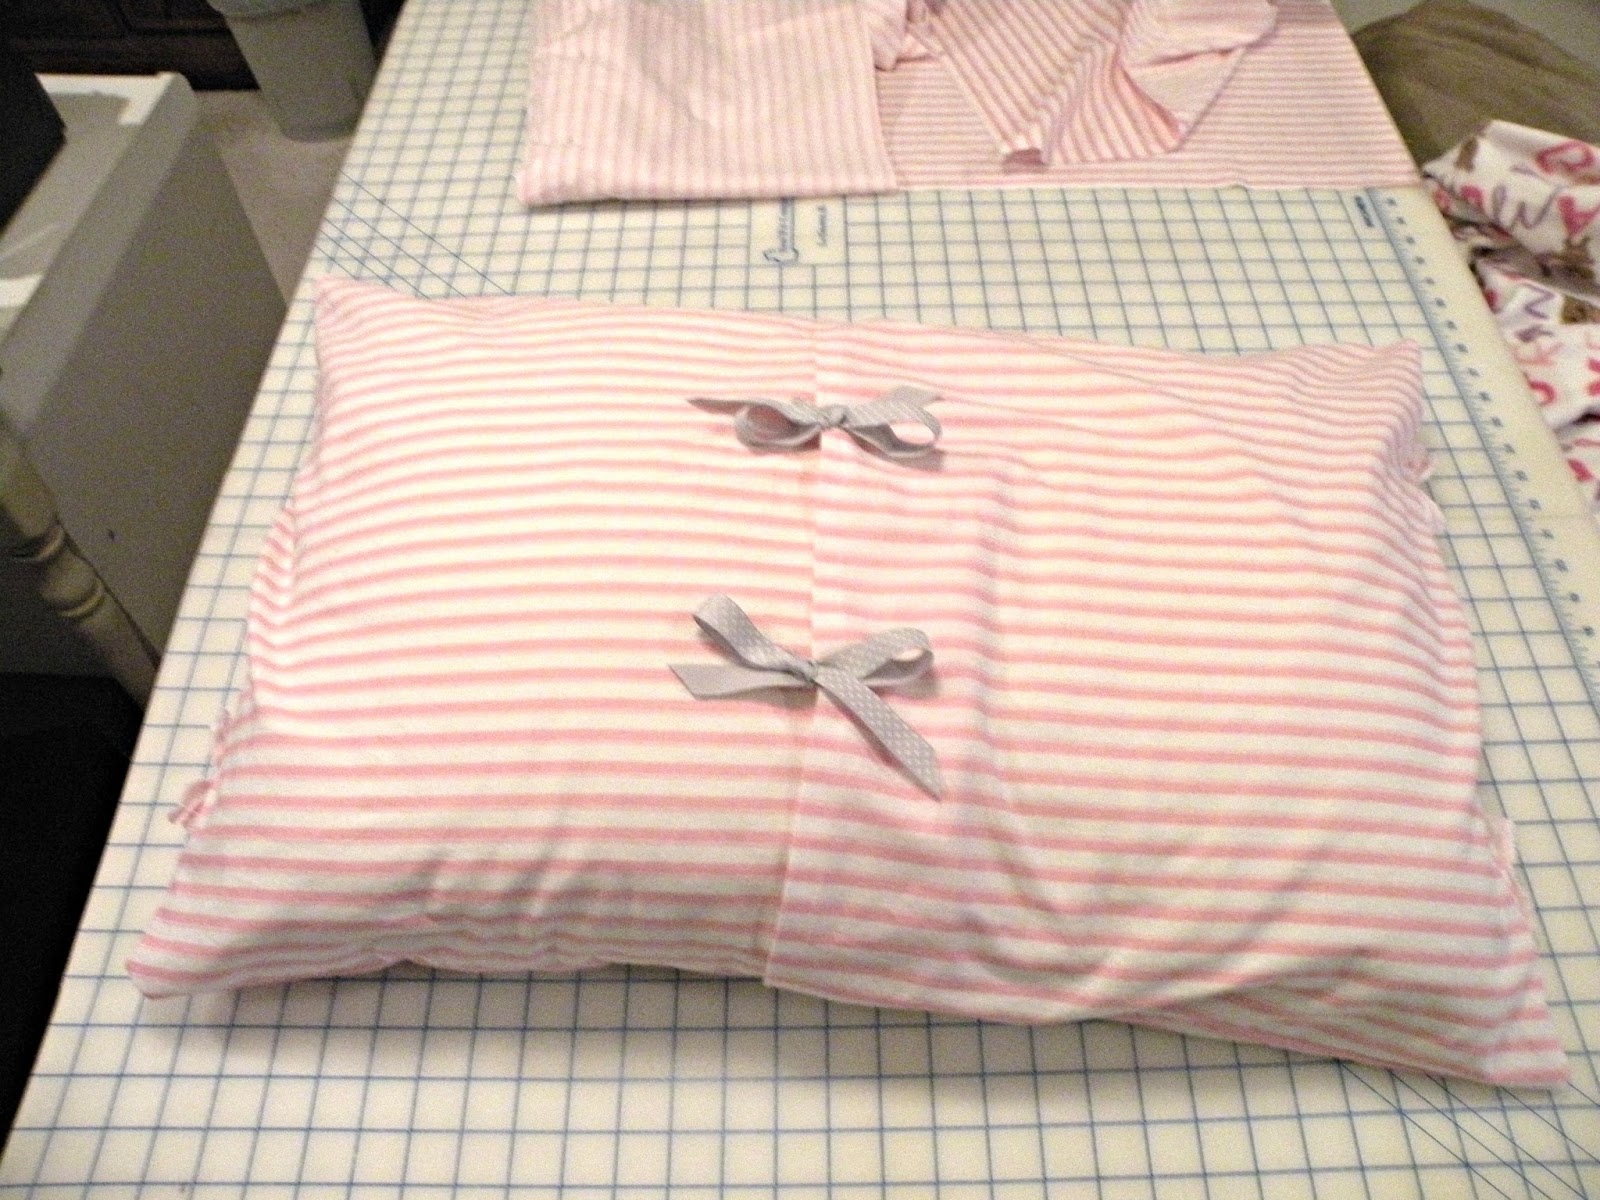
      Then sew all the way around and turn it rightsies outsies to reveal your lovely pillow sham! I decided to add some ribbon ties to the back, more for looks than actual function. I just sewed one piece of ribbon to each side of the pocket, then tied 'em up all pretty (lies, my mom tied them up all pretty. When I try to make nice bows they end up looking like a kindergartener tied them, then Death himself came along and tried to fix them but when he touched the bows they got even wiltier and sadder).


     Then floof it up and put it in a place of prominence and pride to take a picture and pretend like you're not in fact going to put your nice pretty shams behind the one gross but super-comfy pillow you drool all over every night! 


Sweet dreams! 


Friday, June 14, 2013

Bessie's Dream House

     I decided yesterday that since I've been wanting to spruce up my living space lately, it's only fair if Big Bessie's living space gets some home improvement too! Sure, she shares my room, but I doubt she cares about what I put on the walls. So I made her a little house to call her own, since she's an independent lady and all. 

Haha, look at the treat in there. I was trying to get her to give it a try, but I think it still smelled like spray adhesive. Gotta give these things time.

     But you know how cats are -- they're picky. So I wasn't going to drop money on a cat mansion when there's always a chance she'd hate it. I wanted to make her a cozy little place where she'd feel secure if the other cats are picking on her (a real thing, trust me -- I'm not just being a crazy overprotective cat lady, one of the other cats really does pick on her. I'm not making myself sound any less crazy, am I?) or if she's trippin' on catnip and the demons from behind her eyeballs are coming to get her, but I decided to do it using only things I could find around the house. That way, if she hated it, I could throw it all out and pretend it never happened without feeling like I'd wasted money. 

     So I started with item number one on the list of Things Cats Dig, a cardboard box. Then I used some leftover batting and fleece to throw together a pad for the bottom. I folded the batting over double to give it a little more squish, then cut it to the size of the box.


     I didn't even bother sewing the pad up, partly because I only had enough of the scrap fleece to cover one side, partly because it's for the cat. She doesn't care. So I put it together with hot glue, like so. 


     Then I quickly drizzled a hot mess (literally) of glue all over the back and plopped it into the box. 


     Next I cut some holes into the box: a big square hole for the entrance (Big Bessie is an accurate name, so it had to be a pretty large opening), and two small circular holes on each side of the "roof" I planned to construct, so that she could look out through them and plot and scheme, as cats do. I used a big honkin' utility knife because no one was around to tell me "You're gonna hurt yourself with that!" I also cut the flaps on the short ends of the box into the shape I wanted the roof to be. You'll notice that this way, the longer sides don't meet up, and the top of the roof is open. I just grabbed another piece of cardboard and cut it to the size of the opening to remedy that.

You'll also notice I spray-painted the box white first. It went...poorly. The spray-paint couldn't hide enough of the boxes sins, like rough patches where tape had been pulled off. Skip the spray paint, save yourself the effort.
    
     Then all that was left was to decorate the kitty-house and hot glue the structure of the roof together.

     I chose to decorate mine by covering the sides in two different patterns of wrapping paper. Just unroll the paper, rest the side you want to cover on the paper, and trace around it, leaving an extra inch or so anywhere that you want the paper to wrap around and cover the edges (This part took me back to taking the SATs, with those questions where you had to figure out what a three-dimensional shape would look like unfolded into two dimensions. Good times!). Then use spray adhesive to smooth the paper onto the box. 

     Then I added some ribbon on the front edges to cover up where the paper didn't line up perfectly, a shell covered in aluminum foil to give it some beach house flair and sparkle, two plastic photo corner type dealies, and her name written in metallic purple. Obviously you could decorate according to your own taste and your cat's personality (reeeally not helping myself sound less like a crazy person here). For example, Big Bessie is a pretty princess type (sometimes I call her Princess Dumpster, for she is delicate and fancy like a princess, but shovels food in like she's filling a dumpster. I'm complimentary like that), so I went for pretty patterns, shiny accents, and a general Barbie's Dream House feel. But for Kaden, the troublemaker cat that is 100% true to the stereotypes set forth in Lady and the Tramp, I would use darker colors and put a skull and crossbones on the front instead of a seashell, so he could have a little scoundrel's cove to hang out in. Options! 

     And lest I leave you hanging, I'll end the suspense: she likes it now that it doesn't smell like glue anymore. I caught this snap of her sneaking in to check things out. 


Friday, April 26, 2013

Favorite Things Friday!

     My favorite things this week were all superficial items, and I don't feel bad about it one bit. I know people say that money can't buy happiness, but I think those people are just spending their money wrong. I bought a few things this week that just made me feel better about life. Lemme show you: 

Look, I even laid it all out on a pretty backdrop for you! Blogger of the year, right here.

Let's go clockwise from the top right, because it feels like the right thing to do. 

     First I picked up this pretty gold headband. I was already in the market for a headband that's nicer than the grimy stretchy one I wear while I wash my face, and this one caught my eye because it felt very Game of Thrones to me somehow. Sidenote: I'm sort of obsessed with Game of Thrones. This week's episode was so amazing that I watched a lot of it with my "excited for vengeance" look on, which words can't even describe. It's something like this: 


     I think I'm going to download the books to my tablet so I can stay awake for a week straight reading them all enjoy them at a leisurely and totally sane pace. Hey, I guess not all of my happy things are material goods this week! I threw a bonus tv show in there! Woo, culture!

     The next happy-making thing I got is that bright, bright, BRIGHT pink cardigan underneath the headband. I just couldn't resist it's delightful neon charms. It's also a bit looser than a normal fitted sweater, so it's super comfy, and it's very lightweight, which means I can wear it into spring and summer (in the arctic-blast air conditioning in stores and restaurants, dontcha know). Plus it was on sale for more than half off its original price, which makes my cheap heart flutter. 

     Next up is a pair of reflective blue-green sunglasses from Target. I like to get a new pair of cheap sunglasses at the start of each summer. It gets me excited for the warmth and sunshine. I like these reflective ones because it means I can stare at people without them knowing (just kidding. No wait, I'm totally not. People-watching is the absolute best). 

     This next one's a big deal. Like a caps-lock worthy BIG DEAL. I got shorts! That's a milestone for me because I really, really hate shorts. I like the idea of them, but I have a really hard time finding a pair that looks good/makes me feel cute. But I can't just go all through summer wearing jeans; it would get rather toasty after a while. So the other day when I was in a good mood and my self-esteem levels were nice and high, I set out on a mission to find shorts. It was still a bit tough though. My mom and sister had to convince me to buy these. But now that I have them home and can try them on in my own closet under normal lighting conditions and with a mirror I trust, I like them a lot more. I firmly believe fitting room mirrors are portals to a poorly lit alternate dimension in which everyone looks as bad as they possibly could. It's a rough dimension to live in, but maybe they have like, world peace there or something to make up for it. Or maybe they look in the mirror and see THIS dimension's version of themselves/us and think "Hot damn, not half bad!" That just got really confusing really fast, so let's just move on. 

     Then we have my new brush, which I realize is probably incredibly dull for most people, but hear me out. It's called "the Wet Brush" (creative name, I know), and is specifically designed for brushing your hair when it's wet (whaaaat, you never would have guessed!). The reason this is so exciting is twofold: first because I have a stupid amount of really tangly hair that I can only brush when it's wet because you can't brush curly hair, and this makes it a bajillion times easier to keep passing birds from eyeing my hair and thinking "I could raise a few kids there." And second because I tried SO DAMN HARD to find this stinkin' brush online, and lots of places have it, but with shipping costs that outweigh the cost of the brush itself. I finally found it in a Sally's and happily snatched it up. 

     Movin' on, I then got a shiny, sparkly, confetti confection of a shirt that also manages to feel like I'm walking around in my (very fancy) jim-jams. Double win! As you can see, those stars manage to be surprisingly sparkly for a screen-print. They catch the light as well as sequins, but without the itchy scrape-y feeling sequins bring with them. This was the last one in the store, and it's an extra large, but that worked out surprisingly well because it's really loose and flowy and so, so comfortable. A+, shirt, you done good!

     Next up is another somewhat Big Deal item: a swimsuit! I know almost everyone hates shopping for swimsuits, but I got this one on the same day as the shorts, so it wasn't actually that bad by comparison. I'm a total weirdo, in a lot of ways we don't need to talk about right now, but specifically in that I find bathing suit shopping way easier than shorts shopping. You'd think the more potential for exposed jiggle, the more potential for plummeting self-esteem, but not for me. That's not to say throwing on a bikini is always a delight, it's just that I think shorts were designed by a malevolent deity specifically to bring hardship, misery, and woe to my days. Anyway, this swimsuit caught my attention because the super retro style reminds me of the one-piece number that old-school Barbie used to rock, which I have always loved. And it's got all of my favorite things: black and white, bows, polka dots, and ruffles! The only way it could have been more "me" is if it came with a free teacup pig that could oink my name. 

     And last but not least, my new phone case. My old one (the one that looked like the TARDIS) somehow got a chip cracked out of it and left a sharp edge that caught on everything. After looking at cases for hours and hours, I finally decided to just go with something cute and simple. Purple bunny ears! I don't know why, but it just called to me. It said to me "You need me in your life!" and my phone said "Yeah, I'm a phone, why WOULDN'T I have bunny ears? It makes perfect sense!" and I said "If inanimate objects are starting to talk to me I should probably stop staring at the computer screen for a little while because my brain must be frying," so I went ahead and ordered it and walked away. 

     PHEW. Who would have thought I had over 1000 words to say about a bunch of clothes and bits and bobs? Wait, that's not even a rhetorical question, the answer is "anyone who knows anything about me." 


Friday, April 5, 2013

The Pink Housecoat Reimagining

     That could totally be the title of some weird indie movie starring James Franco as a mentally unstable crossdresser. You're welcome, Hollywood.

     But no, that's not what I came here to talk about. I wanted to give you a quick update on the progress of what was originally supposed to be the pink jacket. You remember, the thing that looked like Sleeping Beauty's dress before they fixed it with magic?  

Basically.

     Well, after staring at it on the dress form for a good hour or so, I decided there was no way it was going to turn into a cute jacket. Not without magic anyway. It just wasn't going to happen. T'was not in the cards. Le sigh. 

     But I wasn't going to let that stop me. I'm not about to waste fabric. So I started planning how I could salvage it, and ended up deciding to go for a sort of 60's mod sleeveless dress. But figuring out a plan was the easy part. Actually turning that mess of a thing into something a human being might wear is turning out to be even more of a challenge than I thought. So far I've cut out a good foot of fabric from various ludicrously oversized areas, as well as added darts in the front for some shape--the new front, that is. I flipped it around so that the back of the jacket is going to be the front of the dress, so that the front won't have a seam all the way down the middle. 

This is on the dress form, so no one has to feel weird about this being a picture of boobs.
 
     And it worked out nicely because I wanted to put a zipper in the back anyway. I picked white, rather than a matching pink, and chose to leave it visible because I plan to add other white details later that I think will all tie together nicely.

In other good news, I actually took the time to color-correct these pictures, so they're at least somewhat close to their true colors! Wheee!


     Still to come: more shaping, facings, a collar, and hemming. It's slow-going work, trying to troubleshoot the approximately 8 million things wrong with the fit of this thing, but it's a good learning experience for me. And hopefully for other people, who will read the tale of how this went so horribly wrong and learn from my mistake (that mistake being: TRUST NO PATTERN SIZING). 


Wednesday, March 27, 2013

Jacket progress

     So there's good news and there's bad news. The good news is, look at these pockets.

Again with the "showing up a totally different color in photographs than in real life" thing. Pink is such a pain in the butt sometimes.

     "Daaamn, those are some fine-ass pockets," you're probably thinking. And you're right, they are. Curved edges are one of those things that stress me out when I'm sewing, for some reason. The developed, logical part of my brain says "it's just a matter of gathering a bit to get the curve to sit right," but the unevolved, idiot part of my brain goes "you can't sew a CURVED line, you'd need black magic for that!" I can't explain it. But after the disproportionate stress of sewing it, I always appreciate a nicely turned out curved edge.

     Right, now the bad news. The bad news is that once I got the two front pieces connected to the back piece, I realized that the sizing on this particular pattern is just plain wrong. Now, I know pattern sizing is always a bit dodgy, but usually I can at least figure out a good starting point, then adjust to fit later. But this jacket is so comically huge that it looks like Rubeus Hagrid's art smock. Or possibly the uniform of a cult of mentally unstable Avon ladies. It's bad, y'all. I'm not even mad or frustrated about it, because it's really quite comical. Are you ready to see it? Ok, here we go.


     (Please insert that downward-sloping "hooooo boy" whistle of dismay here for maximum effect.)

     It is the world's most cheerfully hued potato sack! Run for the hills, pink Staypuft Marshmallow Man is coming for you! Liberace called, and he wants his hair-cutting cape back! And other such "Oh my God, this thing is a mess" jokes.

     It's a long way from what it's supposed to look like, is what I'm saying.

The finished product I'm aiming for: classic shape, funky color, fun details (like the non-standard buttons, and the possibility of some white piping being thrown into the mix to make this whole thing look even more bubblegum-ridiculous).


     Yeah, so that's a bit of a bump in the road on the way to the cute spring jacket of my dreams. But fear not, I have faith that it can be fixed! It may take a bit of re-sizing, a bit of re-shaping, and some general finagling, but it can -- and will -- be done!


Monday, March 25, 2013

A Spring Sewing Project

     I've finally gotten around to starting a new sewing project! I figured that since spring is here (allegedly. As I write this it's snowing, which makes me somewhat skeptical), it's about time to start on the pink jacket I mentioned approximately one billion years ago. It'll be useful for those April showers...assuming Mother Nature gets her act together and remembers that the showers this time of year are supposed to be made of liquid raindrops, not giant puffballs of snow or sleet.


     This isn't even sort of an accurate portrayal of the color, because I was in a hurry when I took the picture and I'm too much of a disappointment to bother with color correcting and all that noise. Also, I just noticed that the pattern envelope says $18.95 on it, so let's all just take a collective moment to have a hearty guffaw at that. Har har har! As if. Ninety-nine cent pattern sale, son!

     Here's what I can tell you about this jacket so far: It's pink, it will have a Peter Pan collar, and it will have those cute buttons on it. Here's what I can't tell you: how long it will be, whether or not I'll be putting pockets on it. I've got all the pieces cut out and ready, but I never know what or how much I'll be changing until it's come together a bit more.

     I'll be working on it throughout the coming week, so stay tuned for updates! (Do you ever think "Oh man, I bet the kids today don't even know why we say that. They've never had to tune a thing in their life!" Because it's not like they've ever had to slowly turn a dial like they're trying to break open a safe to find a radio station between the static, they just hit numbered buttons and magic happens. And now that I've brought it up, are you wondering why I would use that idiom in reference to the internet? GEEZ, don't you remember the old days, when we had to tune our internets by hand to change the website? Kids today, I tell you what...)