Showing posts with label How to. Show all posts

Wednesday, January 22, 2014

3 Ways to Fake Shorter Hair, for all your Incognito-ing Purposes


     I love having my hair super long because it makes me feel like a magical mermaid princess (grab your happiness where you can get it, people), but sometimes I want a change. Not badly enough to actually cut my hair, because I know myself well enough to know I'd regret that enormously at this point in my life. But still, sometimes I get tired of my hair creeping into the neckline of my shirt and tickling me, or whipping around in the wind and getting tangled in my eyelashes (never underestimate the gripping powers of my hair). Other days I just want to look a little different so I can slip by my nemeses unnoticed. What, you don't have nemeses? How droll. Anyway, I've learned a couple different tricks for making my hair look like someone else's hair, ranging from "so easy it's almost like cheating" to "kind of tricky but worth it for the shock value." Here's how! For the record, I'm starting all of these with my hair already roughly curled from the half-assed pincurls I had in the night before, and I do recommend starting with curled hair if you decide to try any of them! 


METHOD ONE: CRAM IT INTO A HEADBAND SO YOU LOOK ALL DOWNTON ABBEY AND JUNK

     Difficulty: Stupidly easy. 

     For this one, all you're going to do is take a headband/bandanna of your choosing and slide it onto your head, on top of your hair, pinning it at the back to keep that bump of hair above it under control, if that's a thing that bothers you...


     Then gather your hair at the bottom, bring it up and tuck it into the back of the headband, like so...

This photo guest-stars my ridiculous cow-lick that makes it look like I have a bald spot. I think a cow actually sneaks into my room every night and does that. Maybe it's Lexie. 
    
     Then all you have to do is squish it around and rearrange it until you like it and it covers most of the headband in the back, then stick a few bobby pins in for security. Mind you, this won't hold up in a wind-storm or anything (tested that theory the other day; it ended solidly in hot-mess territory). But with a good number of pins and some hairspray, it'll see you through an average day. 


     I think this one looks best with very curly hair, and in the past when I've done this I've hit the front pieces with a 3/4 inch curling iron, but I'm on a heat-styling ban right now, so I couldn't do that this time. That's also why my bangs look nuts like 98% of the time these days (no flat-ironing to force them to bend to my will), but whatever, my hair needs a break. 

     The end result is very 1920s socialite who doesn't care what society says ladies can and can't do, wearing a sassy pants ensemble to an afternoon of golf, which I happen to think is a fabulous look. 


METHOD TWO: MAKE LIKE IT'S THE '90s AND GRAB A BEANIE 

Difficulty: Can be done while half-asleep (tested and confirmed).

     This one's also so easy I almost feel like I'm insulting you by including step-by-step pictures, but it is a blog after all, and that's kind of what I'm supposed to do. It's in the manual, you see. So onward we press. For this do, all you have to do is pull your hair up into a high ponytail, fanning it out around your head so it's pretty evenly spread all over...


     Then slap a beanie on top. If you don't like the look of hats that stand up too much, you can always pin the top of your ponytail so it lies flatter, then wear any number of other hat styles, but if you want to do it the easiest way possible, beanie it up. 


     This seriously could not get any easier, and it's a lot more convincing than the headband method, if you want to see genuine panic flicker across your loved ones' faces when they see you and think you've chopped all your hair off. But if you REALLY want to freak people out, try method three...


METHOD THREE: THE "HOLY SHIT WHAT DID YOU DO"

Difficulty: Kind of tedious and takes a little practice, but really not that hard.

     For this one, you'll need to start by sectioning off your hair into just the top-most layer, starting at the ears and going up toward the back. You want to get those front sections in there so you can use them to cover all the dirty trickery you're going to be pulling elsewhere. Here, have a hopefully-helpful picture to show what I mean:


     Clip that outta the way and forget about it for a while. Now for the sneakiness. Taking one-inch sections, you're going to wrap up a little loop near your head to take in the length of your hair, then pin it down. Like a-dis:


     See how I just coiled it up and pinned the little hair-pretzel (barf, I'm so sorry for even bringing that mental image to life) to my scalp so that the end hangs much shorter? Easy-peasy. Continue doing that with all the hair that isn't clipped up. It doesn't have to be neat or pretty,  but you'll probably want it to be somewhat flat, unless you have a small head and want it to look bigger. No judgment. I have the opposite problem. My head has its own gravitational pull. 

     Once you're done, you can let down that top layer. If you wanted to pick a time to have doubts and start to panic a little, now's a great one, cause it'll look bat-crap insane at this point. But don't panic for too long, it'll all come together shortly. When you're emotionally ready, take the top/front piece and pull it back over all the pinning you've done underneath. What we're gonna do here is approximate the look of a half-up style as a ruse to cover our tricksty hobbit dealings. 

Totes gonna be my new profile picture because what is even happening here? This is some Effie Trinket sculptural weirdness, and I sort of love it. 
     Do the same on the other side, then, as ever, squish it around and pin wherever you don't like things until you do like them (I instructions goodly). If you've got any oddness showing or pins that you don't feel like endeavoring to conceal, slap a bow or other accessory on there and roll with it. 


     This one is easily my favorite because if you pin it right it's super secure, so it feels like you actually cut it. If you're having a sick-of-long-hair day, this style will make you feel like you got a cute new bob without having to commit to anything. And it's so, so fun to startle people with it. Just go around letting people think you cut your hair, then show up the next day with it long again. Act like you don't know what anyone's talking about when they ask you how you did it. This is how witch-hunts are started. 

     I hope if you're feeling the hair malaise this gave you some ideas to shake things up, or if you don't have long hair in the first place, then I hope you... enjoyed a post full of pictures of me doing weird stuff with all the dead protein filaments growing out of my head? I dunno man, only you know why you stuck around this long, but I thank you for it. 


Monday, November 18, 2013

Wait, don't freak out.

     That's how I prefaced my entrance into any room yesterday. See, I had decided it would be fun to do a faux bob for the day. Just for a change of pace; I'm not thinking about cutting it or anything. I just like to play around with different options. But it may have been a little too realistic -- several people greeted me with a panicked look on their faces. 


     Honestly, this one is like difficulty level: witchcraft. But I'll sit here and make it sound all simple, just to annoy everybody. First I sectioned my hair off into a top section and a section underneath, clipping the top section out of the way. Then I curled pieces of random sizes, and after each piece, I'd coil it up like a pin curl, but starting about halfway up my hair, leaving the bottom half out. A couple of bobby pins crossed over one another held the curl in place, and I continued the process around the rest of the bottom layer. Once it was all pinned up, I let down the top half and curled and pinned it the same way; the only difference is that I pulled a few of the front pieces on each side back before pinning them to cover the curls of the bottom layer. I didn't really worry about covering the pins in the back, just kind of pinned one piece so that it covered another, so on and so on, until you couldn't really see them (to my knowledge. What do I care, it's the back of my head. I don't have to look at it). I threw on a clip just for kicks and giggles and called it a day.

     It was pretty fun for a day, and I do so enjoy leaving panic in my wake everywhere I go. I know I've been talking about hair a lot lately, but I promise this isn't turning into a hair blog (although I do have one more hair post coming up -- but after that, I'll cool it for a while, I promise. Wait, no I don't. No promises. Hair is fun). I just really enjoy messing around with my appearance so that I never look the same from one day to the next. It just tickles me. Being pretty much unrecognizable from one day to the next: it's kind of my superpower. 


Wednesday, October 23, 2013

Spooky Sticks

     I figure I should really be cramming in any last minute Halloween ideas now since it's rapidly approaching, so today let's talk about another quick, easy, and cheap decoration that you can whip up, once again using my favorite free resource: sticks! The inspiration for this was found at Target, where they had a similar set-up going for $25 dollars a pot. That's fifty bucks to bookend your front door with some creepy looking sticks. No thanks. Here's what you do if you're feeling like not paying for fancy landscape refuse:

1. Collect some nice branches. 

2. Spray paint them black. 

3. Add glitter if desired.

4. Place in a black pot at desired angle of stand-up-ness.

5. Spray foam the shit outta it. 


6. Cover that however you so desire. You can paint it black for a swamp witch look...


... or slap some moss in there for a slightly less oil-spill-ish appearance (although really, what's scarier than environmental disasters?).


     Pretty Halloween-appropriate, yeah? It probably adds to the scary factor that I've been sitting on my bed by the window, zonked out on cold medicine and rocking a sickly cast that really takes my natural paleness into full on restless spirit territory, so I'm sure anyone driving by has been thoroughly spooked. 


Monday, October 14, 2013

Oh-ho, Zuuly you nut!

     And the Zuul dress is done! The sleeves were cut in according to the diagram in Part I, then finished off with some elastic, and it's got a much better shape to it now. Of course, it's not supposed to have too much of a shape at all, but there's a good amount of middle ground between "potato sack" and "Real Housewives-style bandage dress."  


     I included two slightly different angles there just so we can all appreciate the pretty shimmer of that fabric combo. Preeetty. 

     The slit is also new since the last update. Obviously the original Ghostbusters dress has a much higher slit, but I'm not too keen on the idea of accidentally flashing my underwear to the world, so mine's shorter. You'll also notice the dress is pinned onto the dress form on one side. That's because she's got no shoulders to hold it up (don't bring it up, she doesn't like to talk about it). It'll stay up better on me, due to my possession of a set of arms. If I feel like it's falling off, I'll just use some double sided tape to hold it in place. The only other real change I made to the design (in comparison to the movie version) was to make it a bit shorter, so it hits just above the knees. That's entirely a personal decision, just because the original hits mid-calf, and I happen to know that that length would do me absolutely zero favors. So it's just to make it a bit more flattering. 

     The final update on this will be when I put the whole shebang -- the dress, the mahoooosive hair, and the extreme '80s contouring -- together to wear out for Halloween, so be sure to keep an eye out for the big reveal!


Monday, October 7, 2013

There is no Dana...

     The day has come! It's time to reveal my devious plans for Halloween, since I've finally gotten my act together enough to start working on it. My Halloween costume is...


     Dana Barrett (as possessed by Zuul) from Ghostbusters! I'm super excited to finally do this for Halloween, since I've been saying I wanted to for years. 

     I bought the two different types of fabric I showed in my sneak peek post knowing that there was never going to be one single fabric that matched the Zuul-y gloriousness above, and I was going to have to layer for authenticity. I could have just found a shimmery orange and it would have been passable, but I'm not aiming for just passable. If I'm doing Halloween, I'm doing Halloween all out. The shimmery shade-shifting fabric, underneath the orange sheer fabric, creates the perfect combination. The only drawback is that they're both sheer fabrics, and two sheers do not make an opaque (though it's not super obviously sheer, either). So I'll be wearing a nude-colored slip underneath my ensemble just to err on the side of caution and covered skivvies. Anyway, here's my plan of attack for this project. 

This picture also illustrates how surprisingly well those two fabrics layer to get the desired effect. In the picture above, the lining looks gold, but in other shots you can see it's really a much darker silver/purple/green color that just gives a hint of shimmer when it peeks through.
     
     First I spread the fabric out in the floor, doubled, and stared at it for a while. Then I asked my mom to please come help me before I destroyed everything, because I wasn't sure how to go about achieving my vision here, so I needed her advice, and also because I have a bad track record with specialty fabrics and didn't want to ruin the limited amount I had bought for this, only to go back and find out it was gone and I couldn't buy anymore and all my dreams would crash down around me. Point being, I ruin specialty fabrics sometimes, so I asked her to do the actual sewing for me, since she's got way more sewing know-how and experience than me. No shame in asking for help when you're out of your depth!

     Once that important step was out of the way, we came up with the basic plan you see above. The top is on a fold, and the bottom edges have been sewed together (so it's four layers of fabric, orange and shimmer sewed together, then another orange and shimmer together) so that it can be treated as one swath of fabric with a hem already in place. From there we cut off a strip along the side, on the fold, that will become a sash/belt. Then we guesstimated a size for the neck opening; I tried it on and we ended up making it a few inches wider anyway. Now, for my purposes, we ended up cutting along the top (where the neckline goes) all the way across after cutting off the sash piece, then re-sewing the dress at the top of the sleeves and finishing the neck opening with a small hem. But that's just an option, you could just as easily leave it on the fold and only cut out and finish the neckline. Different strokes and all. 

     The body of the dress is going to be formed by cutting out and sewing a Dolman sleeve onto a basic tunic shape that's intentionally left quite loose and wide so it can be gathered by the sash. I say "going to be" because after the intense planning stage and the surprising amount of time it took to get the fabric flattened out, trimmed into even pieces, sewed together at two ends, turned out right and ironed, and cut and sewn into the basic formation (both of the fabrics are quite clingy and finnicky, and the shimmery fabric tends to roll, which makes the whole thing kind of a nightmare to even get laid out evenly, honestly), my mom and I both agreed that we'd made a respectable amount of progress for one night. But you know I couldn't leave you without another preview, so here's how it looks draped on the dress form right now, just to give you an idea of the direction it's headed in. Obviously, since the sides haven't been shaped at all, it's rather bunchy right now. But it'll turn out brilliantly, I'm sure. I have faith in the powers of Halloween magic! Ok, and in my super helpful mom. 


     This picture also helpfully illustrates why I'm opting to wear a slip underneath. In real life, this looks fine. But add flash photography and suddenly you're untagging yourself in every Facebook photo you can find because oh hi, there's your underwear.

     I'll be keeping you updated on any progress as it's made on this project, including when I road-test the method I'm thinking of using for getting crazy-big, frizzy, ultra-80's demonic possession hair. I am beyond excited for that. Note: not sarcasm, I seriously cannot wait to push the limits of exactly how much space my hair can occupy. For science! And my own amusement. 


Friday, October 4, 2013

Halloween-ing the house!

     Halloween is rapidly approaching, and around here we're spookifying the house in preparation. Here's a quick, easy, and cheap way to bring a little creepiness into the home (I say this as a total hypocrite -- I can practically hear Morticia Addams saying "...but Debbie....pastels?" every time I walk into my room. Oh well. Split personalities for the win!). 

Step 1: Raid the woods. 

     Take a walk through your local foliage and collect some nice twisty twigs. Try your best to keep them away from your giant dog who is comically obsessed with sticks. 

As a side note, this picture reminded me of a children's book my mom used to read to me that had ragdoll children and they had to go through a thicket at some point and it wasn't supposed to be scary but I always found it tremendously upsetting for some reason (I still get anxious thinking about it) and now I can't remember what it's called and I can't find it on Google and I've been looking for over an hour and I'm worried it may just be a manifestation of my anxiety that I invented as a child and it's not a real book at all and I'M FEELING VERY AGITATED is what I'm getting at.

Step 2: Paint it black. Then add glitter.

     Throw down some newspaper or a dropcloth or what have you and hit the sticks with some black spray paint. Then, while the paint is still wet, sprinkle some glitter on top. 

I wish I'd seen that smudge on the lens earlier. Let's just pretend it's a ghost, in the spirit of Halloween. Oooh, a lost soul who wants me to have poor quality photos -- scaaary.

Step 3: Arrange fittingly. 

     These particular sticks were destined to become a nest for this fine fellow here.

    
     And of course I couldn't resist a spookified version:


     And done! Easy peasy, lemon squeezy. The best part about this little Halloweenification is that you don't have to worry about storing this from year to year. It takes a tiny smidgen of spray paint and glitter that you probably already have, and sticks. You can't get much cheaper than free, so go ahead and toss them when the season of creeping is over.


Wednesday, September 18, 2013

Cat Toy Apocalypse

     (Dibs on Cat Toy Apocalypse as a heavy metal/traditional yodeling fusion band name.)

     Bessie's cat toys have been driving me nuts. For lack of a better solution, they've just been sitting around in something of a disorganized pile. I can't put them in a box or basket, you see, because Bessie, problem-child that she is, will chew on anything that has corners. Not with enough intention to actually damage anything or leave bite marks, just enough to make loud noises with her teeth that wake me up when she's gnawing on some bit of furniture at 4:00 AM to get my attention so I can wake up and feed her because SWEET MERCY HER BOWL IS HALF EMPTY, CALL FEMA, THIS IS AN EMERGENCY (I cannot emphasize enough to you that although she is my cat and I'm her person and I love her and all, she is a right pain in the ass most of the time). So that rules out most easily found storage solutions. Time to get creative. I decided that if I made a little box out of flexible foam it would keep the toys corralled but not be enticing to the Beast, since it wouldn't make any noise when chewed upon.


THE SUPPLIES

 
     A glue gun, glue sticks, flexible foam sheets, spray adhesive, and cute fabric. 


THE METHOD

     First I decided on the size I wanted the little  box to be. I ended up going with one and a half widths of the foam, because that would make it square, and squares are nicer than rectangles (to work with, I mean, not in terms of personality. This ain't no Flatlands reference). I just hot glued the piece-and-a-half together to make the square base. I also cut two more sheets in half to make the sides of the box. 


     Next I hot-glued the sides onto the base, trying to keep things nicely aligned and straightened but not worrying too much about it because a) I knew I was going to cover it in fabric anyway, which hides a lot of sins and b) it's a cat toy box, it doesn't need to be perfect. Perspective, folks. 


     Once the basic construction of the box was done, it was time to cover its hideousness with fabric. I traced around the base, then added a bit on each side so I could fold the extra on the sides over and glue them down to make nice edges. That way when I stuck all the pieces on the sides of the box down, extending the raw edges slightly onto the base, I could cover the raw edges with this one nice bottom piece. I also made a piece the same way to go on the bottom of the outside, just cuz. 
 

     For the side pieces I cut rectangles twice the height of the sides so that I could cover both the inside and outside of each side with one sheet, and I added a little extra on each side of the rectangle for wiggle room, and so that I could wrap it underneath the inside and outside bottom pieces, concealing all the raw edges underneath the bottom pieces that I gave nice edges to earlier. Does that make sense? I hope it does. Anyway, once I had all the pieces prepared I stuck them on with spray adhesive, sticking the two sides opposite each other on first, then the other two sides on, folding the edges under so everything looks nice and finished. I came back in with the glue gun to fix any places that didn't fully adhere with just spray adhesive, like the folded corners. I burned myself quite badly on this part, so do be careful with hot glue, people. It's hot.


THE FINISHED PRODUCT

 
     Finally all that was left was to pile in all the toys and slip the whole thing somewhere discreet. Next to my desk ended up being the winning location. 


     Aaaahh, much less messy. The one organized bone in my body breathes a sigh of relief (bones breathe and have personality traits, right? Is that a thing? That's a thing). 


Monday, August 19, 2013

PIE ANOTHER DAY.

     Since I used that pun when texting my sister the other day it's been pretty much my favorite thing. It's so bad it's good. But the pie in question was actually just so good it's good. Nice transition there, huh? Smoooooth. 

     For Sunday dinner this week I had a very specific vision that occurred to me around Wednesday (Yeah, I am pretty much always thinking about food). Since the weather has been so amazing -- cool, breezy, almost chilly in the mornings! -- I wanted to capitalize and make something toasty and homey. You know how cooler weather is, it makes you want to snuggle up in a sweater and get right at home for the winter (this is probably the point at which you start to go "Uh, it's still August, let's not get carried away," but NAY, I say to you, let's get carried all the way the hell over there!). So I decided on an American classic: a homemade apple pie. But you know me, I can't just do things the normal way. I have to experiment and create weird food hybrids! So I figured, let's take this to the next level. Let's do caramel apple pie.


     Now, I made a caramel apple pie once a few Thanksgivings ago, but it was a lot of work and involved making your own caramel from scratch. I can barely be bothered to get dressed on a Sunday, much less stand at the stove stirring sugar into caramel like a confectionery wizard for an hour, so I wanted to find an easier way. And I did! Let's do this! 

     First thing's first: get your caramel going. All I used for mine was sweetened condensed milk, heated up until it thickened and...well, caramelized, in the most literal sense. A lot of people swear by the easy, old-school method of plopping the sealed can in a pot of water and simmering it for an hour or two. I didn't do that though, because even though people SWEAR it's safe, you're still heating up a pressurized can of sugar-milk, and I didn't want to make a caramel IED. I ain't about that life. So I used this set-up (Well, you know...representationally. Obviously I took the condensed milk OUT of the can, or else I wouldn't be solving anything):


     Basically you just want to pour the sweetened condensed milk into a smallish oven-safe container, cover it with foil, and put the whole shebang into a bigger oven-safe dish full of water. Once you've got this weird little set-up complete, just stick it in the oven at 450 degrees for a good long while, at least an hour. The longer you leave it, the thicker and more caramelly (roll with it) it will get. Don't just walk away and forget about it though, you'll want to check on it periodically to make sure your water doesn't all evaporate. Here's what mine looked like when I took it out after an hour, partially because I didn't want it to get too thick to go in a pie, and partially because I wanted to go to Target:

Which is why it's in a Tupperware, I threw this in the fridge so fast you don't even know. In the middle of baking a pie? Screw that, we're going to Target! I didn't even NEED anything there.
     
     When I got home and remembered "Oh yeah, I was in the middle of something!" I set to making my pie crust. Now, real talk: you can totally buy the kind that you just roll out and go, and no one will know the difference, unless you hang out with some very prestigious pie critics, in which case your life sounds cool and I'm jealous. But if you have the time and the willingness the make a pie crust from scratch, it's way better: flakier, with a richer flavor and better overall texture. Making pie crusts is a pain in the ass though, so no judgments here if you wanna go the store-bought route. I use the recipe from the Better Homes and Gardens Cookbook (the red and white one -- if you don't have it, go look again because yes you do). It's simple and turns out delicious every time. 

     Once you're done with your crust, get that sweet, sweet caramel goodness back out and make the pie's fruity entrails (glad to ruin that for you). I used a bag of gala apples and this little doojig, which I would never ever make apple pie without. It peels, slices, and cores the apples for you in just a few seconds, so all you have to do is whack them in half from top to bottom to get a stack of perfect little apple pieces. If I had to peel, core, and slice all those apples by hand, I'd say "screw it" and buy a can of pie filling. Ain't nobody got time for that. 

     Anyway, when you've got a big bowl of apple slices, pour the caramel over them, stir to coat them all, and season however you'd like. I added some cinnamon, nutmeg, ground cloves, and a fistful of sugar, because pie-time is not the time to worry about sugar content.


     Then top it off with the second half of your pie crust and brush it in the method of your choosing. I like to do melted butter and a sprinkle of sugar, but some people prefer to do an eggwash or use milk. Follow your heart! And the way to man's heart is through his stomach, so...follow your stomach! When you're done with that, wrap the edges with foil so they don't get too dark, and bake the pie at 350 degrees for 25 minutes. Then take the foil off and bake it for about 20 minutes more. You may need a little more or less time to get the crust perfectly golden and delicious-looking without the edges getting too brown (BURNT, ok, let's call it what it is). And then you're done! 


     Serve with vanilla ice cream if you're a purist, or melt a slice of cheddar or American cheese on top if you're not afraid of people looking at you funny (I'm used to it). 


Friday, August 16, 2013

This post is a sham!

     Ahh, nothing like starting a post with a good old fashioned pun. Because, you see, this post is about making pillow shams! Wakka wakka! Ok, sorry. Anyway, I've been wanting to change out my pillow shams for a while now. The ones I had were from a set of blue striped sheets that I'm not actually using anymore, and they didn't clash, but they didn't thrill me either. I wanted something that would better suit my "fluffy cozy unicorn cottage on a pink cloud" motif (yes, really. I have the design sense of a six year old girl. That's where I'm at in my life right now). I guess you could also feasibly call it shabby chic, but that's way less evocative. I actually had my eye on some ruffly shams from the Shabby Chic range at Target, but they were $20 per sham, and I knew I could make my own version that was A) more personalized to my taste, and B) cheaper. And I was right! My version ended up being exactly what I wanted, and I spent $12 to make two of them (of course, only one of them is in these pictures because I didn't finish the second one before the time to write this post came creeping up on me, but that's neither here nor there). So I saved 28 bucks whipping these babies up myself!


      So let me show you how to make them! 


      First up, you'll need to cut out some pieces. 


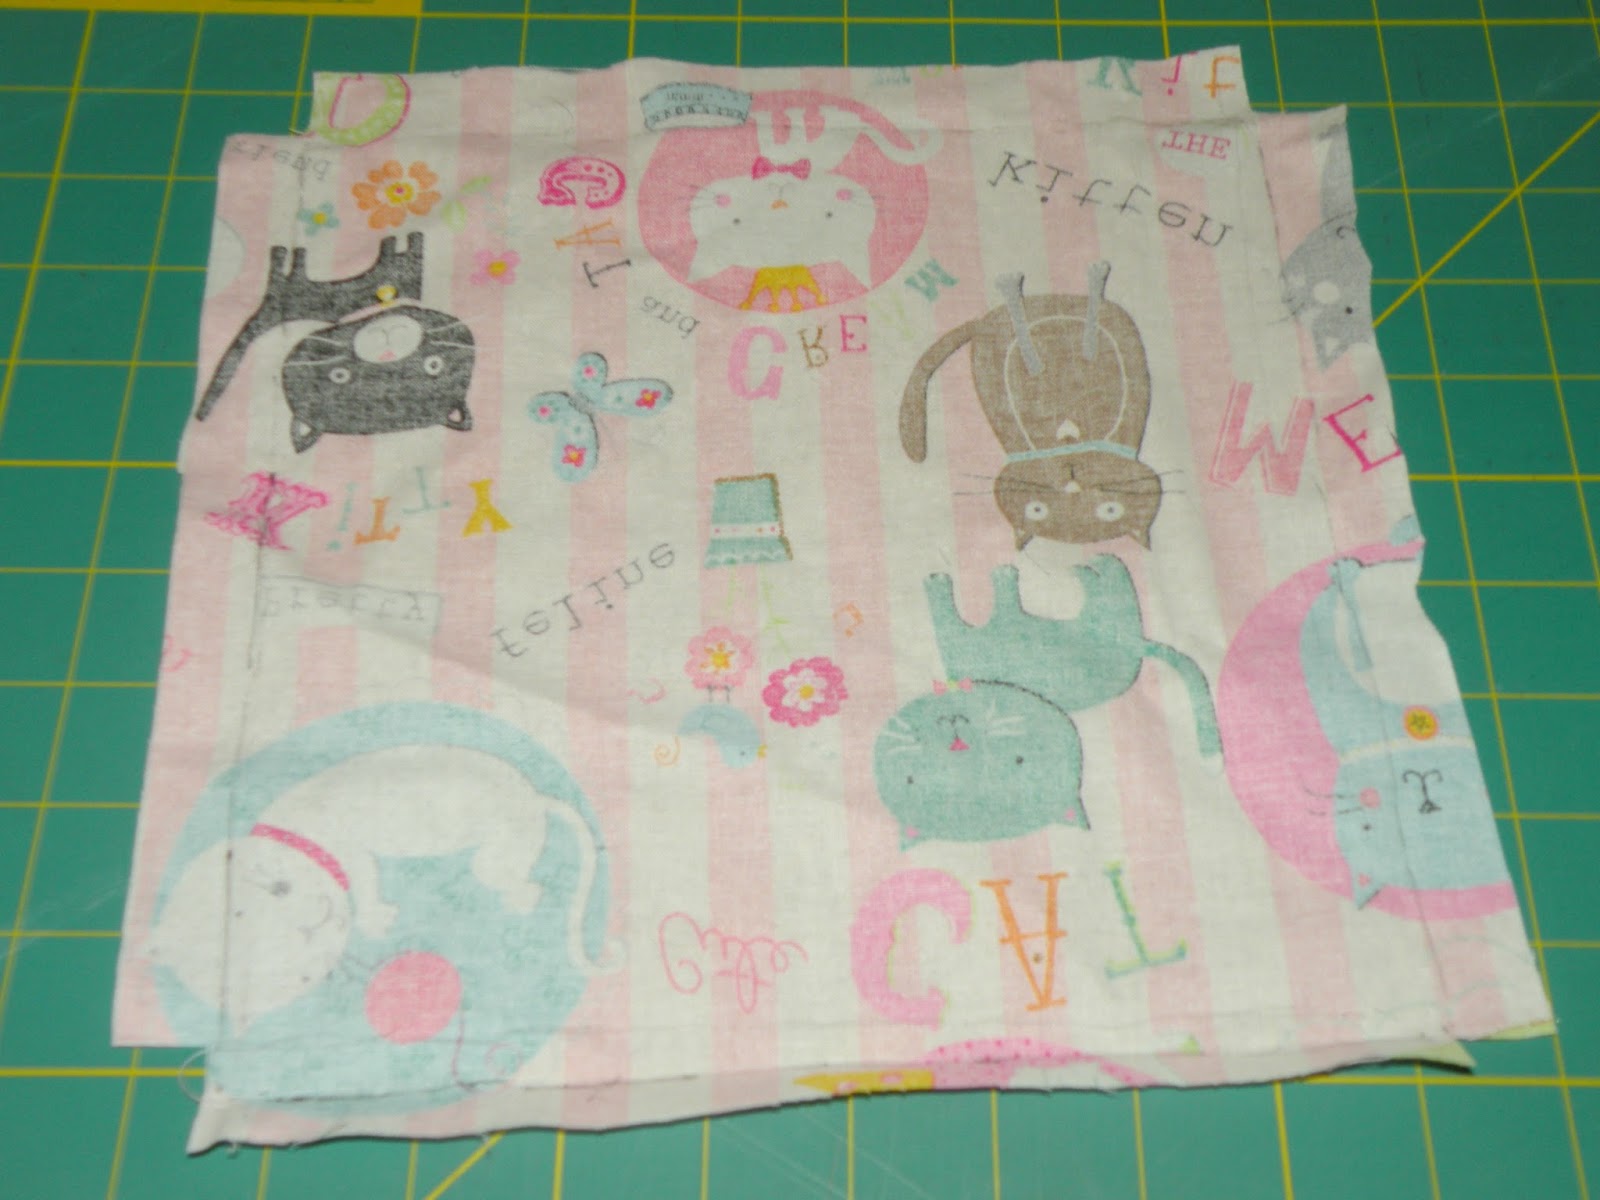
      Front piece: The easiest way to do this is to use an existing pillowcase as a guide; lay it flat on top of your fabric and trace around it, making sure to leave room for your seam allowances. 

     Ruffle strips: The length of these would depend on the amount of ruffle action you want going on, but you'll probably want the strips to be at least twice the length of the front so you can get a respectable amount of frilliness goin'. To get them this long, I cut these strips out on folded fabric so I had two identical pieces for each ruffle strip, then sewed them together at one of the short sides to make looooong strips. At this point I also sewed down the long sides about 1/4 inch from each edge so that when I wash the shams the ruffles won't unravel too far, but will still get the frayed edge that is so popular in shabby chic styles (unfortunately in a lot of the stuff you can buy, they don't finish the edge at all, so if you wash it you might just pull a ball of fluff out of the dryer). 

     Back pieces: To get that overlap in the back of the sham that lets you fit the actual pillow inside, the back pieces will need to be a bit longer than the front piece. First, measure your front piece and divide its length in half. Then you can either add 3 inches to both sides OR, if you feel like making things complicated like I did, you can add 2 inches to one side and 4 to the other (which, to be fair, is how most shams are made: one side longer than the other to make cramming your pillows in easier). Either way, once you've found the right length, cut out your back pieces and hem the edges that will form the sham opening.

     Next up comes the ruffling! I know some people are intimidated by the idea of ruffling, thinking you need a special foot for your sewing machine or something, but nah, screw that noise. We're doing this old school. All you need to do is set your sewing machine to a nice long stitch length and sew right down the middle of each ruffle. Then grab the bobbin thread (I actually used a white bobbin and pink thread on top, which made it easy) and gradually work the fabric down the thread until you achieve your desired level of ruffle-tude. It's kind of a pain at first, but once you get into a groove it goes quickly. Just don't get too handsy and break your thread.


     Then sew the ruffles onto the front piece in whatever configuration your heart desires. All you need to do for this is pin them in place, then hold the ruffles flat on each side of the presser foot as you sew straight down the middle of the ruffle. 


Always a cat in my process pictures, never the same cat twice.

     Then it's time to sew the back pieces to the front! This is my favorite part of any project: the part where it starts to look like the object it's supposed to look like. My least favorite part is the bit about 20 minutes in where I start to second-guess myself and want to cry because surely I have somehow ALREADY RUINED EVERYTHING. I have sewing anxiety. I'm working on it. Anyway, pin the pieces in their proper configuration, right sides together...

Not sure what my excuse is for the quality of these pictures today. They were taken at night, so that accounts for the less-than-stellar lighting, but I'm not sure why this one, for example, is making me seasick right now. I started to try to straighten it a bit in photoshop, but I think this thing was taken by M.C. Escher or some shit. And I think he was drunk.

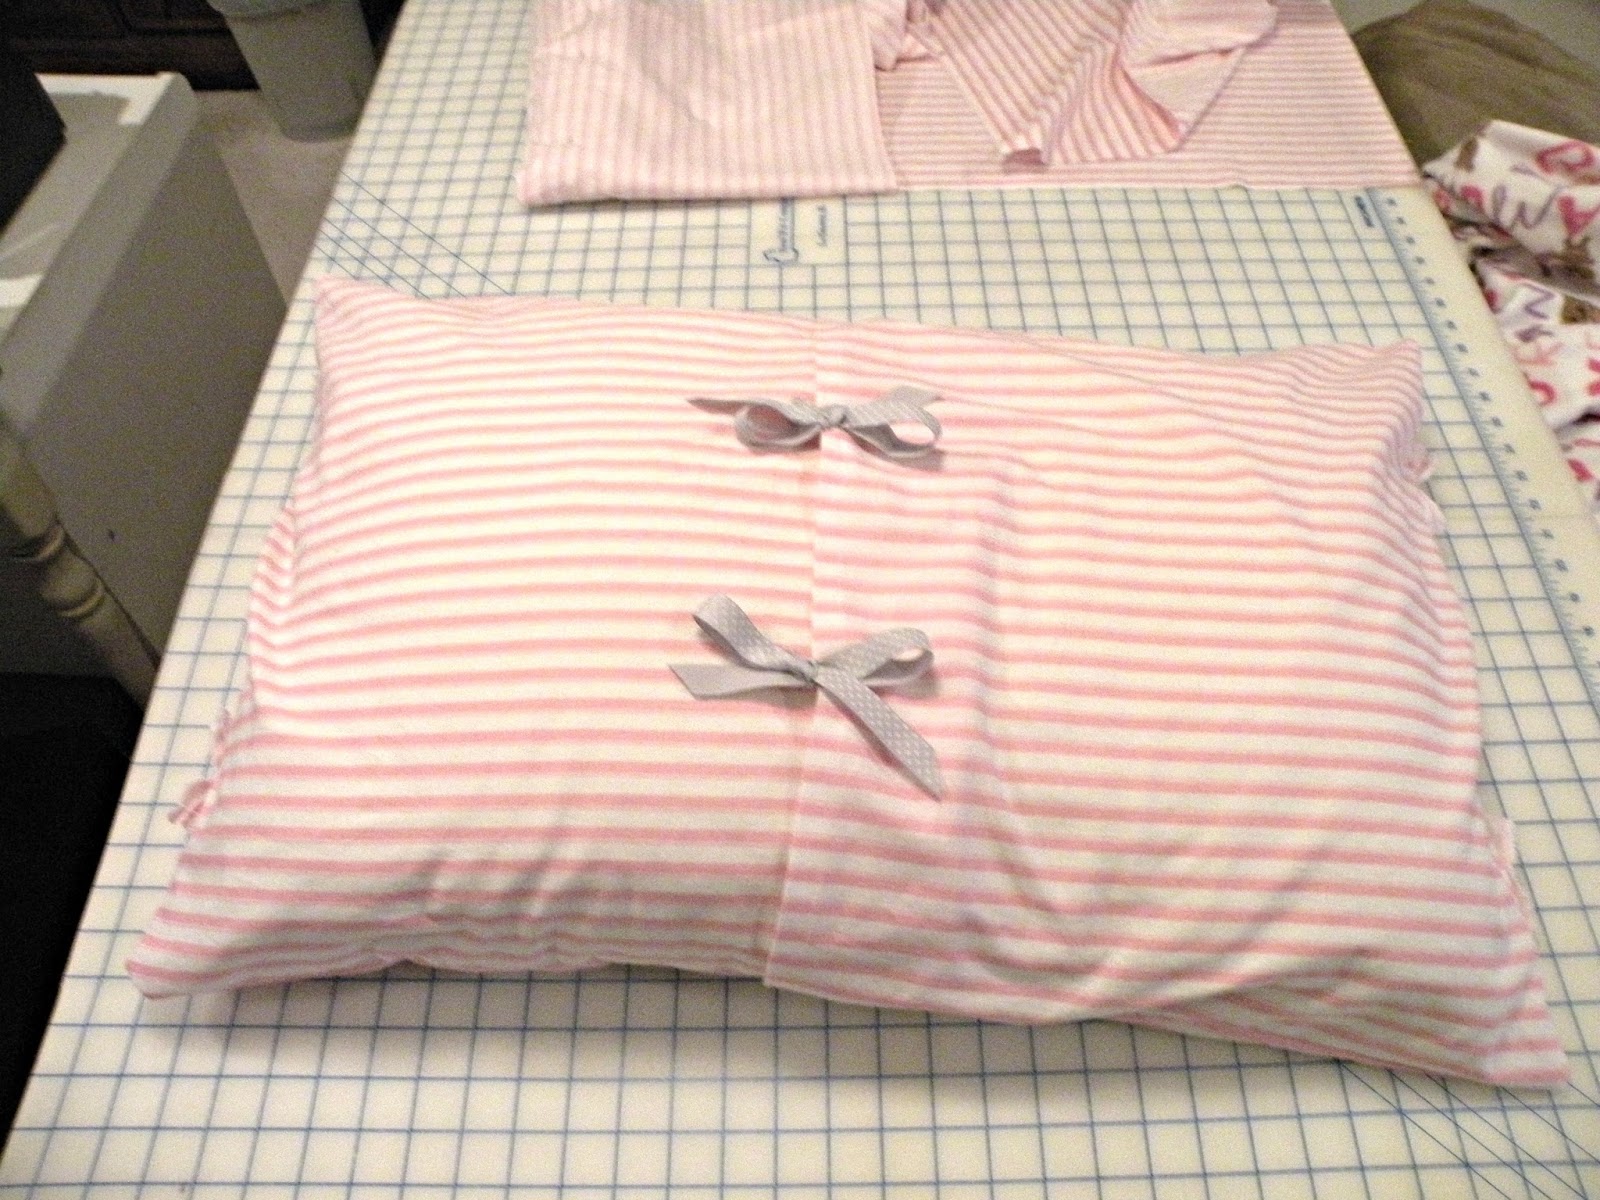
      Then sew all the way around and turn it rightsies outsies to reveal your lovely pillow sham! I decided to add some ribbon ties to the back, more for looks than actual function. I just sewed one piece of ribbon to each side of the pocket, then tied 'em up all pretty (lies, my mom tied them up all pretty. When I try to make nice bows they end up looking like a kindergartener tied them, then Death himself came along and tried to fix them but when he touched the bows they got even wiltier and sadder).


     Then floof it up and put it in a place of prominence and pride to take a picture and pretend like you're not in fact going to put your nice pretty shams behind the one gross but super-comfy pillow you drool all over every night! 


Sweet dreams! 


Monday, August 12, 2013

Strawberry Shortcut Cheesecake!

     Confession time:  I hate baking cheesecake. It's one of the only things in the whole world that makes me grimace a bit when someone asks me to make it (the other thing is fried chicken -- I'm a bad Southerner, ok?). It's just so fussy and time-consuming and then if it cracks at the very end I have all the bad feelings in the world. 

     But I had been getting requests to make cheesecake from a certain very-pregnant sister of mine, and cheesecake did sound pretty good. So on Sunday I whipped up this amazing, super-delicious shortcut cheesecake! It had all the cream-cheesy tastiness of cheesecake, and a lovely light texture,  but it only took me about 15 minutes to put together! 


     Here's how I threw this thing together: 

1.  Crushed up a decent amount (half a package, at least. Always better to err on the side of having too much!) of Oreo cookies, then stirred in about half a stick's worth of melted butter to make a nice crumbly crust that just barely held together when I shaped it with my hands. Dumped it into a springform pan and smooshed it around the bottom and up the sides of the pan to form the crust. 

2.  Mixed together a package and a half (about 12 ounces) of cream cheese (I had let it soften for a while first to make the mixing easier), a cup of confectioner's sugar, and a tub of good old fashioned Cool Whip! Once it was all smooth, I plopped it in the pan and spread it out all nice-like. 

3.  Then I just topped the whole thing with a can of pre-made strawberry pie filling (obviously if you're in the mood for cherry or blueberry or blackberry or what have you, follow your heart) and stuck it in the fridge until it was time to eat. 

     And it was that easy! This dessert was a big hit, too; everyone had seconds. I think the Oreo crust is what makes it. Seriously, if you're looking for a way to make a dessert, any dessert, taste better, add Oreos and butter. It's a Law of Baking. 


Friday, August 9, 2013

The things we do for our feline overlords.

     Bessie and I have been having a disagreement. Namely, she thinks it's fun to get all up in these boxes on the bottom shelf of my bookcase and nose around, pawing at them and picking them up and dropping them (with her FACE) so they make an unholy racket at ridiculous hours of the early morning. I disagree. I don't find that fun at all.


     I couldn't just put the boxes somewhere else because they were keeping all those cords back there out of Bessie's reach. Originally I had books and dvds there, but I replaced them with boxes when she started chewing on them, figuring I'd rather have her chew up the corners of a few storage boxes than chew on wires and either electrocute herself or start a house fire (she hasn't chewed on the boxes after all, but as I said, the face-bulldozing is quite noisy). So I had to get creative. Here's what I ended up doing:

     1. First I grabbed some fabric that matches my room nicely, namely a blue and white striped seersucker fabric that my grandma had given my mom out of her stash. Then I got to measuring. I measured the inside width and height of the dresser, because I planned to hold the fabric in place with tension rods at the top and bottom of the second and third shelves. I added two inches to the height measurement to allow for the rod pockets, and decided to just use the width of the fabric for the width of the curtain, because I wanted it to be gathered.


     2. Then I cut it to the appropriate size...
 

     3. Then I ironed in a seam allowance on each of the vertical edges, as well as folding the top and bottom edges in 1/4 inch, then another inch, to create the rod pockets. 


     4. Next I sewed the vertical edges with the pockets (but not the 1/4 inch inside the pockets) unfolded.


     5. Finally, the rod pockets got sewn shut horizontally along the top and bottom edges.


     Then it was just a matter of slipping the tension rods in and putting the whole shebang into place!


    If you're super observant you might be able to tell from the clock in the before and after pictures that this whole thing took almost exactly an hour, and really only that long because I dilly-dallied a lot. Hopefully it will solve the Bessie-the-Destructor problem and let me get some sleep!