Showing posts with label Projects. Show all posts

Monday, July 21, 2014

Bring me all the stuff and junk and doodads you can find.

     I made a thing this weekend! And by "I made," I mean "I had the idea and bought parts for, then asked my dad to help me with anything that could end in me drilling off part of my fingers." Technicality. Anyway! 

     So Ollie and Evie are at an age where they've gotten really into....everything. Ollie in particular is fascinated with doorknobs and drawer pulls, and Evie likes to just stare at various mechanisms with her hands up by her shoulders, twisting them around in circles in the air while she thinks about what to do next (I feel you, girl. Me too). So I figured one of these "busy board" type deals would probably be life-alteringly delightful for them. Or at least they'd enjoy smacking things around on it for a few minutes. Either way, worthwhile pursuit. 

     If you're not familiar with the concept, a busy board is basically just a hunk of wood that you slap a bunch of....things to mess with onto. I picked up two kinds of door locks, a drawer pull, a twisty ring drawer handle doojig (world's tiniest doorknocker?), and a bunch of large washers, then went rootin' around in the garage and came up with a hinge, two wooden handles, and that little...thingzer at the bottom right. Can you tell I'm basically useless in a hardware store unless I'm buying paint? I kick ass at picking out paint. Beyond that, I cannot help you. Once I had all that gathered together, it was basically a matter of sticking it onto something. My dad sanded a spare piece of wood down nice and smooth and took off the eye-poking threats at the corners, then helped me attach everything securely so there's no risk of any choking hazards coming loose. And here's where we ended up! 


     In case you're curious, here's a labeled guide so you can learn something today. 


     Just kidding, told you I was useless. 


Friday, April 18, 2014

Quick and Easy Maxi-skirt!

     This little project was born of necessity. Basically I was wearing the two other maxi skirts I own every day (well, every day it was warm enough) and realized I could use a more neutral one so I would never have to wear pants ever ever again so long as I shall live (until fall). So I picked up that gold polka-dotted stretchy number you saw in that preview post, and a bit of elastic here and some stitching there, then I had a skirt! Ok, it was a little more than that. But not really. Basically here's what happened.


     Only one seam, since I wanted it to be gathered anyway (so you wouldn't see it) and "there's no point cutting it just to sew it back together" as a front and back panel, as my mom said. So wise. Elastic at the top, sewn on with the elastic streeeetched out, so it gathers when in its natural position, with one row of zig-zag stitches to hold it to the back of the fabric, folded over, and another row of stitches to hide it. Hem at the bottom -- honesty time, I haven't done it yet, which is why in the "finished" picture I'm about to show you I'm on my tippy toppy toes -- and that's about it. 


     So now I just need to hem this bad boy, then I shall commence wearing it every day until people start to make fun of me for it, at which point I will... continue to wear it but know in my heart of hearts that those people kind of suck a little bit. 


Monday, April 14, 2014

Sneaky peek-y!

     Over the weekend I was really very sick. For reference, I'm generally one of those stubborn idiots who won't go to the doctor until I'm knocking on Death's door at 3AM yelling "Come outside, Mr. Deathy, unless you're scaaaared," and at one point I was so dehydrated I was genuinely concerned I might need to go to the hospital. Couldn't keep any water down. Stomach bugs, man. They are my downfall (Well, I have many downfalls. I am a delicate flower). I'm feeling somewhat better since my dad ran out and got me every flavor of Gatorade so I could force in some electrolytes and junk, and my mom made me a grilled cheese when I was capable of eating again. That's the great thing about parents, man, they just refuse to let you die. Anyway, the point of that was to preface why today I've just got a little preview of some upcoming projects.  


     Any ideas what I'm making with these things? Don't worry, I'm not going to leave you in suspense. The sheer fabric with the cool little flower embroideries is going to be a kimono(?!)/sheer jacket/thing like the one from Target that I recently put in my favorites. Yep, just loved it so much I decided to pull a Thor (I like this. ANOTHER!). The black pom-pom trim is going on the sleeves, just like the Target one -- partly because I guess I ran out of creativity there, partly because I thought it would be a good way to keep it from looking too funereal/lingerie-like. As for that stretchy black fabric with gold polka dots, it's going to be a maxi-skirt. I have a blue one that I made from an old dress (I can't remember if I blogged about it or not, and I'm too mummy-brained to go look for it) that I wear constantly, so I thought it would be pretty easy to make another one. It's just an elasticized fabric tube, after all. Do those sound like last words, courting danger, asking for it to be really difficult for some reason? I kind of feel like yes, but I'm feeling reckless, let's leave it. 


Monday, March 24, 2014

Gold on the Ceiling...Ok, tin but whatever.

     Check. Out. What my dad put up in the kitchen this weekend. 


     This epicness is the new tin ceiling. It's super fancy and historical looking and makes me feel like I should pop on a monocle and drink tea from fancy china with my pinkie out. It only took a day and a half-ish to install, probably because my pops is superhuman and never runs out of energy, so he just works and works and works until everything's done. I did not inherit that trait. I'll work until I feel like I've made a good amount of progress, then spend ten minutes googling videos of goats jumping or whatever before I feel refreshed enough to start up again. I have methods, don't judge. Anyway, we're all basically colonial-president-level fancy around here these days.


     The tiles are from American Tin Ceilings, and they were pretty pricey, but it's something my mom has wanted for a long time, ever since seeing all the gorgeous old tin ceilings in Downtown Fredericksburg. Plus you just send them the measurements of your room and they draw out all the plans for you, so that's nice. There's lots of other really beautiful options, too (go here if you fancy a looky-loo). These are the 24 inch tiles, so they're not too small and busy or anything like that (although I think small tiles could be cool in the right room, or even as a backsplash). 

     So next time you're thinking "Hey, I need my house to look at least 30% more like a set from Downton Abbey," maybe a tin ceiling is the answer! 


Wednesday, March 12, 2014

From fail to...slight less...fail-y....I dunno, these puns don't write themselves, you guys.

     So remember when I re-did that lap desk? Yeah that turned out to be a total failure. It sucked the first time around anyway because of that whole thing where I had forgotten why I freaking hate Mod Podge so much, but even after I finally thought I had it done with spray adhesive and clear lacquer, it ended up not working out. 

Booo, hissss.
     As I had feared, the paper pulled up on the edges and got torn up. Luckily I had a backup plan. See, it had occurred to me about an hour after I finished, as ideas tend to do, that if I was going to go with white and gold stripes, why didn't I just paint the damn thing in the first place? But at that point it was too late. 

     Which brings us to me tearing off that paper in big, satisfying chunks. I thought it would be miserable to scrape it all off, but it was actually alarmingly easy. But once it was all gone, there was this...


     The spray adhesive had left a sticky lumpy mess behind that I couldn't just paint over, so I took some sandpaper to it. Once that was done, I took some white spray paint to it...


     ...which was HORRIBLE AND PATCHY AND MADE ME FEEL SCREECHY AND THE SCREECHING ALARMED THE DOGS. I seriously had a rage meltdown at this stupid spray paint. It sucked so bad. I kept doing nice thin coast like good spraypainters are supposed to, and it just...never got any better. Once I'd done a truly stupid number of coats and it dried it didn't look quite as terrible, but I still glowered at it for a while before deciding if I even wanted to keep going. I was at a point where I'd put so much work into this stupid lap desk and it still looked like crap, so I kind of felt like I should just trash it and go buy a new one somewhere. But I persevered! Mostly because if I hadn't I wouldn't have had anything to post about today. Except maybe "I tried to do a project but it sucked because I suck at everything DESPAAAAIR" and I feel like I do those posts pretty often as it is, so. Anyway.

     After I gave it a good long while to dry, I taped off some stripes with Frog tape, since that's supposed to be le so much better than regular painter's tape. I just eyeballed them, because that's how I roll. 


     Then I went to town with my gold spray paint and pulled the tape off as soon as I was finished. Well, technically I waited long enough for me to fumble around for the tape packaging and read through all the "don't eat this, you'll die" warnings to get to the directions and find out if I was supposed to wait or not. Then I pulled it off. It felt like an accomplishment that I didn't have any color bleed underneath. 


     The stripes ended up covering most of the lingering patchy weirdness, and once I coated it with clear lacquer and brought it into its habitat it didn't look messed up at all (high praise). 


     So I guess I'm...satisfied with it? It works, it looks nicer than its previous incarnations, and it shouldn't peel up or chip or anything strange like that, and at this point I'll take that as a win. I know, I know, I'm almost too inspirational: "DIY! Take a drab thing and turn it into something that you don't entirely despise!" 


Friday, February 28, 2014

Quick Fixes: Alternate Ending Edition?

     One of the perils of working from home is that it's hard to designate a work space, so if you're anything like me you end up working in bed all day. Supposedly that's bad because then your brain associates climbing into bed with working instead of sleeping, so it's harder to sleep at night or whatever (the human brain is an amazing piece of machinery. And also really stupid). Plus I feel like if you sit on memory foam all day your ass'll turn to straight-up mush. I can't work at my desk because the chair is really uncomfortable and the height of it would make my head snap off my neck after a few hours of working (I hunch. I hunch bad). So I've been trying to get into the habit of using my super-comfy glider and a lap desk. That way it's comfy, I don't slouch over what I'm doing, and I can set everything aside to get up and walk around every now and again (so my butt doesn't turn to Play-Doh. The concern is real). The only problem? After staring at that lap desk for hours every day I started to resent it for its ugliness. I don't know why; it's not like it had, like, a repeating print of the poop emoji all over it. I just got really tired of looking at its fake wood-grain top. I make no claims that this is rational. It is but my truth. 

Ugh, look at it. It's like...smug. 
       My weird projections about the bad attitude of a slab of compressed sawdust aside, it also had some nail polish and ink stains on it that weren't exactly gorgeous. So a plan was hatched! First let's see how it turned out. 

Ta-daaaaa! If this picture looks hastily taken, it's because my camera kept saying "battery exhausted" and turning off before I could take an after picture and I was like "okwhateverfine camera, WE'RE ALL EXHAUSTED BUT WE STILL DO OUR JOBS." 
     So to get to this I took a roll of wrapping paper, cut a manageable approximation of the right size, then hit the lap desk with some spray glue and carefully rolled the paper across it, trying to keep it from getting any bubbles underneath. Then when it was all smooth I flipped it over and traced around it with an x-acto knife and did two coats of clear lacquer to seal it, so if I spill Diet Coke on it or something it'll wipe right off.


     Now if I made that seem like it was all sunshine and daisies and the magical crafting gods smiled down upon me and said "let thine endeavors go smoothly on this day," that is because I am a tricksty hobbits who trickstily arranged her blog post to make her look like less of a failure. But then thought "whatever, everyone already knows I'm a failure" and decided to include the rest of the story too. 

     What actually happened was that when I bought the wrapping paper I thought "Oh I'll just mod-podge this onto the top and it'll be all glossy and decoupaged and cool!" And so I did a nice thin even layer of mod-podge, then carefully rolled my paper across, squeegeeing out any air bubbles as I went...only to have it turn wrinklier than the littlest piggy at the market after a long bath when it dried. At this point I stared at it, seething and remembering the last time I used mod-podge, which also ended with me saying "Why do people even use this? It suuuuucks!" Seriously, I am hard-pressed to remember a mod-podge project that didn't end in total unmitigated disaster. So it looked like crap, and it was too late to just pull it off and try again, so I spent twenty minutes scraping it off with a...spackler? What is this thing even called?


     So that was fun. And by fun I mean I sandpapered off my fingerprints trying to get the last bits off. 

     But all's well that ends well, and it looks nice now. And I learned an important lesson: Never to try a mod-podge project again as long as I live. Yay, learning! 


Wednesday, January 8, 2014

Just a friendly reminder...

     ...that gluing stuff to bobby pins and hair clips is really easy and super fun and you get new stuff for free! I've been on a bit of a spree lately. I dunno what it is that makes me want to take random things and stick them in my hair for decoration. Some sort of bizarre birdlike instinct to augment my nest of hair before spring comes? Who knows. The heart wants what the heart wants, etc. Anyway, here are some of the things I've turned into hair bedazzlements recently.


     The first idea I had was to make a pretty little velvet bow from some pink ribbon I've had sitting around since before Christmas. I want to wear it on top of my head like Marie, the cat from The Aristocats. Except like...human. Like this picture that I pinned on Pinterest.

     Then I figured I'd go digging through my stash of bits and bobs while the glue gun was still hot and see what else I could come up with. I've had the red sequined Hello Kitty-style bow for ages and I had always intended to make it into a hair pin so I could run around being stupidly adorable like a Japanese cat -- follow your dreams, kids! I picked it up on clearance at a craft store and forgot about it until now! The seagull, that big round gold thing (please read with upward inflection to denote my complete lack of a clue as to what that ever was), and the floral doodad were all floating around in a jar of miscellaneous potential craft supplies that I keep. You'll notice that for most of these, a single bobby pin hot-glued to the back was enough to hold everything together (the pink bow has one tucked into the middle piece of the bow on the back with a dot of glue for hold). For the big floral...thing, though, I decided to use several pins in more of a decorative hair-comb formation, since it's heavier and could use more support. I could have just glued it to an actual hair comb, but I didn't have one on hand and I'm far too impatient to wait until I can go out and get one. So this works! That one might be my favorite, because it actually started out looking all sad and rhinestone-less because they had all fallen out years ago. I'm not sure where it came from, but I think it might have been in a bag of broken jewelry that my mom bought for super cheap on impulse at an antique store. Which makes me even happier to bring it back to a state of functionality!


Monday, December 30, 2013

Hello Cake-Kitty!

     This weekend I was commissioned to make a special birthday cake -- one that was not only shaped like a kitty face, but had a surprise inside. Because I like to do things all backwards and nutsy, let's start with the surprise inside: what looks like your average everyday cake is a rainbow explosion inside! 


     I placed the sides opposite one another when I layered them so when it gets cut open it will be a color explosion. The reason I didn't swirl them more for a tie-dyed effect is mainly just that I'd never done a tie-dyed cake before, and I worried about the colors getting muddy. I wanted them to stay super neon!

     And now for the outside! It looks like...this! 


     Bear in mind that it also had whiskers that were formed from uncooked spaghetti noodles dipped in chocolate, but I didn't want to install them ahead of time for fear that the moisture of the cake would turn the noodles soggy and weird and sad. The ears and nose/mouth region were made from a third batch of cake that I cooked into a sheet to cut from and layer. The eyes are chocolate discs, the eyebrows, melted chocolate piped onto waxed paper and set, and the nose, tongue, ears, and bow are all pink buttercream. The buttercream fur was definitely the hardest part, but only because of how much time it took; in terms of actual skill it was still not difficult. And I can attest to the tastiness of the whole shebang thanks to having leftovers from the sheet cake the ears and mouth were made from. Mmm, mm. 

     Not a bad way to spend a Sunday! 


Monday, December 23, 2013

Oooh, look at this completely unnecessary skill I learned this weekend!

     Bonus points: not only is it totally unnecessary, it's hysterically time-consuming! Like, twenty minute chunks of my life, ske-plosh, down the drain. Don't get me wrong, the end results are super pretty and impressive. It's just that in hindsight I realize there are probably more exciting ways I could have spent my Friday afternoon. Oh well, now I can whip this out at parties to impress people with my papercraft wizardry. Check it! I present to you: wrapping paper sea-urchin-type pointy spike bows!


     They're so, so pretty in person. Way more of a statement than any old squashed little bow you dug out of your attic five minutes before the party. I used this tutorial here, so I won't go into detail on how I made them, since that blog does a really good job of explaining it. The only thing I did differently was use hot glue instead of Elmer's, because I do not have the patience to hold eight hundred little cones of paper together while they dry. Once I'd gotten the hang of it and switched to hot glue, they took about twenty minutes each from start to finish. So I wouldn't recommend planning your whole wrapping scheme around one of these on every present (unless you're just feeling like a few hours of something crazy tedious would mellow you out -- no judgment, you do you), but if you need a real show-stopper for one present, then yeah, definitely give it a shot. They're not hard to assemble once you get into a groove. So hey, why not? 


Friday, December 20, 2013

Gift wrapping and gift snacking!

     Christmas is creeping up like a sasquatch in the night, so I finally got around to wrapping up some presents! 


     I put it off for way too long every year,  but I actually love wrapping presents. Not so much the whole bit with wrangling the paper and trying to keep all the pets from stepping on it and putting holes in it before you ever get a chance to slap on the first piece of tape, but the tying up with ribbons and bows. It's satisfying to turn a bunch of cardboard boxes into pretty little parcels for everyone to appreciate for approximately two seconds before they tear into it with the might and ferocity of a hungry raptor. 

     In other festive news, I whipped up a beauty of a cake the other night for my dad to take to work to celebrate the holidays! Check it out:


     It's a simple two-layer 9x13 white cake (I always recommend good old-fashioned white cake whenever you're feeding a group, because nobody doesn't like white cake. And if they do, keep an eye on them, they're weird), frosted with whipped buttercream (mmmm, buttercream) and decorated with ice-like sugar sprinkles and a big red fondant bow.  And it turned out pretty nicely, if I do say so myself!  


Wednesday, November 20, 2013

(Insert your favorite pun based on the word "dye" here)

     Yesterday was an exciting benchmark -- my first foray into dyeing clothes! I had never dyed anything before (aside from tie-dye projects, obviously. Wait, is that obvious?), mostly because I had this conception that it was a big hassle and super messy. But I finally had the kick in the pants I needed to try it out, in the form of this hand-me-down shirt. 


     Amanda was cleaning out her closet the other day and asked me if I wanted this shirt to sleep in or something. The caveat of "to sleep in or something" is because of that stain on the left sleeve; apparently she got chocolate on it, didn't notice, washed and dried it, then noticed it, and....left it sitting in her closet for five months. So that's a pretty damn set-in stain. It was not coming out. And sure, I could have just worn it as a PJ top, but it's one of the nice soft, drapey, comfy shirts from Victoria's Secret that I'm too cheap to buy myself. I wanted to make the most of this freebie! So I decided to try dyeing it a dark color to hide the stain and thus squeeze some extra wearability out of it. I figured it was at least worth a shot, since even if I ruined it completely somehow, hey, it was still a free shirt to begin with. 


     I picked this dark purple dye because I figured it would camouflage the stain but still be pretty. Obviously to hide a chocolate stain, brown or black would be the easiest options, but I didn't want to go brown because brown is a disgusting color (sorry I'm not sorry), and black would have looked fine, but since I mainly wear dark-washed jeans or leggings, dyeing the shirt black would pretty much rule out wearing it anywhere other than funerals with very casual dress codes. So, purple it is. I followed the directions on the back of the packet almost to the letter, except that it said to stir the fabric item in the dye/hot water/salt mixture constantly for fifteen minutes, and I felt like surely they had just put that on there to screw with people. Fifteen minutes is a long time to stand around stirring a tub of clothes and murky water like Charlie Bucket's mom. I stirred for maybe three minutes before I got bored and quit. 

I mean, I stirred it a little better than this. 
     Then after it had stewed for the appropriate amount of time, I rinsed-rinsed-rinsed it in the sink before chucking it in the washer on cold with some similarly colored items. Yeah, I did a purple load. How's that for separating your laundry? I didn't put it in the dryer because the packet said to avoid exposing the dyed item to heat or sunlight. So to avoid heat, I figured best not put it in the dryer or wear it when snuggled up in my heated blanket, and to avoid sunlight, I'll just continue my usual cave-dweller lifestyle. Once it had air-dried...ta-da!


     You can still see the stain if you're looking, but it's at a level of unnoticeableness (pretend that's a word) that I'm comfortable with. Only the truly detail-oriented will notice when I'm wearing it (especially because it's on the back of the sleeve, where I'd have to be raising my hand or something, which I rarely do because I'm a rebel and I'll talk out of turn if I want to, dammit. YOLO and such).  I think it's kind of cool how the embroidered Victoria's Secret dog at the bottom didn't take any dye since it's synthetic thread and synthetic fibers are less porous than natural fibers because they're spun from polymers that make it smooth and blah blah blah, science. I am glad that none of the other threads are visible though, because I don't think I'd like a purple shirt with neon green seams. Too much muchness. The other side-effect is that all that stirring around with a stick, combined with no heat from the dryer, means this shirt streeeetched out quite a bit. I'm actually totally cool with that, because it just makes it slouchy and cocoon-esque and generally a delight to wear, but if you're thinking about dyeing something yourself, take that into account. 

     Overall I am happy to report that my first foray into at-home clothes dyeing is a success! I like when that happens. 


Friday, November 8, 2013

Night night, sleep tight.

     I'd been wanting to make myself a sleep mask for a while now, for a totally First World Problems-esque reason: I like to fall asleep with the tv on, because listening to it keeps my mind just occupied enough to stave off my nighttime anxiety/racing thoughts, but not so occupied that I can't fall asleep. That's not the first world problem, though. It's that my tv is kind of too big and bright. Yeah, I'm sorry that I even made you read me saying that, because I realize what a jerk it makes me sound like. But it's true! It's a great tv for daytime, but when I'm trying to fall asleep, those bright white commercials can be a little jarring (somebody call the Waaaah-mbulance). So I decided I'd whip up a quick little eye mask to wear at night. Well, it would have been a quick project, were I not completely and utterly incompetent. But we'll get to that. First, let me get to the point and show you what I made. 


     As you can see, it's pretty simple. It's assembled from these pieces...


     I would have taken pictures of the assembly process, but as I mentioned, it was kind of a shit-show for me, so the documentation part slipped my mind. Basically I just cut out two pieces of a soft stretchy-ish fabric based on a template I made of paper, then cut out two layers of batting in the same shape, but smaller so they'd fit inside. For the straps, I made my life way more difficult than it had to be by making them out of fabric, sewing a long rectangle into a tube and turning it (the unfinished edge ended up inside the seam of the mask, so I didn't have to worry about that). In hindsight, I wish I'd just used ribbon. To assemble, I put the two pieces of the mask right sides together and sewed around everywhere except the sides, where I wanted the straps to attach inside. Then I turned it right side out, shoved the batting inside, lined up the straps, and sewed them in, closing the open spaces on the mask at the same time. To make the mask stay on and actually, you know, function, I sewed a bit of elastic at the back (you can see it in the top photo if you look closely; it's right underneath where the two straps overlap at the back). Finally, for the cheeky eyelashes and winged liner, I used some scrap lace and ribbon, attached with hot glue. 

     Did I make that sound simple? It really should have been. But nooo, I had to make it involve literal tears and blood. See, originally I was going to make the whole mask out of that blue fabric the straps are made from, but it turns out that fabric is a complete and utter bitch to sew on. It kept shredding and turning into this fine blue fuzzy dust in my hands. Absolute misery. Eventually my frustration got the better of me, and I decided to switch gears. The animal print fabric I chose instead was somewhat easier to work with, but since it's stretchy, it still gave me a few issues. I also somehow managed to gravely wound myself with a pin when placing the straps, which necessitated a ten minute break to hold a paper towel on my finger (I considered adding a picture of the bloodied paper towel for drama, but decided that was probably too gross and vaguely serial-killer-y). How do you hurt yourself so badly with a straight-pin that it bleeds for ten minutes? Hell if I know. Blind luck, I guess. So that's where the blood came in.  

     After that I figured I was in for a massively traumatic hot glue gun burn or something, but surprisingly I managed to traverse that minefield safely. Where it really all went to hell was when I was about two minutes from being done, as I was sewing in the elastic piece at the back. Remember those nice straps that I went to all the trouble of making out of that God-forsaken blue fabric composed of a heretofore unknown form of matter that is apparently only a solid mass until I touch it? Just after I finished sewing the first side of the elastic, I went to cut the thread using the little blade tucked away on the back side of my sewing machine. But somehow I managed to get the strap caught in the (seriously, freaking microscopic) blade instead, and in that one quick motion I'm used to doing to cut the thread, I SLICED RIGHT INTO MY BEAUTIFUL OVERLY COMPLICATED STRAPS LIKE GODDAMN SWEENEY TODD. It was at this point that I completely lost it. 


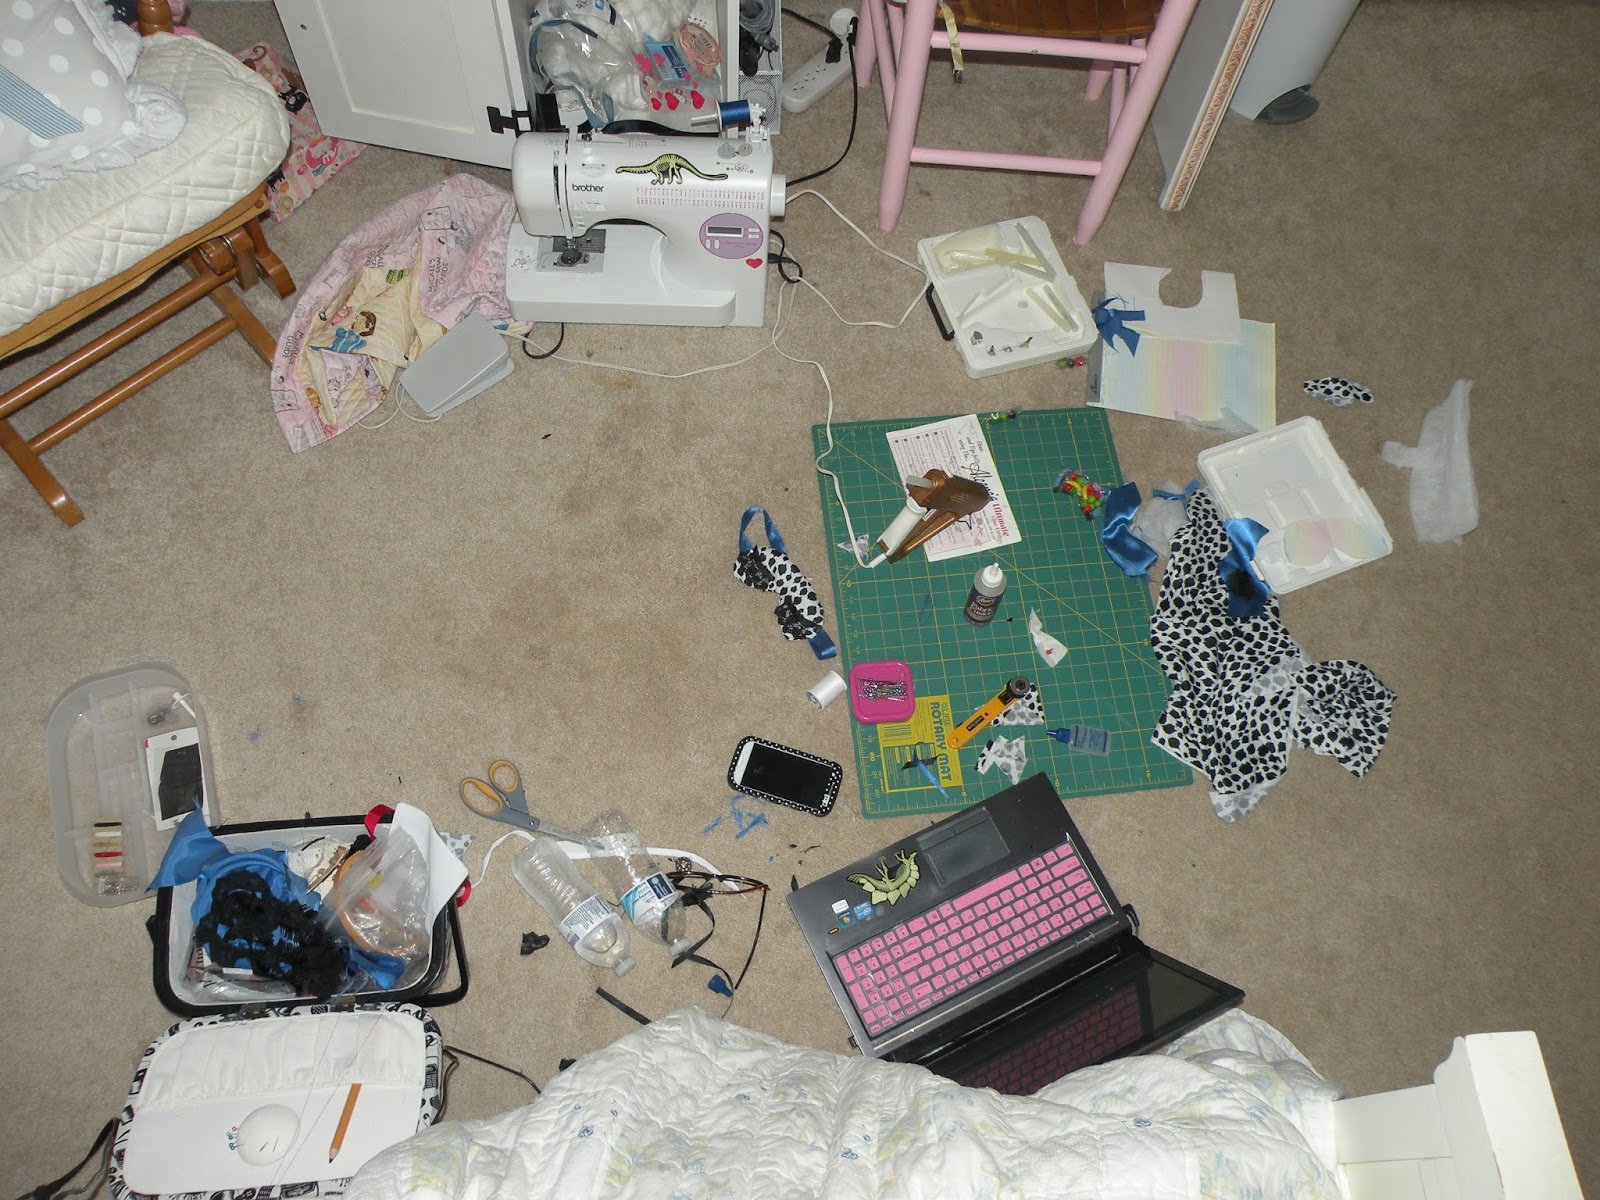
     I couldn't decide if I wanted to laugh or cry, so I kind of did both? It was that fifty-fifty split of sobbing and hysterical laughter that's generally reserved for disturbed lighthouse keepers. I'm sure it was frightening to behold. Especially because I did it while sitting in the middle of this mess:


     Not exactly the kind of beautiful, clean, organized, naturally-lit workspace all the other DIY bloggers have, but I'm pretty sure they're just photoshopping out all the candy wrappers and fabric schnibbles and bloodied tissue scraps. At least that's what I'm going to tell myself. 

     Anyway, after taking a tiny project and somehow turning it into a massive ordeal, I'm gonna go take that sleep mask for a spin and hope my next project goes more smoothly! 


Monday, October 28, 2013

Don't Cross the Streams

     Well, the weekend Halloween parties have come and gone and now it's finally time for me to show you my finished Zuul costume! Drumroll super '80s synthesizer beat please...

I'd like to take this opportunity to remind you I wore a slip under this dress, so you're not seeing anything untoward here, I promise. 

     And of course, after spending that much time working on my demonic contouring, you know I have to include a close-up, and being the person that I am, obviously I'm gonna have to add lightning and an end-of-days-esque filter...


     This was so much fun to do. The hair was floofy, the dress was slinky, the makeup was over the top, and I was shimmerier than a disco moon (rarer than a blue moon, a disco moon happens once every couple of decades when funk music makes a comeback. The more you know!). 

     I hope you guys enjoy this epic tribute to a seriously classic movie, and I also kind of hope I'll somehow start a trend here. Every Halloween there's always a ton of Ghostbusters running around, but no Zuul! It's a crying shame! 


PS: If you're curious how I got my hair (yes, that is my actual, real, growing-out-of-my-head hair) to do that, how long it took, and how I turned it back into my normal hair again, stay tuned for Wednesday's post! 


Wednesday, October 23, 2013

Spooky Sticks

     I figure I should really be cramming in any last minute Halloween ideas now since it's rapidly approaching, so today let's talk about another quick, easy, and cheap decoration that you can whip up, once again using my favorite free resource: sticks! The inspiration for this was found at Target, where they had a similar set-up going for $25 dollars a pot. That's fifty bucks to bookend your front door with some creepy looking sticks. No thanks. Here's what you do if you're feeling like not paying for fancy landscape refuse:

1. Collect some nice branches. 

2. Spray paint them black. 

3. Add glitter if desired.

4. Place in a black pot at desired angle of stand-up-ness.

5. Spray foam the shit outta it. 


6. Cover that however you so desire. You can paint it black for a swamp witch look...


... or slap some moss in there for a slightly less oil-spill-ish appearance (although really, what's scarier than environmental disasters?).


     Pretty Halloween-appropriate, yeah? It probably adds to the scary factor that I've been sitting on my bed by the window, zonked out on cold medicine and rocking a sickly cast that really takes my natural paleness into full on restless spirit territory, so I'm sure anyone driving by has been thoroughly spooked. 


Friday, October 18, 2013

Experimental Rock

     Oh, the wide world of geology-related puns. It shall never cease to amuse me. 

     The reason I made that joke at the risk of infuriating pun-haters everywhere is because this whole shebang I'm about to tell you about was pretty much just an experiment. You see, I didn't have anything else to do, and I had recently found a rock that I'd been holding on to since last fall (I'd shoved it in the pocket of a jacket and forgotten about it). So I figured I'd just kind of play around with it and see where I ended up. Here's the rock in question, and what I did with it. 


     If I recall correctly I picked this up while walking the dogs at the park. It caught my eye because it had a nice glint in the sun and was already pretty flat on two sides. To start out, I took the Dremel to it to smooth and flatten all the edges, then shine it up a bit. Just for fun, here's a shot of one of the sides where I've done one half and not the other. It's satisfying in the same way as powerwashing something really dirty.


     When I got done smoothing everything out, I was left with this.


     I put that in gif form for you because I had a feeling in photos this was going to look like...well, a beige rock. I wanted you to get a sense of the pretty natural sheen and depth. I dunno, maybe I'm just really into rocks. If nothing else, it shows off what I did here, which was just to smooth everything out and bring out the natural shape of the rock, because that's my personal preference (remember how I like my things to look like they were crafted by an ancient artisan and only recently excavated?).

     Anyway, next I decided I wanted to add some glitz. First I tried taping off the two large flat surfaces and spray painting the sides with my favorite gold spray paint (the Krylon kind). 


     It was alright, and I didn't hate it. But then Amanda suggested I gold leaf the sides (she had some that she'd received in a monthly nail art box -- of course -- that she wasn't ever going to use). Go big or go home, right? That's what I loved about this experiment: if it succeeds, awesome, I get to look like the coolest witch in the coven with some weirdo homemade rock jewelry; if not, hey, it's a rock. Throw it back outside.

     Here's what's cooking once the gold leaf was applied.


      Much better! To actually turn this into a piece of jewelry, I just spun some little loopies into some gold wire and wrapped it around. I wanted to hold it in place permanently with a dab of epoxy, because I like to be sure of these things, but then I decided I liked how glossy the epoxy made everything, so I dunked the whole damn thing in there. Just went for it. Then proceeded to glue my hands to EEEEVERYTHING. It sucked. But this turned out to be a pretty pendant!


     So this guy will not be getting chucked back outside! I love a happy ending. 


     And the happy ending to this post is a nice before and after shot to remind you how far we've come (and for convenient Pinteresting purposes. Yeah, hi all you readers coming from Pinterest! Welcome, come in, sit down, have a lemonade, don't let the dog drool on you).


Monday, October 14, 2013

Oh-ho, Zuuly you nut!

     And the Zuul dress is done! The sleeves were cut in according to the diagram in Part I, then finished off with some elastic, and it's got a much better shape to it now. Of course, it's not supposed to have too much of a shape at all, but there's a good amount of middle ground between "potato sack" and "Real Housewives-style bandage dress."  


     I included two slightly different angles there just so we can all appreciate the pretty shimmer of that fabric combo. Preeetty. 

     The slit is also new since the last update. Obviously the original Ghostbusters dress has a much higher slit, but I'm not too keen on the idea of accidentally flashing my underwear to the world, so mine's shorter. You'll also notice the dress is pinned onto the dress form on one side. That's because she's got no shoulders to hold it up (don't bring it up, she doesn't like to talk about it). It'll stay up better on me, due to my possession of a set of arms. If I feel like it's falling off, I'll just use some double sided tape to hold it in place. The only other real change I made to the design (in comparison to the movie version) was to make it a bit shorter, so it hits just above the knees. That's entirely a personal decision, just because the original hits mid-calf, and I happen to know that that length would do me absolutely zero favors. So it's just to make it a bit more flattering. 

     The final update on this will be when I put the whole shebang -- the dress, the mahoooosive hair, and the extreme '80s contouring -- together to wear out for Halloween, so be sure to keep an eye out for the big reveal!


Monday, October 7, 2013

There is no Dana...

     The day has come! It's time to reveal my devious plans for Halloween, since I've finally gotten my act together enough to start working on it. My Halloween costume is...


     Dana Barrett (as possessed by Zuul) from Ghostbusters! I'm super excited to finally do this for Halloween, since I've been saying I wanted to for years. 

     I bought the two different types of fabric I showed in my sneak peek post knowing that there was never going to be one single fabric that matched the Zuul-y gloriousness above, and I was going to have to layer for authenticity. I could have just found a shimmery orange and it would have been passable, but I'm not aiming for just passable. If I'm doing Halloween, I'm doing Halloween all out. The shimmery shade-shifting fabric, underneath the orange sheer fabric, creates the perfect combination. The only drawback is that they're both sheer fabrics, and two sheers do not make an opaque (though it's not super obviously sheer, either). So I'll be wearing a nude-colored slip underneath my ensemble just to err on the side of caution and covered skivvies. Anyway, here's my plan of attack for this project. 

This picture also illustrates how surprisingly well those two fabrics layer to get the desired effect. In the picture above, the lining looks gold, but in other shots you can see it's really a much darker silver/purple/green color that just gives a hint of shimmer when it peeks through.
     
     First I spread the fabric out in the floor, doubled, and stared at it for a while. Then I asked my mom to please come help me before I destroyed everything, because I wasn't sure how to go about achieving my vision here, so I needed her advice, and also because I have a bad track record with specialty fabrics and didn't want to ruin the limited amount I had bought for this, only to go back and find out it was gone and I couldn't buy anymore and all my dreams would crash down around me. Point being, I ruin specialty fabrics sometimes, so I asked her to do the actual sewing for me, since she's got way more sewing know-how and experience than me. No shame in asking for help when you're out of your depth!

     Once that important step was out of the way, we came up with the basic plan you see above. The top is on a fold, and the bottom edges have been sewed together (so it's four layers of fabric, orange and shimmer sewed together, then another orange and shimmer together) so that it can be treated as one swath of fabric with a hem already in place. From there we cut off a strip along the side, on the fold, that will become a sash/belt. Then we guesstimated a size for the neck opening; I tried it on and we ended up making it a few inches wider anyway. Now, for my purposes, we ended up cutting along the top (where the neckline goes) all the way across after cutting off the sash piece, then re-sewing the dress at the top of the sleeves and finishing the neck opening with a small hem. But that's just an option, you could just as easily leave it on the fold and only cut out and finish the neckline. Different strokes and all. 

     The body of the dress is going to be formed by cutting out and sewing a Dolman sleeve onto a basic tunic shape that's intentionally left quite loose and wide so it can be gathered by the sash. I say "going to be" because after the intense planning stage and the surprising amount of time it took to get the fabric flattened out, trimmed into even pieces, sewed together at two ends, turned out right and ironed, and cut and sewn into the basic formation (both of the fabrics are quite clingy and finnicky, and the shimmery fabric tends to roll, which makes the whole thing kind of a nightmare to even get laid out evenly, honestly), my mom and I both agreed that we'd made a respectable amount of progress for one night. But you know I couldn't leave you without another preview, so here's how it looks draped on the dress form right now, just to give you an idea of the direction it's headed in. Obviously, since the sides haven't been shaped at all, it's rather bunchy right now. But it'll turn out brilliantly, I'm sure. I have faith in the powers of Halloween magic! Ok, and in my super helpful mom. 


     This picture also helpfully illustrates why I'm opting to wear a slip underneath. In real life, this looks fine. But add flash photography and suddenly you're untagging yourself in every Facebook photo you can find because oh hi, there's your underwear.

     I'll be keeping you updated on any progress as it's made on this project, including when I road-test the method I'm thinking of using for getting crazy-big, frizzy, ultra-80's demonic possession hair. I am beyond excited for that. Note: not sarcasm, I seriously cannot wait to push the limits of exactly how much space my hair can occupy. For science! And my own amusement.