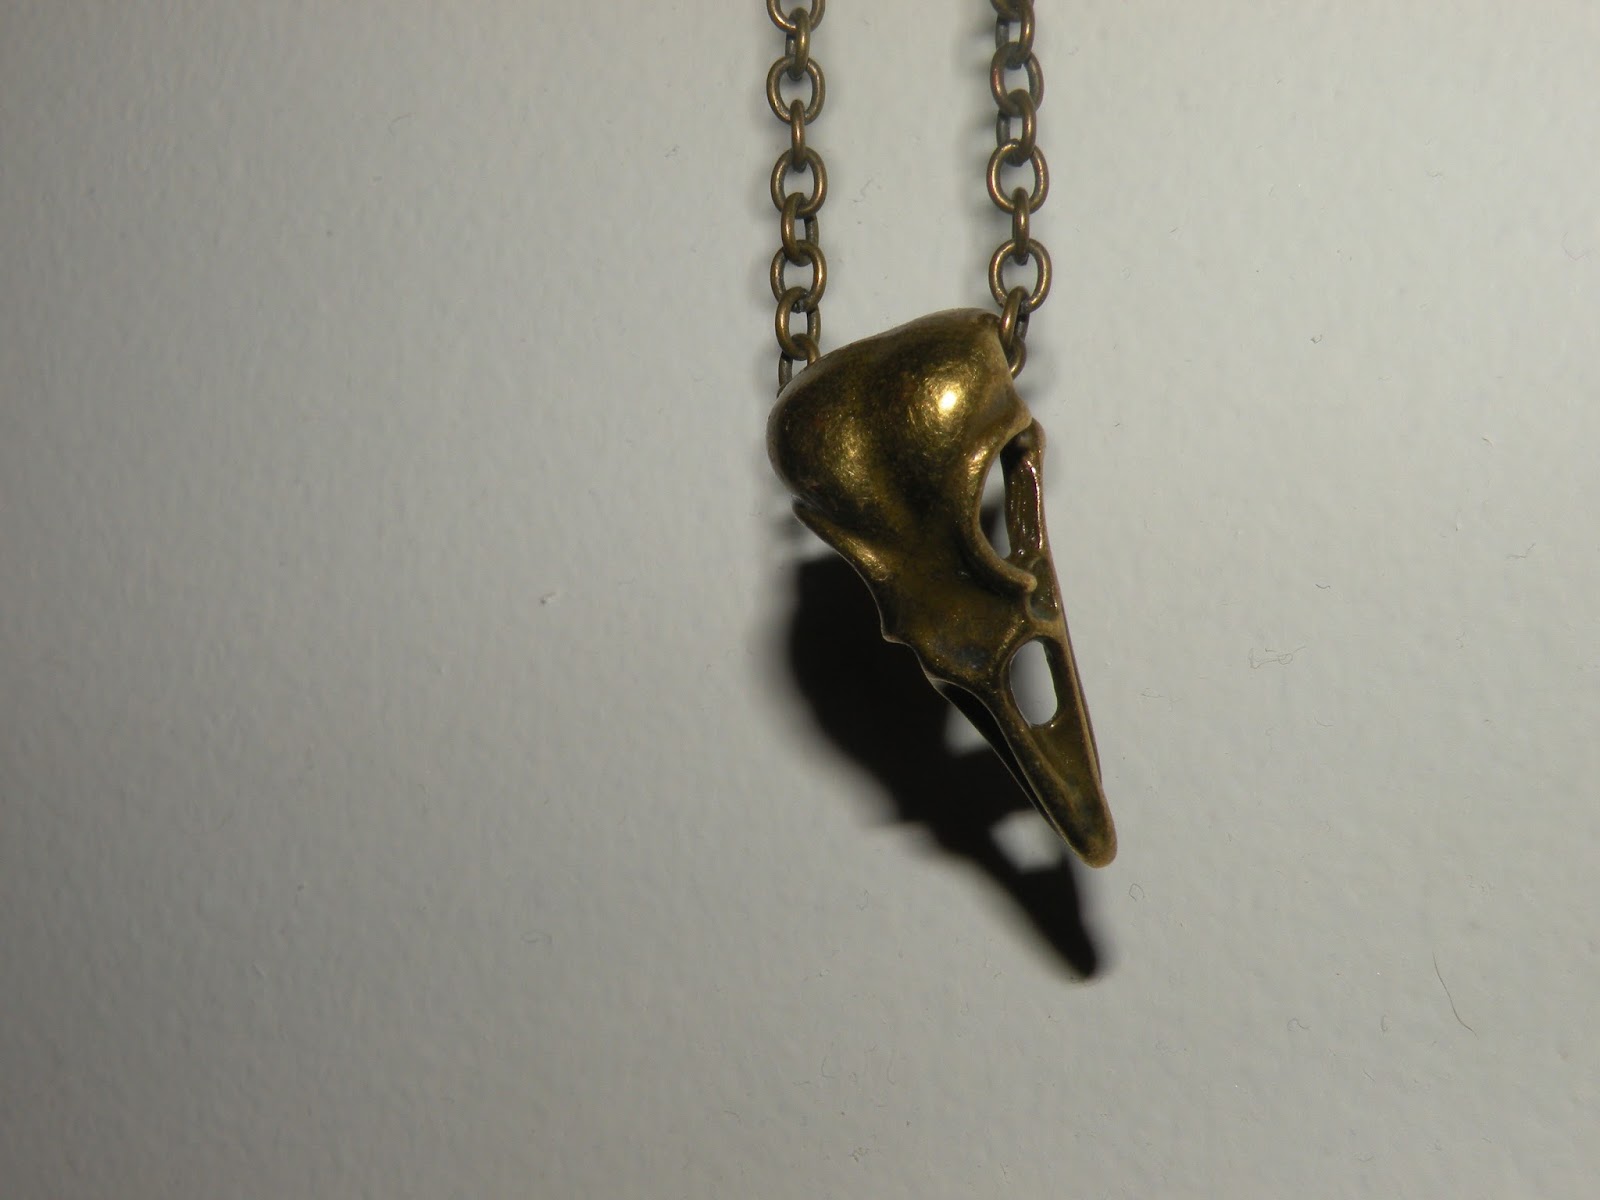
It's a leetle bird skull pendant that I picked up at the craft store. I don't know why, it just spoke to me. Well, that's not true, I know why. It's because my greatest life goal is to look like a cool but kind of spooky witch. We all have our dreams. I slapped this puppy (birdy?) on a long chain so I can sling it on over a floaty dress with a kimono and get my hippie recluse on.
Showing posts with label accessories. Show all posts
Wednesday, August 13, 2014
Weird Thing Wednesday.
I mean. That's pretty straightforward, right? It's Wednesday, let's look at this weird thing I bought.
Wednesday, June 11, 2014
Shopping fail.
While I was at the beach I only got one thing from the souvenir-type shops (did I mention I went and came back already? I did. All of last week's posts were pre-written. Bwahaha, so stealth). This pair of super cool earrings. They have a little doodad that attaches in the back, behind the ear but in front of the earring back, and holds the little shell, sea turtle, and starfish below the earlobe. They're super cool.
But then when I pulled the sticker off, wondering what the sticker underneath the sticker was all about...
Boooo. I mean, I get that they had to mark it up a little so they'd make a profit, but I feel like they could have done a better job hiding that from me. So in the end I guess this isn't really a shopping fail so much as a selling fail. Yay, blame-shifting!
![]() |
| Went ahead and selectively focused this for you so you wouldn't have to see all the little veins and get totally freaked out about ears like I did. You're welcome. |
And I felt like they were pretty reasonably priced, too! I mean, ten bucks for a cool pair of earrings is totally fair.
But then when I pulled the sticker off, wondering what the sticker underneath the sticker was all about...
Boooo. I mean, I get that they had to mark it up a little so they'd make a profit, but I feel like they could have done a better job hiding that from me. So in the end I guess this isn't really a shopping fail so much as a selling fail. Yay, blame-shifting!
Monday, May 12, 2014
MONDAY Favorites: GIF Edition!
Since I was too sick to put together a coherent Favorites post on Friday, I figured I'd do something a little special and different and make today Monday's Favorites, now with 100% more GIF-y goodness!
These gawgeous thangs were made by my amazingly talented Aunt Patti (you can go check out her Etsy shop HERE- right now everything is 20% off and the proceeds from any purchase you make go to Miracle Horse Rescue, which is a great charity that helps horses that have been abused or neglected. Tell me that's not a win-win!). I saw them posted on her Facebook page and immediately said "Oooh, those are cool. They would look pretty on my head." And they do! I love a happy ending, don't you? They fit perfectly with my whole "hippie archaeologist by day, benevolent but still kind of spooky witch by night" aesthetic, and they also happen to be the same kind of blue-y green-y gray-y color of my eyes in sunlight, which is exactly the kind of super-cliched character detail I'd have made fun of in my college writing courses, so yay nostalgia!
By which I mean "sporadically, whenever I see the bottle sitting around and think "Oh, I could go for something sour." You know me and my immune system are not seeing eye to eye right now, on account of it being a good-for-nothing layabout and all, so I decided I'd try this stuff and see if the "blast of vitamin C" makes me feel any healthier. All I've noticed so far is more like a blast of powdered citric acid, but I'm cool with it. They're kind of like giant soft Sweet-tarts, except ostensibly less horrible for you. I don't know if I believe it will make me any less likely to get sick, but the placebo effect kind of brings back that teenager-like feeling of invincibility, like I couldn't possibly get sick, ever ever again, so I'm all for it.
When I found myself at Ulta again the other day (found myself there. As if I have no idea how I got there. I just woke up from a fugue state in the middle of Ulta. Yes, that's it exactly), I picked up two liquid eyeliners from Jane cosmetics. I already had the gold one, which is amazing, and I needed a new black liquid eyeliner because the 20 I already owned were all drying out. But it was 2 for $10, and they're normally $8, so I had to get two, and the second one I picked was this one, called "metallic nude." It. Is. So. SHINY. This was actually what gave me the idea to do a GIF post, because a static picture alone just was not doing justice to the shininess. I also like these eyeliners because they have an actual brush tip, not a felt tip. I know a lot of people like the felt tip because it's easier to work with, but I don't like that they dry out, and also I kind of like how a tiny little paint brush makes me feel like Mulan in the Disney movie when I use it.
Here's what the black eyeliner looks like, in case you are interested in the nuances of black eyeliner (I mean, I am, but I'm interested in almost everything). It dries matte, so it has a 60's velvety feel to it. I also have the metallic nude on my inner corners.
I don't find it hard to work with either. I mean it's not a beginner's eyeliner, for sure, but it's not so runny that it gets in your eyes and makes you look like a tiny squid swam across your sclera. Too far, people who are weird about eyeballs? Sorry.
I hope this GIF-tacular post makes up for the fact that it's on the wrong day, and I also hope you all had delightful weekends full of all your own favorites!
FAVORITE #1: LOOKET THESE EARRINGS!
![]() |
| Should I have put a seizure warning on this post? I mean I warned you there'd be gifs, right? |
FAVORITE #2: I'VE BEEN EATING THIS STUFF LIKE CANDY, IN THE MOST LITERAL WAY POSSIBLE.
![]() |
| Mmm, snake-oil -- I mean Vitamin C.... |
By which I mean "sporadically, whenever I see the bottle sitting around and think "Oh, I could go for something sour." You know me and my immune system are not seeing eye to eye right now, on account of it being a good-for-nothing layabout and all, so I decided I'd try this stuff and see if the "blast of vitamin C" makes me feel any healthier. All I've noticed so far is more like a blast of powdered citric acid, but I'm cool with it. They're kind of like giant soft Sweet-tarts, except ostensibly less horrible for you. I don't know if I believe it will make me any less likely to get sick, but the placebo effect kind of brings back that teenager-like feeling of invincibility, like I couldn't possibly get sick, ever ever again, so I'm all for it.
FAVORITE #3: THINGS TO PAINT ON MY FACE!
![]() |
| Skin is so weird looking up close. Especially when you're the color of the mooooon. |
When I found myself at Ulta again the other day (found myself there. As if I have no idea how I got there. I just woke up from a fugue state in the middle of Ulta. Yes, that's it exactly), I picked up two liquid eyeliners from Jane cosmetics. I already had the gold one, which is amazing, and I needed a new black liquid eyeliner because the 20 I already owned were all drying out. But it was 2 for $10, and they're normally $8, so I had to get two, and the second one I picked was this one, called "metallic nude." It. Is. So. SHINY. This was actually what gave me the idea to do a GIF post, because a static picture alone just was not doing justice to the shininess. I also like these eyeliners because they have an actual brush tip, not a felt tip. I know a lot of people like the felt tip because it's easier to work with, but I don't like that they dry out, and also I kind of like how a tiny little paint brush makes me feel like Mulan in the Disney movie when I use it.
Here's what the black eyeliner looks like, in case you are interested in the nuances of black eyeliner (I mean, I am, but I'm interested in almost everything). It dries matte, so it has a 60's velvety feel to it. I also have the metallic nude on my inner corners.
![]() |
| Do you like how I just told you I have blue-green-gray eyes and very pale skin, then closed with a gif where I look tan with almost brown eyes? Sorceryyyyyy! |
I don't find it hard to work with either. I mean it's not a beginner's eyeliner, for sure, but it's not so runny that it gets in your eyes and makes you look like a tiny squid swam across your sclera. Too far, people who are weird about eyeballs? Sorry.
I hope this GIF-tacular post makes up for the fact that it's on the wrong day, and I also hope you all had delightful weekends full of all your own favorites!
Friday, April 11, 2014
Friday Footnote (Oh my God this pun): My feet are made of disco!
Just a quick note for you on this lovely Friday: LOOK HOW SHINY MY SHOES ARE.
![]() |
| And also how blindingly white my feet are. I am the moon. |
Wednesday, March 26, 2014
Quick Fixes: Looket this locket!
So I was browsin' the craft store the other day, helping Amanda pick out ingredients to make a necklace for an '80s party, when these little thingies caught my eye.
Actually I first saw the little filler doodads on the left there and did a "gasp OOOOOOOOOH" because that is everything I love in my jewels contained in one tiny package: moons, stars, mixed metals, sparkles (they had a TON of different sets too: beach theme, sports, and so on). Then I spent a good three minutes trying to find the other component, the thing you actually put the baublies in. I finally found them at the veeery top of the display. They had this plainer version and one that had rhinestones around the outside, like in the picture on the packaging on the left, but I thought that was too flashy for me.
So I got them home and put them together (it just snaps open with a strong magnetic closure, like a locket), and IT'S REALLY PRETTY. Sorry for getting all capsy, but I really like how it's got a thrown-together vibe, like "Oh I was just finishing up some spells I was casting this morning and tossed some talismans and charms in here to take with me," because you know one of my favorite aesthetics is "weird cat-lady who the neighbor kids are pretty sure is a witch," aka the aunts from Practical Magic.
I'm going to put it on a long silver chain to wear, but I can't decide if I should leave it as is or age the silver locket part a bit. It might feel a little too shiny and new for me right now. I was thinking of scuffing it up a bit with some sandpaper and rubbing a little dark paint in the scratches to make it look old, like someone recently dug it up in the forest (I have weird fashion aspirations, don't I?). Or possibly putting some tiny bits of gold or copper leaf on it in a few places to bring in more of that mixed metal look I love so much? I'm not sure how that would hold up, anyway. I just don't know! I'll have to think on it.
| They were also on sale for 50% off, so if you were thinking that $8.99 is surprisingly pricey for a cheap-ass like me, you were right! |
Actually I first saw the little filler doodads on the left there and did a "gasp OOOOOOOOOH" because that is everything I love in my jewels contained in one tiny package: moons, stars, mixed metals, sparkles (they had a TON of different sets too: beach theme, sports, and so on). Then I spent a good three minutes trying to find the other component, the thing you actually put the baublies in. I finally found them at the veeery top of the display. They had this plainer version and one that had rhinestones around the outside, like in the picture on the packaging on the left, but I thought that was too flashy for me.
So I got them home and put them together (it just snaps open with a strong magnetic closure, like a locket), and IT'S REALLY PRETTY. Sorry for getting all capsy, but I really like how it's got a thrown-together vibe, like "Oh I was just finishing up some spells I was casting this morning and tossed some talismans and charms in here to take with me," because you know one of my favorite aesthetics is "weird cat-lady who the neighbor kids are pretty sure is a witch," aka the aunts from Practical Magic.
I'm going to put it on a long silver chain to wear, but I can't decide if I should leave it as is or age the silver locket part a bit. It might feel a little too shiny and new for me right now. I was thinking of scuffing it up a bit with some sandpaper and rubbing a little dark paint in the scratches to make it look old, like someone recently dug it up in the forest (I have weird fashion aspirations, don't I?). Or possibly putting some tiny bits of gold or copper leaf on it in a few places to bring in more of that mixed metal look I love so much? I'm not sure how that would hold up, anyway. I just don't know! I'll have to think on it.
Wednesday, January 8, 2014
Just a friendly reminder...
...that gluing stuff to bobby pins and hair clips is really easy and super fun and you get new stuff for free! I've been on a bit of a spree lately. I dunno what it is that makes me want to take random things and stick them in my hair for decoration. Some sort of bizarre birdlike instinct to augment my nest of hair before spring comes? Who knows. The heart wants what the heart wants, etc. Anyway, here are some of the things I've turned into hair bedazzlements recently.
The first idea I had was to make a pretty little velvet bow from some pink ribbon I've had sitting around since before Christmas. I want to wear it on top of my head like Marie, the cat from The Aristocats. Except like...human. Like this picture that I pinned on Pinterest.
Then I figured I'd go digging through my stash of bits and bobs while the glue gun was still hot and see what else I could come up with. I've had the red sequined Hello Kitty-style bow for ages and I had always intended to make it into a hair pin so I could run around being stupidly adorable like a Japanese cat -- follow your dreams, kids! I picked it up on clearance at a craft store and forgot about it until now! The seagull, that big round gold thing (please read with upward inflection to denote my complete lack of a clue as to what that ever was), and the floral doodad were all floating around in a jar of miscellaneous potential craft supplies that I keep. You'll notice that for most of these, a single bobby pin hot-glued to the back was enough to hold everything together (the pink bow has one tucked into the middle piece of the bow on the back with a dot of glue for hold). For the big floral...thing, though, I decided to use several pins in more of a decorative hair-comb formation, since it's heavier and could use more support. I could have just glued it to an actual hair comb, but I didn't have one on hand and I'm far too impatient to wait until I can go out and get one. So this works! That one might be my favorite, because it actually started out looking all sad and rhinestone-less because they had all fallen out years ago. I'm not sure where it came from, but I think it might have been in a bag of broken jewelry that my mom bought for super cheap on impulse at an antique store. Which makes me even happier to bring it back to a state of functionality!
The first idea I had was to make a pretty little velvet bow from some pink ribbon I've had sitting around since before Christmas. I want to wear it on top of my head like Marie, the cat from The Aristocats. Except like...human. Like this picture that I pinned on Pinterest.
Then I figured I'd go digging through my stash of bits and bobs while the glue gun was still hot and see what else I could come up with. I've had the red sequined Hello Kitty-style bow for ages and I had always intended to make it into a hair pin so I could run around being stupidly adorable like a Japanese cat -- follow your dreams, kids! I picked it up on clearance at a craft store and forgot about it until now! The seagull, that big round gold thing (please read with upward inflection to denote my complete lack of a clue as to what that ever was), and the floral doodad were all floating around in a jar of miscellaneous potential craft supplies that I keep. You'll notice that for most of these, a single bobby pin hot-glued to the back was enough to hold everything together (the pink bow has one tucked into the middle piece of the bow on the back with a dot of glue for hold). For the big floral...thing, though, I decided to use several pins in more of a decorative hair-comb formation, since it's heavier and could use more support. I could have just glued it to an actual hair comb, but I didn't have one on hand and I'm far too impatient to wait until I can go out and get one. So this works! That one might be my favorite, because it actually started out looking all sad and rhinestone-less because they had all fallen out years ago. I'm not sure where it came from, but I think it might have been in a bag of broken jewelry that my mom bought for super cheap on impulse at an antique store. Which makes me even happier to bring it back to a state of functionality!
Friday, October 18, 2013
Experimental Rock
Oh, the wide world of geology-related puns. It shall never cease to amuse me.
The reason I made that joke at the risk of infuriating pun-haters everywhere is because this whole shebang I'm about to tell you about was pretty much just an experiment. You see, I didn't have anything else to do, and I had recently found a rock that I'd been holding on to since last fall (I'd shoved it in the pocket of a jacket and forgotten about it). So I figured I'd just kind of play around with it and see where I ended up. Here's the rock in question, and what I did with it.
If I recall correctly I picked this up while walking the dogs at the park. It caught my eye because it had a nice glint in the sun and was already pretty flat on two sides. To start out, I took the Dremel to it to smooth and flatten all the edges, then shine it up a bit. Just for fun, here's a shot of one of the sides where I've done one half and not the other. It's satisfying in the same way as powerwashing something really dirty.
When I got done smoothing everything out, I was left with this.
I put that in gif form for you because I had a feeling in photos this was going to look like...well, a beige rock. I wanted you to get a sense of the pretty natural sheen and depth. I dunno, maybe I'm just really into rocks. If nothing else, it shows off what I did here, which was just to smooth everything out and bring out the natural shape of the rock, because that's my personal preference (remember how I like my things to look like they were crafted by an ancient artisan and only recently excavated?).
Anyway, next I decided I wanted to add some glitz. First I tried taping off the two large flat surfaces and spray painting the sides with my favorite gold spray paint (the Krylon kind).
It was alright, and I didn't hate it. But then Amanda suggested I gold leaf the sides (she had some that she'd received in a monthly nail art box -- of course -- that she wasn't ever going to use). Go big or go home, right? That's what I loved about this experiment: if it succeeds, awesome, I get to look like the coolest witch in the coven with some weirdo homemade rock jewelry; if not, hey, it's a rock. Throw it back outside.
Here's what's cooking once the gold leaf was applied.
So this guy will not be getting chucked back outside! I love a happy ending.
And the happy ending to this post is a nice before and after shot to remind you how far we've come (and for convenient Pinteresting purposes. Yeah, hi all you readers coming from Pinterest! Welcome, come in, sit down, have a lemonade, don't let the dog drool on you).
The reason I made that joke at the risk of infuriating pun-haters everywhere is because this whole shebang I'm about to tell you about was pretty much just an experiment. You see, I didn't have anything else to do, and I had recently found a rock that I'd been holding on to since last fall (I'd shoved it in the pocket of a jacket and forgotten about it). So I figured I'd just kind of play around with it and see where I ended up. Here's the rock in question, and what I did with it.
If I recall correctly I picked this up while walking the dogs at the park. It caught my eye because it had a nice glint in the sun and was already pretty flat on two sides. To start out, I took the Dremel to it to smooth and flatten all the edges, then shine it up a bit. Just for fun, here's a shot of one of the sides where I've done one half and not the other. It's satisfying in the same way as powerwashing something really dirty.
When I got done smoothing everything out, I was left with this.
I put that in gif form for you because I had a feeling in photos this was going to look like...well, a beige rock. I wanted you to get a sense of the pretty natural sheen and depth. I dunno, maybe I'm just really into rocks. If nothing else, it shows off what I did here, which was just to smooth everything out and bring out the natural shape of the rock, because that's my personal preference (remember how I like my things to look like they were crafted by an ancient artisan and only recently excavated?).
Anyway, next I decided I wanted to add some glitz. First I tried taping off the two large flat surfaces and spray painting the sides with my favorite gold spray paint (the Krylon kind).
It was alright, and I didn't hate it. But then Amanda suggested I gold leaf the sides (she had some that she'd received in a monthly nail art box -- of course -- that she wasn't ever going to use). Go big or go home, right? That's what I loved about this experiment: if it succeeds, awesome, I get to look like the coolest witch in the coven with some weirdo homemade rock jewelry; if not, hey, it's a rock. Throw it back outside.
Here's what's cooking once the gold leaf was applied.
Much better! To actually turn this into a piece of jewelry, I just spun some little loopies into some gold wire and wrapped it around. I wanted to hold it in place permanently with a dab of epoxy, because I like to be sure of these things, but then I decided I liked how glossy the epoxy made everything, so I dunked the whole damn thing in there. Just went for it. Then proceeded to glue my hands to EEEEVERYTHING. It sucked. But this turned out to be a pretty pendant!
And the happy ending to this post is a nice before and after shot to remind you how far we've come (and for convenient Pinteresting purposes. Yeah, hi all you readers coming from Pinterest! Welcome, come in, sit down, have a lemonade, don't let the dog drool on you).
Labels:
accessories,
before and after,
DIY,
GIF,
I made this,
jewelry,
Projects,
rocks,
style
Monday, September 2, 2013
Quick Fixes: Glitter Sunglasses!
So I was perusing a magazine the other day and came across this picture...
Ooooh. So shiny, so pretty! The problem is that these are almost 400 dollars. Hahahahahahaohgodhelpme. I can't even imagine a world in which spending that much on something that you're almost certainly going to sit on or lose or drop in the toilet makes sense. So I decided that I would take inspiration from these and make something similar for myself -- but on a much more reasonable budget. Aka free, because my budget is just the phrase "DON'T SPEND MONEY, EVER" written in blood on a piece of paper where the spreadsheets and shit would normally be. Remember those free sunglasses I got a while ago? Another pair of those is getting the makeover treatment today! To make these sparkly specs I first gathered my supplies.
If you want to make a pair of these yourself you'll need: a pair of sunglasses (obviously), some glitter in a color of your choosing (I chose black, because I wanted it to be subtle -- well, as subtle as glitter can get), Mod Podge or Elmer's glue, and a paintbrush.
To glitter the glasses, all you need to do is brush the frame with some Mod Podge, then sprinkle some glitter on top. If you're worried about gluing glitter on the actual lenses, you could tape them off or even pop the lenses out if it's an especially cheap pair. I wasn't particularly worried about it, so I just took the gluing slowly and carefully. Mod Podge takes a bit to set and dry, so you can afford to take it slow and do pretty big chunks before you need to get the glitter on there.
A tip for those that perhaps do not do a lot of be-glittering in their day-to-day lives: always do your glittering over a piece of paper or a magazine. That way you can be really liberal in the application of your glitter, and when you're done you can fold the paper over and use it as a funnel to put the extra back into the original container, so you don't waste any of that precious sparkly goodness.
That's really all there is to this project: glue, then glitter. Full disclosure so you can learn from my mistakes: after the glitter had dried, I thought it would be a good idea to do a coat of clear enamel to hold the glitter on more securely and lock in the shine. Don't do that. It doesn't work. It somehow managed to mattify big sections of the glitter, making it look like the glasses were just oddly textured, like maybe I sat them too close to a flat-iron or something. It was not a good look. If you're worried about glitter falling off onto your face (I am not, there's usually glitter somewhere on my face anyway. Crafter problems), a thin coat of clear nail polish is the way to go. It holds the glitter on firmly without mattifying the sparkle and negating the whole purpose of this shenanigan.
Ta-da! These are such a fun way to spice up an otherwise plain pair of sunglasses. And the whole thing only took about half an hour! Granted, I'd probably advise leaving these to dry overnight before you wore them, lest you smudge them up or, I dunno, glue them to your face, rendering you permanently cool, though somewhat disadvantaged in dim settings. But the actual crafting part is super quick and easy, and with results this spangly, I'd say you should definitely give it a shot!
Ooooh. So shiny, so pretty! The problem is that these are almost 400 dollars. Hahahahahahaohgodhelpme. I can't even imagine a world in which spending that much on something that you're almost certainly going to sit on or lose or drop in the toilet makes sense. So I decided that I would take inspiration from these and make something similar for myself -- but on a much more reasonable budget. Aka free, because my budget is just the phrase "DON'T SPEND MONEY, EVER" written in blood on a piece of paper where the spreadsheets and shit would normally be. Remember those free sunglasses I got a while ago? Another pair of those is getting the makeover treatment today! To make these sparkly specs I first gathered my supplies.
If you want to make a pair of these yourself you'll need: a pair of sunglasses (obviously), some glitter in a color of your choosing (I chose black, because I wanted it to be subtle -- well, as subtle as glitter can get), Mod Podge or Elmer's glue, and a paintbrush.
To glitter the glasses, all you need to do is brush the frame with some Mod Podge, then sprinkle some glitter on top. If you're worried about gluing glitter on the actual lenses, you could tape them off or even pop the lenses out if it's an especially cheap pair. I wasn't particularly worried about it, so I just took the gluing slowly and carefully. Mod Podge takes a bit to set and dry, so you can afford to take it slow and do pretty big chunks before you need to get the glitter on there.
A tip for those that perhaps do not do a lot of be-glittering in their day-to-day lives: always do your glittering over a piece of paper or a magazine. That way you can be really liberal in the application of your glitter, and when you're done you can fold the paper over and use it as a funnel to put the extra back into the original container, so you don't waste any of that precious sparkly goodness.
That's really all there is to this project: glue, then glitter. Full disclosure so you can learn from my mistakes: after the glitter had dried, I thought it would be a good idea to do a coat of clear enamel to hold the glitter on more securely and lock in the shine. Don't do that. It doesn't work. It somehow managed to mattify big sections of the glitter, making it look like the glasses were just oddly textured, like maybe I sat them too close to a flat-iron or something. It was not a good look. If you're worried about glitter falling off onto your face (I am not, there's usually glitter somewhere on my face anyway. Crafter problems), a thin coat of clear nail polish is the way to go. It holds the glitter on firmly without mattifying the sparkle and negating the whole purpose of this shenanigan.
Ta-da! These are such a fun way to spice up an otherwise plain pair of sunglasses. And the whole thing only took about half an hour! Granted, I'd probably advise leaving these to dry overnight before you wore them, lest you smudge them up or, I dunno, glue them to your face, rendering you permanently cool, though somewhat disadvantaged in dim settings. But the actual crafting part is super quick and easy, and with results this spangly, I'd say you should definitely give it a shot!
Labels:
accessories,
before and after,
DIY,
Glitter,
quick fixes,
style
Wednesday, July 31, 2013
Mathematical!
I'm gonna keep the intro to this super short: I love Adventure Time (it's a cartoon, in case you're better at being an adult than me and don't watch cartoons anymore). I love it enough to advertise my love on a pair of shoes. Those shoes are not hypothetical. These are those shoes.
Now for the details. I painted these with acrylic paint. I chose BMO for the front of the right shoe, Lumpy Space Princess for the front of the left, Finn and Jake for the outside panels, and the simple grass from the closing credits for the inside panels. The only one I'm not 100% satisfied with is Jake, and I may yet go back and fix that panel, but I finished these super late and couldn't bring myself to take it on yet. I may also just leave it as is, because I'm no perfectionist, and let's be honest: they're a pair of cheapie Walmart shoes, I'm going to destroy them with wear anyway. In the morning (the actual morning, not the super-late-at-night-technically-morning-hour that I'm writing this at) I'll take a Magic Eraser to the parts of the white soles that got paint on them to clean them up a bit, and put the laces back in, of course.
But for now, I'm gonna go have myself some Adventure Time themed dreams.
Now for the details. I painted these with acrylic paint. I chose BMO for the front of the right shoe, Lumpy Space Princess for the front of the left, Finn and Jake for the outside panels, and the simple grass from the closing credits for the inside panels. The only one I'm not 100% satisfied with is Jake, and I may yet go back and fix that panel, but I finished these super late and couldn't bring myself to take it on yet. I may also just leave it as is, because I'm no perfectionist, and let's be honest: they're a pair of cheapie Walmart shoes, I'm going to destroy them with wear anyway. In the morning (the actual morning, not the super-late-at-night-technically-morning-hour that I'm writing this at) I'll take a Magic Eraser to the parts of the white soles that got paint on them to clean them up a bit, and put the laces back in, of course.
But for now, I'm gonna go have myself some Adventure Time themed dreams.
Labels:
accessories,
Adventure Time,
clothes,
Cute,
DIY,
Drawings,
I made this,
Projects,
shoes,
style
Monday, July 29, 2013
DIY 101: Simple Post Earrings
This weekend I decided to do a quick and easy project that I think is a great gateway craft for beginning DIY-ers. It's basically a method for taking any cute little thing you find -- novelty buttons, beads, what have you -- and turning it into a pair of earrings. It's ridiculously easy and cheap, but so many people don't realize how simple it is to make your own earrings (I know, I have a pair of earrings made from pink elephant novelty buttons that people used to ALWAYS ask me about, and when I told them I made them myself they looked at me like sorcery was involved).
Here's all I did: took some cutting pliers and snipped the loop off the top of these two bow charms. If you're using buttons that have a loop on the back, you can easily do the same to snip the loop off. If you're feeling like a perfectionist, you can take a file to it to get the back really super even. I didn't bother trying to file the edges on these bows because A) they're tiny, so there's really no reason to worry over every tiny detail, B) I didn't feel like it. Hey, I'm just being honest with you.
I also decided to paint them gold, because although I like this finish sometimes, it wasn't what I wanted here.
Then I just mixed up some epoxy on a piece of foil using a toothpick...
Then popped a generous glob of it onto the back of my bows...
And dropped the earring post into the epoxy.
Then scooted it around until it wouldn't be visible from the front, and let it dry for a good long while. Then...ta-da!
So easy, and you can really take this basic method and throw some imagination at it to make practically anything into a pair of earrings.
Here's all I did: took some cutting pliers and snipped the loop off the top of these two bow charms. If you're using buttons that have a loop on the back, you can easily do the same to snip the loop off. If you're feeling like a perfectionist, you can take a file to it to get the back really super even. I didn't bother trying to file the edges on these bows because A) they're tiny, so there's really no reason to worry over every tiny detail, B) I didn't feel like it. Hey, I'm just being honest with you.
I also decided to paint them gold, because although I like this finish sometimes, it wasn't what I wanted here.
Then I just mixed up some epoxy on a piece of foil using a toothpick...
Then popped a generous glob of it onto the back of my bows...
And dropped the earring post into the epoxy.
Then scooted it around until it wouldn't be visible from the front, and let it dry for a good long while. Then...ta-da!
So easy, and you can really take this basic method and throw some imagination at it to make practically anything into a pair of earrings.
Labels:
accessories,
DIY,
How to,
I made this,
jewelry,
Projects,
quick fixes,
style
Wednesday, July 10, 2013
Birthday Roundup!
As you know from my placeholder post beautiful masterpiece of art, Monday was my birthday! Let's do a roundup of all my super fun gifts and my beautiful monster of a cake! In no particular order...wait, no, I'll go in order of presents I opened. Order out of chaos!
First I opened my present from my grandparents.
BAM. Red boots! Anyone who knows me knows I loooove boots. I like to stomp around and pretend I'm about to fight through an apocalypse or something. I've wanted a pair of red boots for ages and ages. Like, since the first time I saw Footloose, even though the chick with the red boots is SO OBNOXIOUS OH MY GOD. But still, cute boots are cute boots. They also make me think of Marceline the Vampire Queen (Adventure Time, anyone? No, I'm the only "grown-up" who still watches cartoons? Ok, cool, whatever).
Next up was my present from Amanda.
A So So Happy hoodie! I love the So So Happy characters. Even the cantankerous ones are so cute. This guy is named Puff (from the website, I didn't just pick that randomly). And check. out. the back.
Spikes on the hood and down the back! So I can be a dinosaur! Life goal: achieved. When the small children in your life say to you "I'm gonna be a dinosaur when I grow up!" go ahead and tell them "I'll bet you are, slugger. I'll just bet you are."
Next is my present from Jen. In the box I found this crazy-soft terry pullover type sweater (all I wear these days is fall clothes, I don't even care that it's 95 outside. With AC on my side I can pretend it's autumn forever!)
But that wasn't all. This was the gift that just kept on giving. It was full of little bits and bobs from my Forever 21 wishlist and things I had pinned on Pinterest or otherwise hinted that I liked, (before you go thinking that makes me a brat, it was because she had been asking me to send her links to potential presents, I wasn't just like "BUY ME DIS AND DIS") like the two headbands up top there...
...the earrings in the bottom middle there, which match the necklace I got for my birthday last year (which, hey look! You can see in this next picture)...
....and this triangular necklace that kind of looks like gilded shark teeth (mermaid-warrior-princess-chic, it's a thing I'm gonna make happen)...
...This little moon-and-star necklace, which is tiny and delicate and perfect in every way...
...and the even tinier set of studs that matches it. I can't even tell you how perfect these are. They're so small and cute! And, of course, they're a crescent moon and a star, which you're probably noticing I have an obsession with. Last but certainly not least, I'll show you my very favoritest compartment in this jewelry box...the ring section.
Sigh. Look at all the glorious options. Rings are my absolute favorite. The four rings in the middle column were part of my gift (more moons and stars! Shock, horror!), the rest are all the rings I immediately sat down to fill the case with so I could look at them all and go "my precioussesssss!" I'm not even kidding, several times since I opened this present I've gone into my closet to put together different combinations of stacking rings, then take them off and put them back in their little places. I'm weird. But it makes me happy.
Now that I've shown you all the amazing things my super-generous family got for me, let's get down to serious business: CAKE. I couldn't find a recipe that I liked for my birthday cake, so I kind of...um...invented one. No, really. I sat down and drew up a schematic like Dr. Frankenstein to bring my monster cake to life.
And like Frankenstein's monster, once it had been brought to life it could not be contained:
It was so ridiculously good. I could only eat a half slice at a time because, I mean, look at that. It's intimidating. But I like food that challenges me towards a higher standard of gluttony, forcing me to say "If I eat one more bite I may go into a diabetic coma, but I'M GONNA FINISH THIS. I just need a breather. I won't quit on you, cake. Wait for me in the fridge, I'll come back for you. (My Heart Will Go On playing softly in the background, getting louder as the fridge door closes)."
Point being, that cake was damn good. It's definitely going to be my new birthday tradition.
And that brings us to the end of my birthday roundup! I hope you enjoyed having a looky-loo at all the fun stuff I got, and didn't feel like I was bragging. I'm just really grateful that I have an awesome family that knows me so well and picks out amazing gifts!
First I opened my present from my grandparents.
BAM. Red boots! Anyone who knows me knows I loooove boots. I like to stomp around and pretend I'm about to fight through an apocalypse or something. I've wanted a pair of red boots for ages and ages. Like, since the first time I saw Footloose, even though the chick with the red boots is SO OBNOXIOUS OH MY GOD. But still, cute boots are cute boots. They also make me think of Marceline the Vampire Queen (Adventure Time, anyone? No, I'm the only "grown-up" who still watches cartoons? Ok, cool, whatever).
Next up was my present from Amanda.
A So So Happy hoodie! I love the So So Happy characters. Even the cantankerous ones are so cute. This guy is named Puff (from the website, I didn't just pick that randomly). And check. out. the back.
Spikes on the hood and down the back! So I can be a dinosaur! Life goal: achieved. When the small children in your life say to you "I'm gonna be a dinosaur when I grow up!" go ahead and tell them "I'll bet you are, slugger. I'll just bet you are."
Next is my present from Jen. In the box I found this crazy-soft terry pullover type sweater (all I wear these days is fall clothes, I don't even care that it's 95 outside. With AC on my side I can pretend it's autumn forever!)
And underneath that, the cutest jimjams I have ever laid eyes upon.
Obviously that isn't the best picture in the world to show off the pajamas, but I'm using it anyway because it tickles me. Except the gross veins in my hands. As soon as I saw this picture full sized I actually stopped what I was doing, said "Whoa there homes, time to hydrate," and went to get some water. But still, polka dots and kitty feet!
The last thing I opened was my present from my parents. I opened the big-ass box and found this jewelry box!
...and this little apple-scented fragrance tucked in the side door. Apple is probably my #1 all-time favorite smell in the world, in case you were feeling like you needed some obscure Jacki-trivia today. The jewelry box also contained...
...the earrings in the bottom middle there, which match the necklace I got for my birthday last year (which, hey look! You can see in this next picture)...
....and this triangular necklace that kind of looks like gilded shark teeth (mermaid-warrior-princess-chic, it's a thing I'm gonna make happen)...
...This little moon-and-star necklace, which is tiny and delicate and perfect in every way...
...and the even tinier set of studs that matches it. I can't even tell you how perfect these are. They're so small and cute! And, of course, they're a crescent moon and a star, which you're probably noticing I have an obsession with. Last but certainly not least, I'll show you my very favoritest compartment in this jewelry box...the ring section.
![]() |
| Bonus appearance by my new jimjams in the mirror. Professionalism! |
Sigh. Look at all the glorious options. Rings are my absolute favorite. The four rings in the middle column were part of my gift (more moons and stars! Shock, horror!), the rest are all the rings I immediately sat down to fill the case with so I could look at them all and go "my precioussesssss!" I'm not even kidding, several times since I opened this present I've gone into my closet to put together different combinations of stacking rings, then take them off and put them back in their little places. I'm weird. But it makes me happy.
Now that I've shown you all the amazing things my super-generous family got for me, let's get down to serious business: CAKE. I couldn't find a recipe that I liked for my birthday cake, so I kind of...um...invented one. No, really. I sat down and drew up a schematic like Dr. Frankenstein to bring my monster cake to life.
![]() |
| Just in case you thought I was kidding. I never kid about food. |
And like Frankenstein's monster, once it had been brought to life it could not be contained:
It was so ridiculously good. I could only eat a half slice at a time because, I mean, look at that. It's intimidating. But I like food that challenges me towards a higher standard of gluttony, forcing me to say "If I eat one more bite I may go into a diabetic coma, but I'M GONNA FINISH THIS. I just need a breather. I won't quit on you, cake. Wait for me in the fridge, I'll come back for you. (My Heart Will Go On playing softly in the background, getting louder as the fridge door closes)."
Point being, that cake was damn good. It's definitely going to be my new birthday tradition.
And that brings us to the end of my birthday roundup! I hope you enjoyed having a looky-loo at all the fun stuff I got, and didn't feel like I was bragging. I'm just really grateful that I have an awesome family that knows me so well and picks out amazing gifts!
Labels:
accessories,
birthday,
cake,
clothes,
Cute,
Food,
Life,
Polka dots,
Rants and Raves
Wednesday, May 29, 2013
Wouldn't you think my collection's complete?
...My collection of mermaid-inspired accessories, that is. It's never complete. I must press forth ever vigilant in the quest to look like some sort of sea creature (I leave that purposefully vague because what most people identify this trend with is mermaids, but honestly I'm shooting more for Sea Witch. You can't tell me Ursula wasn't fab). So today I'm bringing you another quick and easy way to bring a little aquatic flare to your hair (I didn't mean for that to rhyme, please forgive me).
All you'll need is some bobby pins (again, I really recommend using the higher quality ones. They last so much longer and will bring you so much less disappointment), good strong glue or epoxy, and some bubble-esque beads -- mine came from the floral arrangement section of the store, where they keep all kinds of pretty glass gobs that speak to the magpie in me.
Then all you need to do is grab a little bubbly bead, stick a good-sized gob of glue on it, and glue it onto the side of the bobby pin. The reason I glued them to the side instead of the top is because it allows it to sit there like it's in a little cup-holder, so you don't have to worry about it rolling off while it's drying, and there's more surface area shared between the pin, the bead, and the glue this way, so you're less likely to have one pop off later on. Let the glue dry overnight -- it's always best to allow for a nice long dry time when industrial strength glue and your hair are involved.
Once you've let them dry, they're ready to wear! I like to stick them into the messiest updo possible, in keeping with my personal theory that mermaids ain't got time to be worrying about things like "Does my hair look messy" or "Do I look like Bellatrix Lestrange going to the prom."
I really like this style for days when you want your hair up off your neck and out of your face, but also want to look like maybe you came here by accident when you stumbled out of a Jane Austen novel. I won't lie -- I also like this hairstyle a lot because the less you try, the better it looks, and trying is so much EFFORT. I used to wear my hair like this all the time and got compliments on it constantly, because it looks like it takes longer than it does. If you're one of those people who struggles with the whole "artfully disheveled" thing though, fear not! Click through to the full post and I'll show you how I like to do my messy updos.
All you'll need is some bobby pins (again, I really recommend using the higher quality ones. They last so much longer and will bring you so much less disappointment), good strong glue or epoxy, and some bubble-esque beads -- mine came from the floral arrangement section of the store, where they keep all kinds of pretty glass gobs that speak to the magpie in me.
Then all you need to do is grab a little bubbly bead, stick a good-sized gob of glue on it, and glue it onto the side of the bobby pin. The reason I glued them to the side instead of the top is because it allows it to sit there like it's in a little cup-holder, so you don't have to worry about it rolling off while it's drying, and there's more surface area shared between the pin, the bead, and the glue this way, so you're less likely to have one pop off later on. Let the glue dry overnight -- it's always best to allow for a nice long dry time when industrial strength glue and your hair are involved.
Once you've let them dry, they're ready to wear! I like to stick them into the messiest updo possible, in keeping with my personal theory that mermaids ain't got time to be worrying about things like "Does my hair look messy" or "Do I look like Bellatrix Lestrange going to the prom."
I really like this style for days when you want your hair up off your neck and out of your face, but also want to look like maybe you came here by accident when you stumbled out of a Jane Austen novel. I won't lie -- I also like this hairstyle a lot because the less you try, the better it looks, and trying is so much EFFORT. I used to wear my hair like this all the time and got compliments on it constantly, because it looks like it takes longer than it does. If you're one of those people who struggles with the whole "artfully disheveled" thing though, fear not! Click through to the full post and I'll show you how I like to do my messy updos.
Labels:
accessories,
beauty,
DIY,
Hair,
How to,
I made this,
mermaids,
Pride and Prejudice,
Projects,
quick fixes,
style
Subscribe to:
Posts (Atom)