All that said, they did turn out very tasty, even though I didn't do any of the fancy-lady shit she told me to do. I just mixed things together all higgledy-piggledy and hoped for the best, cause I'm a normie like that. I also made the chocolate dipping sauce, but I only had half the required amount of chocolate and forgot to half the recipe (somewhere in the world, Lisa groans and holds her head like Harry Potter when Voldemort approaches. "Some plebeian ruined my recipe somewhere," she mutters). So I just made it up as I went and it turned out fine. Anyway, here's some pretty food pics to drool over before I get outta here.
Showing posts with label I made this. Show all posts
Wednesday, July 23, 2014
How about we just do this like NORMAL PEOPLE instead?
I made chocolate madeleines the other day from a cookbook I picked up at the Green Valley Bookfair, called "Baking Style" by Lisa Yockelson. I won't lie, half the reason I bought it is because it has a pink cloth cover with swirly silver lettering and I imagined it looking right at home sitting on the shelf of my magical little benevolent-witch cottage where I will bake things and learn to whittle. But I did also think the recipes all looked pretty tasty. I didn't take any process shots, though, because this lady cray. Like I respect the commitment to the art and methodology of baking, but there are some things that I just -- come on, NO ONE IS GOING TO DO THAT. Like she wants you to clarify your butter and only use alkalized cocoa powder (the eff even is that? Cocoa powder should have no words on it that sound like battery terminology) and sift everything together onto a sheet of wax paper (why wax paper, Lisa? WHY WOULD YOU NOT USE A BOWL? We didn't even roll anything in it or do something that makes that make sense, you just wanted me to, what, destroy the kitchen when a stray breeze caught my DUNES of sifted sugar and cocoa?).
All that said, they did turn out very tasty, even though I didn't do any of the fancy-lady shit she told me to do. I just mixed things together all higgledy-piggledy and hoped for the best, cause I'm a normie like that. I also made the chocolate dipping sauce, but I only had half the required amount of chocolate and forgot to half the recipe (somewhere in the world, Lisa groans and holds her head like Harry Potter when Voldemort approaches. "Some plebeian ruined my recipe somewhere," she mutters). So I just made it up as I went and it turned out fine. Anyway, here's some pretty food pics to drool over before I get outta here.
Friday, October 18, 2013
Experimental Rock
Oh, the wide world of geology-related puns. It shall never cease to amuse me.
The reason I made that joke at the risk of infuriating pun-haters everywhere is because this whole shebang I'm about to tell you about was pretty much just an experiment. You see, I didn't have anything else to do, and I had recently found a rock that I'd been holding on to since last fall (I'd shoved it in the pocket of a jacket and forgotten about it). So I figured I'd just kind of play around with it and see where I ended up. Here's the rock in question, and what I did with it.
If I recall correctly I picked this up while walking the dogs at the park. It caught my eye because it had a nice glint in the sun and was already pretty flat on two sides. To start out, I took the Dremel to it to smooth and flatten all the edges, then shine it up a bit. Just for fun, here's a shot of one of the sides where I've done one half and not the other. It's satisfying in the same way as powerwashing something really dirty.
When I got done smoothing everything out, I was left with this.
I put that in gif form for you because I had a feeling in photos this was going to look like...well, a beige rock. I wanted you to get a sense of the pretty natural sheen and depth. I dunno, maybe I'm just really into rocks. If nothing else, it shows off what I did here, which was just to smooth everything out and bring out the natural shape of the rock, because that's my personal preference (remember how I like my things to look like they were crafted by an ancient artisan and only recently excavated?).
Anyway, next I decided I wanted to add some glitz. First I tried taping off the two large flat surfaces and spray painting the sides with my favorite gold spray paint (the Krylon kind).
It was alright, and I didn't hate it. But then Amanda suggested I gold leaf the sides (she had some that she'd received in a monthly nail art box -- of course -- that she wasn't ever going to use). Go big or go home, right? That's what I loved about this experiment: if it succeeds, awesome, I get to look like the coolest witch in the coven with some weirdo homemade rock jewelry; if not, hey, it's a rock. Throw it back outside.
Here's what's cooking once the gold leaf was applied.
So this guy will not be getting chucked back outside! I love a happy ending.
And the happy ending to this post is a nice before and after shot to remind you how far we've come (and for convenient Pinteresting purposes. Yeah, hi all you readers coming from Pinterest! Welcome, come in, sit down, have a lemonade, don't let the dog drool on you).
The reason I made that joke at the risk of infuriating pun-haters everywhere is because this whole shebang I'm about to tell you about was pretty much just an experiment. You see, I didn't have anything else to do, and I had recently found a rock that I'd been holding on to since last fall (I'd shoved it in the pocket of a jacket and forgotten about it). So I figured I'd just kind of play around with it and see where I ended up. Here's the rock in question, and what I did with it.
If I recall correctly I picked this up while walking the dogs at the park. It caught my eye because it had a nice glint in the sun and was already pretty flat on two sides. To start out, I took the Dremel to it to smooth and flatten all the edges, then shine it up a bit. Just for fun, here's a shot of one of the sides where I've done one half and not the other. It's satisfying in the same way as powerwashing something really dirty.
When I got done smoothing everything out, I was left with this.
I put that in gif form for you because I had a feeling in photos this was going to look like...well, a beige rock. I wanted you to get a sense of the pretty natural sheen and depth. I dunno, maybe I'm just really into rocks. If nothing else, it shows off what I did here, which was just to smooth everything out and bring out the natural shape of the rock, because that's my personal preference (remember how I like my things to look like they were crafted by an ancient artisan and only recently excavated?).
Anyway, next I decided I wanted to add some glitz. First I tried taping off the two large flat surfaces and spray painting the sides with my favorite gold spray paint (the Krylon kind).
It was alright, and I didn't hate it. But then Amanda suggested I gold leaf the sides (she had some that she'd received in a monthly nail art box -- of course -- that she wasn't ever going to use). Go big or go home, right? That's what I loved about this experiment: if it succeeds, awesome, I get to look like the coolest witch in the coven with some weirdo homemade rock jewelry; if not, hey, it's a rock. Throw it back outside.
Here's what's cooking once the gold leaf was applied.
Much better! To actually turn this into a piece of jewelry, I just spun some little loopies into some gold wire and wrapped it around. I wanted to hold it in place permanently with a dab of epoxy, because I like to be sure of these things, but then I decided I liked how glossy the epoxy made everything, so I dunked the whole damn thing in there. Just went for it. Then proceeded to glue my hands to EEEEVERYTHING. It sucked. But this turned out to be a pretty pendant!
And the happy ending to this post is a nice before and after shot to remind you how far we've come (and for convenient Pinteresting purposes. Yeah, hi all you readers coming from Pinterest! Welcome, come in, sit down, have a lemonade, don't let the dog drool on you).
Labels:
accessories,
before and after,
DIY,
GIF,
I made this,
jewelry,
Projects,
rocks,
style
Monday, October 14, 2013
Oh-ho, Zuuly you nut!
And the Zuul dress is done! The sleeves were cut in according to the diagram in Part I, then finished off with some elastic, and it's got a much better shape to it now. Of course, it's not supposed to have too much of a shape at all, but there's a good amount of middle ground between "potato sack" and "Real Housewives-style bandage dress."
I included two slightly different angles there just so we can all appreciate the pretty shimmer of that fabric combo. Preeetty.
The slit is also new since the last update. Obviously the original Ghostbusters dress has a much higher slit, but I'm not too keen on the idea of accidentally flashing my underwear to the world, so mine's shorter. You'll also notice the dress is pinned onto the dress form on one side. That's because she's got no shoulders to hold it up (don't bring it up, she doesn't like to talk about it). It'll stay up better on me, due to my possession of a set of arms. If I feel like it's falling off, I'll just use some double sided tape to hold it in place. The only other real change I made to the design (in comparison to the movie version) was to make it a bit shorter, so it hits just above the knees. That's entirely a personal decision, just because the original hits mid-calf, and I happen to know that that length would do me absolutely zero favors. So it's just to make it a bit more flattering.
The final update on this will be when I put the whole shebang -- the dress, the mahoooosive hair, and the extreme '80s contouring -- together to wear out for Halloween, so be sure to keep an eye out for the big reveal!
I included two slightly different angles there just so we can all appreciate the pretty shimmer of that fabric combo. Preeetty.
The slit is also new since the last update. Obviously the original Ghostbusters dress has a much higher slit, but I'm not too keen on the idea of accidentally flashing my underwear to the world, so mine's shorter. You'll also notice the dress is pinned onto the dress form on one side. That's because she's got no shoulders to hold it up (don't bring it up, she doesn't like to talk about it). It'll stay up better on me, due to my possession of a set of arms. If I feel like it's falling off, I'll just use some double sided tape to hold it in place. The only other real change I made to the design (in comparison to the movie version) was to make it a bit shorter, so it hits just above the knees. That's entirely a personal decision, just because the original hits mid-calf, and I happen to know that that length would do me absolutely zero favors. So it's just to make it a bit more flattering.
The final update on this will be when I put the whole shebang -- the dress, the mahoooosive hair, and the extreme '80s contouring -- together to wear out for Halloween, so be sure to keep an eye out for the big reveal!
Labels:
costume ideas,
costumes,
Dana Barrett,
DIY,
Ghostbusters,
Halloween,
How to,
I made this,
Projects,
Sewing,
Zuul
Monday, September 23, 2013
Cooking Basics: The Easiest, Most Delicous Roast Ever. Yeah, EVER.
There are days when you want to assemble some sort of lavish casserole structure for dinner that takes five pans and a good allotment of time for construction. Then there are days when you want to put a bunch of stuff in a slow cooker and go about your life (or go back to bed) and forget about it until you walk into the kitchen and smell it and think "Oh, yes, my house elf has done well preparing dinner tonight!" Except not really, because a) if you have house elves you are an abomination of a human being and b) they're technically not real. And I guess c) you actually did the work yourself a few hours ahead of time. Anyway, for those days when you don't wanna do any real work, this is one of my favorite slow cooker recipes.
The beauty of this recipe is it's simplicity, because if you don't add anything to it, it's just a classic Sunday beef roast type deal, and it's homey and comforting and delicious. But if you feel adventurous, you can build on it however you want. It's one of the recipes I think of when people insist to me, "I can't coooook" and I tell them to shut their lie-faces up, because some things literally anyone can cook. The secret of its deliciousness is the three basic ingredients that you HAVE to do how I say (I mean, not really. But I'm as good an authority on this as any. You don't even know Alton Brown, are you sure you want him telling you how to cook your food?). Everything else you can screw around with. The basic ingredients:
1. Beef
Another great thing about this meal is you don't have to buy expensive meat. Any chunk of beef will turn out just fine if you cook it long enough to make it tender, so don't waste your money on the nicest cut you can find, now is not the time to be a meat-elitist. The only real guideline I have for you here is make sure it'll fit in your slow cooker, which I kind of feel like I shouldn't need to tell you, but I did call this post Cooking BASICS, so...you know. Do that.
2. Beef broth
"But why do I need beef broth if I'm cooking beef?" Because cooking is just a modern, de-stigmatized form of witchcraft, and you don't see witches being like "Oh, but I already have newt in this potion, why would I add eye of newt too?" do you? Trust. It's important. It makes magic happen. The guideline for amount here is essentially, "some." You'll want enough to at least halfway cover your roast, generally, but err on the side of adding too much. Too much and you'll just have to kind of fish your meat and potatoes out, which is no big deal, but too little and it'll be too dry and you'll RUIN EVERYTHING, no pressure. Just add some broth.
3. Potatoes
Baby yellow potatoes are the best for this, because the beef broth softens them perfectly and makes them so buttery rich and delicious that you will take a bite and actually sigh and think about how lucky you are to be a human being with access to a Crockpot instead of like, a beaver stuck eating tree bark. That said, if you insist on messing with perfection (or you just want to try something new) you can use red potatoes. I maintain that baby is the only acceptable age group of potato for this, though, because they cook up soft all the way through and you don't have to chop them at all.
This is the Triforce of Deliciousness. If you throw just these three ingredients into a slow cooker and let them do their thing for six hours, you'll get delicious dinner every time. But here's some ideas for things you might want to consider adding:
--Veggies: Onions (Vidalia or any kind of sweet onion is particularly yummy), Carrots, diced Tomatoes, Peas... any of your typical stew vegetables will cook up well here.
--Seasonings: Spices and flavor add-ons are a good way to make any food taste like you worked harder on it than you did. For this recipe, you can take it into a spicier territory with some chili powder or red pepper flakes, go for a barbecue-like spin with brown sugar and a splash of vinegar (for tangyness, and it also helps tenderize the meat if you bought a tough-ish cut), or go upscale and add some red wine.
--Miscellania: If you want to easily take this from a roast to more of a stew, add the vegetables of your choosing at the beginning and a bit of flour towards the end of the cooktime, then when you're ready to eat, take the roast out and shred or cut it, then throw it right back in. Egg noodles are also delicious; again, just throw them in a bit before you're ready to eat (pro tip: if you're adding noodles, drop a dollop of sour cream in, too for bonus tastiness). Just keep in mind that if you're adding any dry ingredients like noodles (or rice, even!), you'll need to use more beef broth to account for that.
There you have the basics for this recipe, oh ye who swear ye cannot cook. Seriously anyone can make a good beef roast, regardless of cooking experience, so I'll hear no excuses on this one. Go forth and make savoriness!
The beauty of this recipe is it's simplicity, because if you don't add anything to it, it's just a classic Sunday beef roast type deal, and it's homey and comforting and delicious. But if you feel adventurous, you can build on it however you want. It's one of the recipes I think of when people insist to me, "I can't coooook" and I tell them to shut their lie-faces up, because some things literally anyone can cook. The secret of its deliciousness is the three basic ingredients that you HAVE to do how I say (I mean, not really. But I'm as good an authority on this as any. You don't even know Alton Brown, are you sure you want him telling you how to cook your food?). Everything else you can screw around with. The basic ingredients:
1. Beef
Another great thing about this meal is you don't have to buy expensive meat. Any chunk of beef will turn out just fine if you cook it long enough to make it tender, so don't waste your money on the nicest cut you can find, now is not the time to be a meat-elitist. The only real guideline I have for you here is make sure it'll fit in your slow cooker, which I kind of feel like I shouldn't need to tell you, but I did call this post Cooking BASICS, so...you know. Do that.
2. Beef broth
"But why do I need beef broth if I'm cooking beef?" Because cooking is just a modern, de-stigmatized form of witchcraft, and you don't see witches being like "Oh, but I already have newt in this potion, why would I add eye of newt too?" do you? Trust. It's important. It makes magic happen. The guideline for amount here is essentially, "some." You'll want enough to at least halfway cover your roast, generally, but err on the side of adding too much. Too much and you'll just have to kind of fish your meat and potatoes out, which is no big deal, but too little and it'll be too dry and you'll RUIN EVERYTHING, no pressure. Just add some broth.
3. Potatoes
Baby yellow potatoes are the best for this, because the beef broth softens them perfectly and makes them so buttery rich and delicious that you will take a bite and actually sigh and think about how lucky you are to be a human being with access to a Crockpot instead of like, a beaver stuck eating tree bark. That said, if you insist on messing with perfection (or you just want to try something new) you can use red potatoes. I maintain that baby is the only acceptable age group of potato for this, though, because they cook up soft all the way through and you don't have to chop them at all.
This is the Triforce of Deliciousness. If you throw just these three ingredients into a slow cooker and let them do their thing for six hours, you'll get delicious dinner every time. But here's some ideas for things you might want to consider adding:
--Veggies: Onions (Vidalia or any kind of sweet onion is particularly yummy), Carrots, diced Tomatoes, Peas... any of your typical stew vegetables will cook up well here.
--Seasonings: Spices and flavor add-ons are a good way to make any food taste like you worked harder on it than you did. For this recipe, you can take it into a spicier territory with some chili powder or red pepper flakes, go for a barbecue-like spin with brown sugar and a splash of vinegar (for tangyness, and it also helps tenderize the meat if you bought a tough-ish cut), or go upscale and add some red wine.
--Miscellania: If you want to easily take this from a roast to more of a stew, add the vegetables of your choosing at the beginning and a bit of flour towards the end of the cooktime, then when you're ready to eat, take the roast out and shred or cut it, then throw it right back in. Egg noodles are also delicious; again, just throw them in a bit before you're ready to eat (pro tip: if you're adding noodles, drop a dollop of sour cream in, too for bonus tastiness). Just keep in mind that if you're adding any dry ingredients like noodles (or rice, even!), you'll need to use more beef broth to account for that.
There you have the basics for this recipe, oh ye who swear ye cannot cook. Seriously anyone can make a good beef roast, regardless of cooking experience, so I'll hear no excuses on this one. Go forth and make savoriness!
Wednesday, September 18, 2013
Cat Toy Apocalypse
(Dibs on Cat Toy Apocalypse as a heavy metal/traditional yodeling fusion band name.)
Bessie's cat toys have been driving me nuts. For lack of a better solution, they've just been sitting around in something of a disorganized pile. I can't put them in a box or basket, you see, because Bessie, problem-child that she is, will chew on anything that has corners. Not with enough intention to actually damage anything or leave bite marks, just enough to make loud noises with her teeth that wake me up when she's gnawing on some bit of furniture at 4:00 AM to get my attention so I can wake up and feed her because SWEET MERCY HER BOWL IS HALF EMPTY, CALL FEMA, THIS IS AN EMERGENCY (I cannot emphasize enough to you that although she is my cat and I'm her person and I love her and all, she is a right pain in the ass most of the time). So that rules out most easily found storage solutions. Time to get creative. I decided that if I made a little box out of flexible foam it would keep the toys corralled but not be enticing to the Beast, since it wouldn't make any noise when chewed upon.
THE SUPPLIES
A glue gun, glue sticks, flexible foam sheets, spray adhesive, and cute fabric.
THE METHOD
First I decided on the size I wanted the little box to be. I ended up going with one and a half widths of the foam, because that would make it square, and squares are nicer than rectangles (to work with, I mean, not in terms of personality. This ain't no Flatlands reference). I just hot glued the piece-and-a-half together to make the square base. I also cut two more sheets in half to make the sides of the box.
Next I hot-glued the sides onto the base, trying to keep things nicely aligned and straightened but not worrying too much about it because a) I knew I was going to cover it in fabric anyway, which hides a lot of sins and b) it's a cat toy box, it doesn't need to be perfect. Perspective, folks.
Once the basic construction of the box was done, it was time to cover its hideousness with fabric. I traced around the base, then added a bit on each side so I could fold the extra on the sides over and glue them down to make nice edges. That way when I stuck all the pieces on the sides of the box down, extending the raw edges slightly onto the base, I could cover the raw edges with this one nice bottom piece. I also made a piece the same way to go on the bottom of the outside, just cuz.
For the side pieces I cut rectangles twice the height of the sides so that I could cover both the inside and outside of each side with one sheet, and I added a little extra on each side of the rectangle for wiggle room, and so that I could wrap it underneath the inside and outside bottom pieces, concealing all the raw edges underneath the bottom pieces that I gave nice edges to earlier. Does that make sense? I hope it does. Anyway, once I had all the pieces prepared I stuck them on with spray adhesive, sticking the two sides opposite each other on first, then the other two sides on, folding the edges under so everything looks nice and finished. I came back in with the glue gun to fix any places that didn't fully adhere with just spray adhesive, like the folded corners. I burned myself quite badly on this part, so do be careful with hot glue, people. It's hot.
THE FINISHED PRODUCT
Finally all that was left was to pile in all the toys and slip the whole thing somewhere discreet. Next to my desk ended up being the winning location.
Aaaahh, much less messy. The one organized bone in my body breathes a sigh of relief (bones breathe and have personality traits, right? Is that a thing? That's a thing).
Bessie's cat toys have been driving me nuts. For lack of a better solution, they've just been sitting around in something of a disorganized pile. I can't put them in a box or basket, you see, because Bessie, problem-child that she is, will chew on anything that has corners. Not with enough intention to actually damage anything or leave bite marks, just enough to make loud noises with her teeth that wake me up when she's gnawing on some bit of furniture at 4:00 AM to get my attention so I can wake up and feed her because SWEET MERCY HER BOWL IS HALF EMPTY, CALL FEMA, THIS IS AN EMERGENCY (I cannot emphasize enough to you that although she is my cat and I'm her person and I love her and all, she is a right pain in the ass most of the time). So that rules out most easily found storage solutions. Time to get creative. I decided that if I made a little box out of flexible foam it would keep the toys corralled but not be enticing to the Beast, since it wouldn't make any noise when chewed upon.
THE SUPPLIES
A glue gun, glue sticks, flexible foam sheets, spray adhesive, and cute fabric.
THE METHOD
First I decided on the size I wanted the little box to be. I ended up going with one and a half widths of the foam, because that would make it square, and squares are nicer than rectangles (to work with, I mean, not in terms of personality. This ain't no Flatlands reference). I just hot glued the piece-and-a-half together to make the square base. I also cut two more sheets in half to make the sides of the box.
Next I hot-glued the sides onto the base, trying to keep things nicely aligned and straightened but not worrying too much about it because a) I knew I was going to cover it in fabric anyway, which hides a lot of sins and b) it's a cat toy box, it doesn't need to be perfect. Perspective, folks.
Once the basic construction of the box was done, it was time to cover its hideousness with fabric. I traced around the base, then added a bit on each side so I could fold the extra on the sides over and glue them down to make nice edges. That way when I stuck all the pieces on the sides of the box down, extending the raw edges slightly onto the base, I could cover the raw edges with this one nice bottom piece. I also made a piece the same way to go on the bottom of the outside, just cuz.
For the side pieces I cut rectangles twice the height of the sides so that I could cover both the inside and outside of each side with one sheet, and I added a little extra on each side of the rectangle for wiggle room, and so that I could wrap it underneath the inside and outside bottom pieces, concealing all the raw edges underneath the bottom pieces that I gave nice edges to earlier. Does that make sense? I hope it does. Anyway, once I had all the pieces prepared I stuck them on with spray adhesive, sticking the two sides opposite each other on first, then the other two sides on, folding the edges under so everything looks nice and finished. I came back in with the glue gun to fix any places that didn't fully adhere with just spray adhesive, like the folded corners. I burned myself quite badly on this part, so do be careful with hot glue, people. It's hot.
THE FINISHED PRODUCT
Finally all that was left was to pile in all the toys and slip the whole thing somewhere discreet. Next to my desk ended up being the winning location.
Aaaahh, much less messy. The one organized bone in my body breathes a sigh of relief (bones breathe and have personality traits, right? Is that a thing? That's a thing).
Labels:
Cats,
DIY,
Home,
How to,
I made this,
no-sew,
organization,
Pets,
pink,
Projects,
quick fixes,
storage
Friday, September 13, 2013
Upgrading the Cloud Situation
I realize that title sounds like code for some sort of horrible top secret operation, but don't get out your conspiracy theorist hats just yet. All it means is I spent some time working on fixing up my bedding (aka the Puffy Pink Cloud; the memory foam and fluffy pink duvet combine to create a rather convincing cloud effect). I decided I needed a different accent pillow after my mom pointed out that the one I had been throwing on there wasn't quite right. I also thought I should go ahead and make a cover for a second body pillow while I was at it, because since I recently removed my boxspring to fix a bunch of weird height alignment issues with the windowsill and various outlets and junk (turns out you totally don't need a boxspring if you have a bed frame that has slats and stuff to support your mattress -- unless you just really like the extra support of a wooden box under there. I do not. I wish to sink so far into my bed that there is almost a suffocation hazard. Almost.) it's had the side effect of my pillows getting sucked back behind the mattress at the top. So a second body pillow was in order to combat the pillow suck. So off to the sewing machine I went, and a couple hours and under ten bucks later (all I had to buy was the white polka dotted fabric and the ruffled trim -- the blue striped fabric is the same stuff I used to cover my bookcase to keep Bessie the Destroyer out of it, and it was from my Grandma when she was clearing her fabric stash a bit so it was freeeee!), this change had occurred:
I realize that makes it look like it also got dark outside, but the first picture is actually from a few days ago, because I'm a cheat like that. I should mention that I didn't actually cover the pillow that wasn't quite right, it's sitting in my glider now and it looks nice there. The new pillow is made from a pillow form I found in the attic.
Anyway, I took some process pictures and was going to write out some basic instructions but now that I'm looking at them, I realize that the whole process is basically, "Rectangles. Sew a bunch of them. In various sizes. At some point, add some trim if you like."
Seriously. I shan't patronize you by showing you pictures of what it looks like to sew a rectangle. Instead I'll just leave you with another picture of how pretty that accent pillow turned out, and how adding the second body pillow makes everything a bit more structured and less "I just rolled out of this bed three minutes ago."
I realize that makes it look like it also got dark outside, but the first picture is actually from a few days ago, because I'm a cheat like that. I should mention that I didn't actually cover the pillow that wasn't quite right, it's sitting in my glider now and it looks nice there. The new pillow is made from a pillow form I found in the attic.
Anyway, I took some process pictures and was going to write out some basic instructions but now that I'm looking at them, I realize that the whole process is basically, "Rectangles. Sew a bunch of them. In various sizes. At some point, add some trim if you like."
Seriously. I shan't patronize you by showing you pictures of what it looks like to sew a rectangle. Instead I'll just leave you with another picture of how pretty that accent pillow turned out, and how adding the second body pillow makes everything a bit more structured and less "I just rolled out of this bed three minutes ago."
Labels:
before and after,
Decorating,
Home,
I made this,
pink,
Polka dots,
Projects,
quick fixes,
ruffles,
Sewing
Wednesday, August 28, 2013
Pasta Invention Time!
By now you know I love to cook from any number of delicious-sounding/looking recipes I find, but I also like to occasionally dabble in Iron Chef-ing, aka grabbing a bunch of ingredients and seeing what I can come up with. Today's recipe comes from just that (also, due to the spontaneity of it, the pictures for this post are kind of lacking in quality. Yep, cell phone pics. Sorry!). I had picked up these noodles at Target with no particular plan in mind; I just spotted them and thought "Oh yes. I want to eat those." So let's see what I came up with for them!
I had originally thought I'd just use the bacon grease to get a bacon-y roux going (fun fact: basically any recipe that starts with a roux is gonna be delicious) and use the bacon in some other recipe, but then I ate a nice crispy piece and thought "Wait a minute, idiot, bacon is delicious. Put it in the pasta!" So I chopped it up and set it aside. Back to the sauce!
As I mentioned, I wanted to go with a roux here. If you're not familiar, basically a roux is just a mix of fat and flour that gets you a nice thick base for sauces. It's usually made with butter, but this is America and I had bacon. So I whisked some flour into the bacon grease until it...looked like it does in the picture. Look, I'll be honest: this is one of those things that you learn from trial and error. There is no set amount of flour or anything, you just add some until it looks good. Same with the milk I added next. I just poured a bunch in while stirring until it looked about right. So that's the downside: some cooking things you just have to screw up a few times to learn how to do them. The bright side is that once you learn how to cook things that have no real recipe, people who don't know how to cook will watch you do it and look at you like a god. So that's fun. Anyway, once the sauce was looking smooth I threw in a big ol' pile of grated Asiago cheese and let it melt.
Then I poured the sauce over the noodles and added most of the chopped bacon. I also stirred in a little dried ground mustard (trust me, it adds just a leeeetle kick to cheesy dishes) and some red pepper flakes for a dash of heat. Now, I could have stopped there, but you know what they say: if it's worth doing, it's worth doing in a manner so decadent and amazing you almost feel a little ashamed to admit to the internet that you did it (that's how that saying goes, right?). So I spread the gooey deliciousness out in a casserole pan...
...and whipped up a topping of, what else? MORE CHEESE. I used some mozzarella, some cheddar, and some Parmesan (what's that bring our cheese count up to? Four?). Then I toasted up three slices of bread and crushed them to smithereens for some fine bread crumbs (fine as in texture, I meant, but I guess fine as in fiiiiine could also apply, depending on how into bread crumbs you are) and added that to the mix.
Then I just sprinkled that mixture over the top of the noodles (along with the bacon I didn't stir right into the noodles) and popped them into the oven for a few minutes to get a melty, crispy, amazing crust on the top.
Awww yiss. This is happiness in a pan. Obviously it's not diet food, but if you came here expecting that then I don't even know what kind of wrong internet turn you took, but you're in the wrong part of town, buddy. You don't belong here. Go back and take a right turn at Google Street over to Pinterest Lane, you might find some health food there.
First thing's first: I boiled the noodles. Seems obvious, but hey, I don't want to be the one that accidentally convinces you to eat uncooked noodles. Then I started cooking up some bacon.
As I mentioned, I wanted to go with a roux here. If you're not familiar, basically a roux is just a mix of fat and flour that gets you a nice thick base for sauces. It's usually made with butter, but this is America and I had bacon. So I whisked some flour into the bacon grease until it...looked like it does in the picture. Look, I'll be honest: this is one of those things that you learn from trial and error. There is no set amount of flour or anything, you just add some until it looks good. Same with the milk I added next. I just poured a bunch in while stirring until it looked about right. So that's the downside: some cooking things you just have to screw up a few times to learn how to do them. The bright side is that once you learn how to cook things that have no real recipe, people who don't know how to cook will watch you do it and look at you like a god. So that's fun. Anyway, once the sauce was looking smooth I threw in a big ol' pile of grated Asiago cheese and let it melt.
Then I poured the sauce over the noodles and added most of the chopped bacon. I also stirred in a little dried ground mustard (trust me, it adds just a leeeetle kick to cheesy dishes) and some red pepper flakes for a dash of heat. Now, I could have stopped there, but you know what they say: if it's worth doing, it's worth doing in a manner so decadent and amazing you almost feel a little ashamed to admit to the internet that you did it (that's how that saying goes, right?). So I spread the gooey deliciousness out in a casserole pan...
...and whipped up a topping of, what else? MORE CHEESE. I used some mozzarella, some cheddar, and some Parmesan (what's that bring our cheese count up to? Four?). Then I toasted up three slices of bread and crushed them to smithereens for some fine bread crumbs (fine as in texture, I meant, but I guess fine as in fiiiiine could also apply, depending on how into bread crumbs you are) and added that to the mix.
Then I just sprinkled that mixture over the top of the noodles (along with the bacon I didn't stir right into the noodles) and popped them into the oven for a few minutes to get a melty, crispy, amazing crust on the top.
Awww yiss. This is happiness in a pan. Obviously it's not diet food, but if you came here expecting that then I don't even know what kind of wrong internet turn you took, but you're in the wrong part of town, buddy. You don't belong here. Go back and take a right turn at Google Street over to Pinterest Lane, you might find some health food there.
Monday, August 19, 2013
PIE ANOTHER DAY.
Since I used that pun when texting my sister the other day it's been pretty much my favorite thing. It's so bad it's good. But the pie in question was actually just so good it's good. Nice transition there, huh? Smoooooth.
For Sunday dinner this week I had a very specific vision that occurred to me around Wednesday (Yeah, I am pretty much always thinking about food). Since the weather has been so amazing -- cool, breezy, almost chilly in the mornings! -- I wanted to capitalize and make something toasty and homey. You know how cooler weather is, it makes you want to snuggle up in a sweater and get right at home for the winter (this is probably the point at which you start to go "Uh, it's still August, let's not get carried away," but NAY, I say to you, let's get carried all the way the hell over there!). So I decided on an American classic: a homemade apple pie. But you know me, I can't just do things the normal way. I have to experiment and create weird food hybrids! So I figured, let's take this to the next level. Let's do caramel apple pie.
Now, I made a caramel apple pie once a few Thanksgivings ago, but it was a lot of work and involved making your own caramel from scratch. I can barely be bothered to get dressed on a Sunday, much less stand at the stove stirring sugar into caramel like a confectionery wizard for an hour, so I wanted to find an easier way. And I did! Let's do this!
First thing's first: get your caramel going. All I used for mine was sweetened condensed milk, heated up until it thickened and...well, caramelized, in the most literal sense. A lot of people swear by the easy, old-school method of plopping the sealed can in a pot of water and simmering it for an hour or two. I didn't do that though, because even though people SWEAR it's safe, you're still heating up a pressurized can of sugar-milk, and I didn't want to make a caramel IED. I ain't about that life. So I used this set-up (Well, you know...representationally. Obviously I took the condensed milk OUT of the can, or else I wouldn't be solving anything):
Basically you just want to pour the sweetened condensed milk into a smallish oven-safe container, cover it with foil, and put the whole shebang into a bigger oven-safe dish full of water. Once you've got this weird little set-up complete, just stick it in the oven at 450 degrees for a good long while, at least an hour. The longer you leave it, the thicker and more caramelly (roll with it) it will get. Don't just walk away and forget about it though, you'll want to check on it periodically to make sure your water doesn't all evaporate. Here's what mine looked like when I took it out after an hour, partially because I didn't want it to get too thick to go in a pie, and partially because I wanted to go to Target:
When I got home and remembered "Oh yeah, I was in the middle of something!" I set to making my pie crust. Now, real talk: you can totally buy the kind that you just roll out and go, and no one will know the difference, unless you hang out with some very prestigious pie critics, in which case your life sounds cool and I'm jealous. But if you have the time and the willingness the make a pie crust from scratch, it's way better: flakier, with a richer flavor and better overall texture. Making pie crusts is a pain in the ass though, so no judgments here if you wanna go the store-bought route. I use the recipe from the Better Homes and Gardens Cookbook (the red and white one -- if you don't have it, go look again because yes you do). It's simple and turns out delicious every time.
Once you're done with your crust, get that sweet, sweet caramel goodness back out and make the pie's fruity entrails (glad to ruin that for you). I used a bag of gala apples and this little doojig, which I would never ever make apple pie without. It peels, slices, and cores the apples for you in just a few seconds, so all you have to do is whack them in half from top to bottom to get a stack of perfect little apple pieces. If I had to peel, core, and slice all those apples by hand, I'd say "screw it" and buy a can of pie filling. Ain't nobody got time for that.
Anyway, when you've got a big bowl of apple slices, pour the caramel over them, stir to coat them all, and season however you'd like. I added some cinnamon, nutmeg, ground cloves, and a fistful of sugar, because pie-time is not the time to worry about sugar content.
Then top it off with the second half of your pie crust and brush it in the method of your choosing. I like to do melted butter and a sprinkle of sugar, but some people prefer to do an eggwash or use milk. Follow your heart! And the way to man's heart is through his stomach, so...follow your stomach! When you're done with that, wrap the edges with foil so they don't get too dark, and bake the pie at 350 degrees for 25 minutes. Then take the foil off and bake it for about 20 minutes more. You may need a little more or less time to get the crust perfectly golden and delicious-looking without the edges getting too brown (BURNT, ok, let's call it what it is). And then you're done!
Serve with vanilla ice cream if you're a purist, or melt a slice of cheddar or American cheese on top if you're not afraid of people looking at you funny (I'm used to it).
For Sunday dinner this week I had a very specific vision that occurred to me around Wednesday (Yeah, I am pretty much always thinking about food). Since the weather has been so amazing -- cool, breezy, almost chilly in the mornings! -- I wanted to capitalize and make something toasty and homey. You know how cooler weather is, it makes you want to snuggle up in a sweater and get right at home for the winter (this is probably the point at which you start to go "Uh, it's still August, let's not get carried away," but NAY, I say to you, let's get carried all the way the hell over there!). So I decided on an American classic: a homemade apple pie. But you know me, I can't just do things the normal way. I have to experiment and create weird food hybrids! So I figured, let's take this to the next level. Let's do caramel apple pie.
Now, I made a caramel apple pie once a few Thanksgivings ago, but it was a lot of work and involved making your own caramel from scratch. I can barely be bothered to get dressed on a Sunday, much less stand at the stove stirring sugar into caramel like a confectionery wizard for an hour, so I wanted to find an easier way. And I did! Let's do this!
First thing's first: get your caramel going. All I used for mine was sweetened condensed milk, heated up until it thickened and...well, caramelized, in the most literal sense. A lot of people swear by the easy, old-school method of plopping the sealed can in a pot of water and simmering it for an hour or two. I didn't do that though, because even though people SWEAR it's safe, you're still heating up a pressurized can of sugar-milk, and I didn't want to make a caramel IED. I ain't about that life. So I used this set-up (Well, you know...representationally. Obviously I took the condensed milk OUT of the can, or else I wouldn't be solving anything):
![]() |
![]() |
| Which is why it's in a Tupperware, I threw this in the fridge so fast you don't even know. In the middle of baking a pie? Screw that, we're going to Target! I didn't even NEED anything there. |
When I got home and remembered "Oh yeah, I was in the middle of something!" I set to making my pie crust. Now, real talk: you can totally buy the kind that you just roll out and go, and no one will know the difference, unless you hang out with some very prestigious pie critics, in which case your life sounds cool and I'm jealous. But if you have the time and the willingness the make a pie crust from scratch, it's way better: flakier, with a richer flavor and better overall texture. Making pie crusts is a pain in the ass though, so no judgments here if you wanna go the store-bought route. I use the recipe from the Better Homes and Gardens Cookbook (the red and white one -- if you don't have it, go look again because yes you do). It's simple and turns out delicious every time.
Once you're done with your crust, get that sweet, sweet caramel goodness back out and make the pie's fruity entrails (glad to ruin that for you). I used a bag of gala apples and this little doojig, which I would never ever make apple pie without. It peels, slices, and cores the apples for you in just a few seconds, so all you have to do is whack them in half from top to bottom to get a stack of perfect little apple pieces. If I had to peel, core, and slice all those apples by hand, I'd say "screw it" and buy a can of pie filling. Ain't nobody got time for that.
Anyway, when you've got a big bowl of apple slices, pour the caramel over them, stir to coat them all, and season however you'd like. I added some cinnamon, nutmeg, ground cloves, and a fistful of sugar, because pie-time is not the time to worry about sugar content.
Then top it off with the second half of your pie crust and brush it in the method of your choosing. I like to do melted butter and a sprinkle of sugar, but some people prefer to do an eggwash or use milk. Follow your heart! And the way to man's heart is through his stomach, so...follow your stomach! When you're done with that, wrap the edges with foil so they don't get too dark, and bake the pie at 350 degrees for 25 minutes. Then take the foil off and bake it for about 20 minutes more. You may need a little more or less time to get the crust perfectly golden and delicious-looking without the edges getting too brown (BURNT, ok, let's call it what it is). And then you're done!
Serve with vanilla ice cream if you're a purist, or melt a slice of cheddar or American cheese on top if you're not afraid of people looking at you funny (I'm used to it).
Friday, August 16, 2013
This post is a sham!
Ahh, nothing like starting a post with a good old fashioned pun. Because, you see, this post is about making pillow shams! Wakka wakka! Ok, sorry. Anyway, I've been wanting to change out my pillow shams for a while now. The ones I had were from a set of blue striped sheets that I'm not actually using anymore, and they didn't clash, but they didn't thrill me either. I wanted something that would better suit my "fluffy cozy unicorn cottage on a pink cloud" motif (yes, really. I have the design sense of a six year old girl. That's where I'm at in my life right now). I guess you could also feasibly call it shabby chic, but that's way less evocative. I actually had my eye on some ruffly shams from the Shabby Chic range at Target, but they were $20 per sham, and I knew I could make my own version that was A) more personalized to my taste, and B) cheaper. And I was right! My version ended up being exactly what I wanted, and I spent $12 to make two of them (of course, only one of them is in these pictures because I didn't finish the second one before the time to write this post came creeping up on me, but that's neither here nor there). So I saved 28 bucks whipping these babies up myself!
So let me show you how to make them!
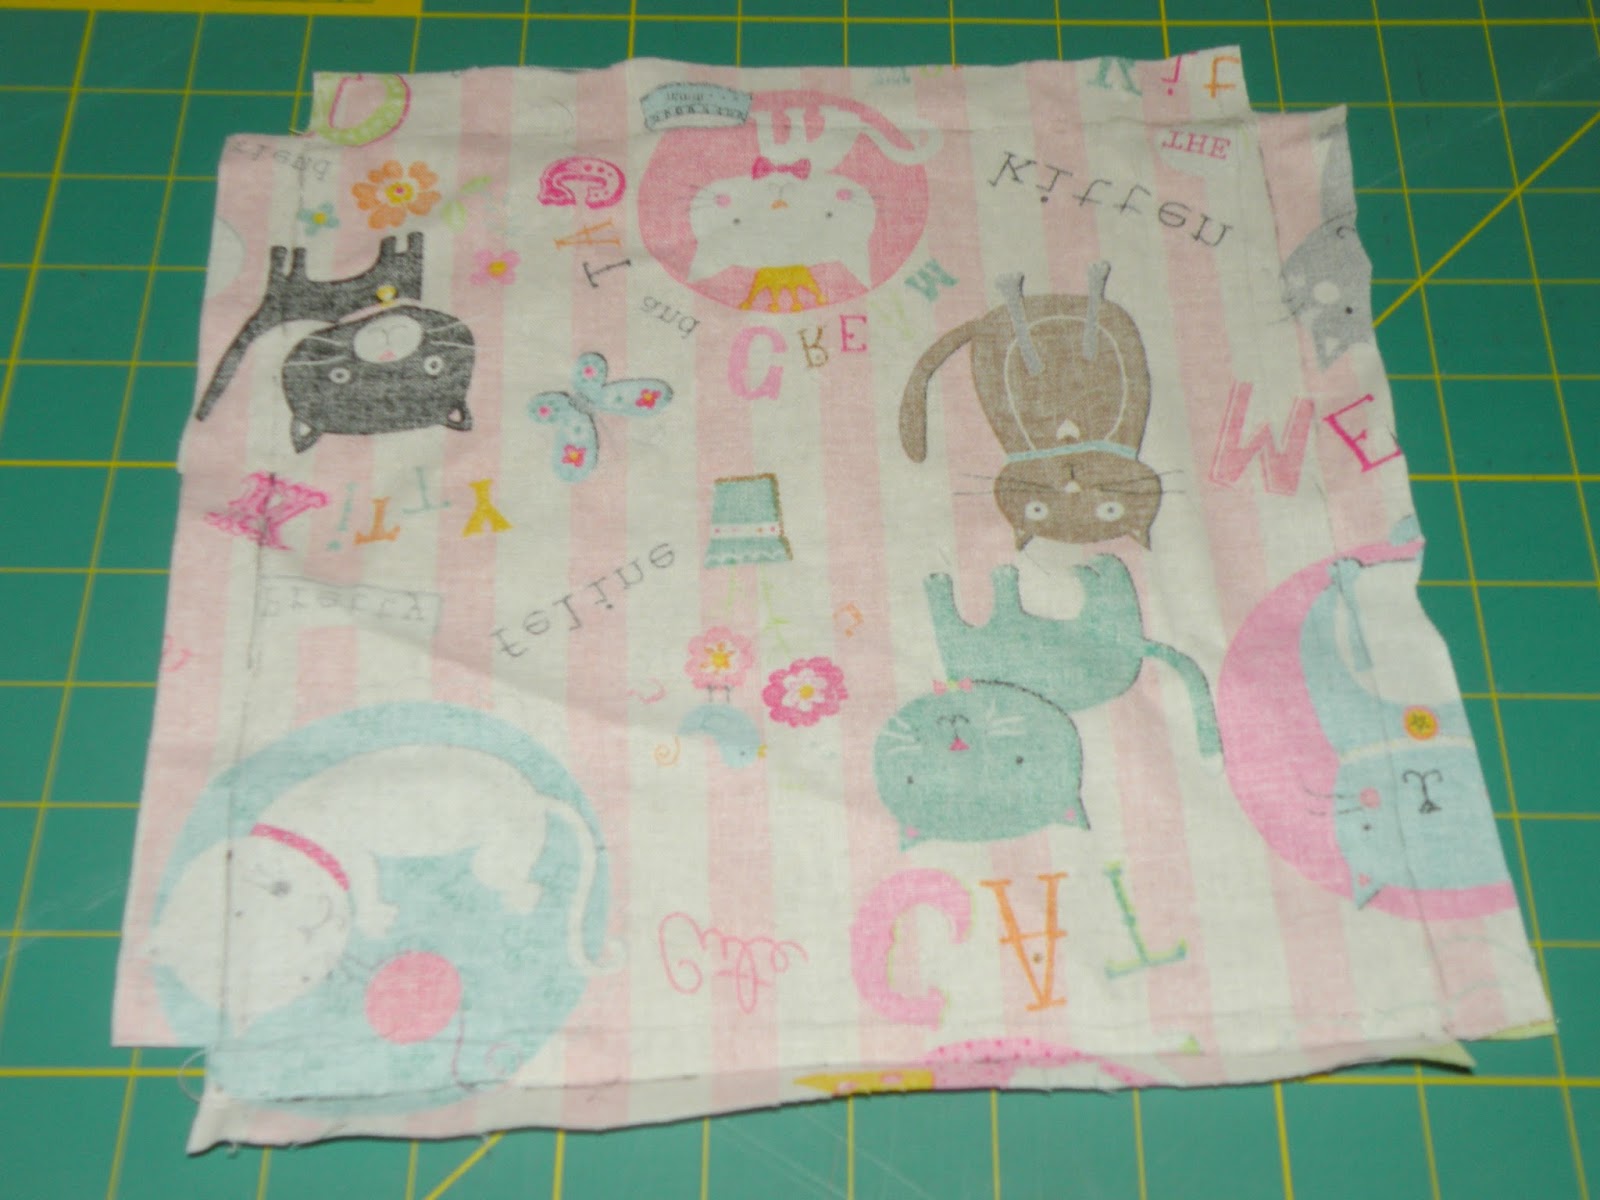
First up, you'll need to cut out some pieces.
Front piece: The easiest way to do this is to use an existing pillowcase as a guide; lay it flat on top of your fabric and trace around it, making sure to leave room for your seam allowances.
Ruffle strips: The length of these would depend on the amount of ruffle action you want going on, but you'll probably want the strips to be at least twice the length of the front so you can get a respectable amount of frilliness goin'. To get them this long, I cut these strips out on folded fabric so I had two identical pieces for each ruffle strip, then sewed them together at one of the short sides to make looooong strips. At this point I also sewed down the long sides about 1/4 inch from each edge so that when I wash the shams the ruffles won't unravel too far, but will still get the frayed edge that is so popular in shabby chic styles (unfortunately in a lot of the stuff you can buy, they don't finish the edge at all, so if you wash it you might just pull a ball of fluff out of the dryer).
Back pieces: To get that overlap in the back of the sham that lets you fit the actual pillow inside, the back pieces will need to be a bit longer than the front piece. First, measure your front piece and divide its length in half. Then you can either add 3 inches to both sides OR, if you feel like making things complicated like I did, you can add 2 inches to one side and 4 to the other (which, to be fair, is how most shams are made: one side longer than the other to make cramming your pillows in easier). Either way, once you've found the right length, cut out your back pieces and hem the edges that will form the sham opening.
Next up comes the ruffling! I know some people are intimidated by the idea of ruffling, thinking you need a special foot for your sewing machine or something, but nah, screw that noise. We're doing this old school. All you need to do is set your sewing machine to a nice long stitch length and sew right down the middle of each ruffle. Then grab the bobbin thread (I actually used a white bobbin and pink thread on top, which made it easy) and gradually work the fabric down the thread until you achieve your desired level of ruffle-tude. It's kind of a pain at first, but once you get into a groove it goes quickly. Just don't get too handsy and break your thread.
Then sew the ruffles onto the front piece in whatever configuration your heart desires. All you need to do for this is pin them in place, then hold the ruffles flat on each side of the presser foot as you sew straight down the middle of the ruffle.
Then it's time to sew the back pieces to the front! This is my favorite part of any project: the part where it starts to look like the object it's supposed to look like. My least favorite part is the bit about 20 minutes in where I start to second-guess myself and want to cry because surely I have somehow ALREADY RUINED EVERYTHING. I have sewing anxiety. I'm working on it. Anyway, pin the pieces in their proper configuration, right sides together...
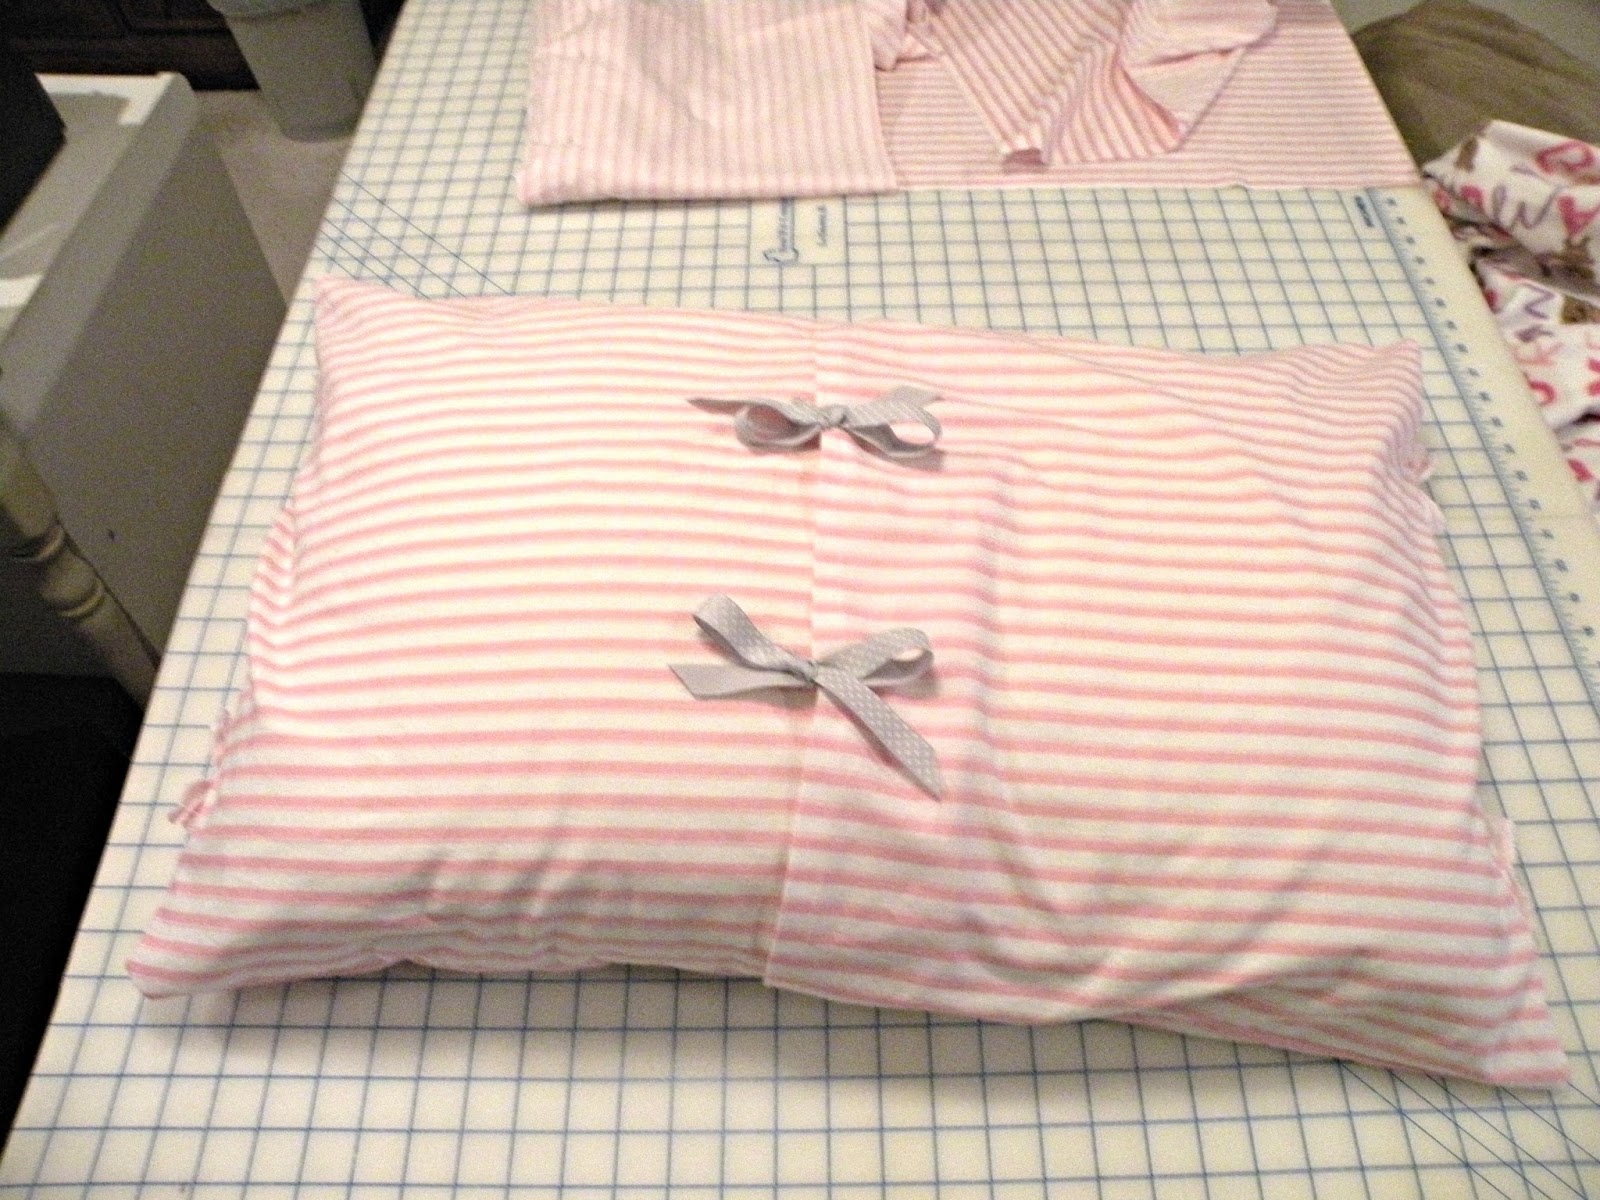
Then sew all the way around and turn it rightsies outsies to reveal your lovely pillow sham! I decided to add some ribbon ties to the back, more for looks than actual function. I just sewed one piece of ribbon to each side of the pocket, then tied 'em up all pretty (lies, my mom tied them up all pretty. When I try to make nice bows they end up looking like a kindergartener tied them, then Death himself came along and tried to fix them but when he touched the bows they got even wiltier and sadder).
Then floof it up and put it in a place of prominence and pride to take a picture and pretend like you're not in fact going to put your nice pretty shams behind the one gross but super-comfy pillow you drool all over every night!
So let me show you how to make them!
First up, you'll need to cut out some pieces.
![]() |
Ruffle strips: The length of these would depend on the amount of ruffle action you want going on, but you'll probably want the strips to be at least twice the length of the front so you can get a respectable amount of frilliness goin'. To get them this long, I cut these strips out on folded fabric so I had two identical pieces for each ruffle strip, then sewed them together at one of the short sides to make looooong strips. At this point I also sewed down the long sides about 1/4 inch from each edge so that when I wash the shams the ruffles won't unravel too far, but will still get the frayed edge that is so popular in shabby chic styles (unfortunately in a lot of the stuff you can buy, they don't finish the edge at all, so if you wash it you might just pull a ball of fluff out of the dryer).
Back pieces: To get that overlap in the back of the sham that lets you fit the actual pillow inside, the back pieces will need to be a bit longer than the front piece. First, measure your front piece and divide its length in half. Then you can either add 3 inches to both sides OR, if you feel like making things complicated like I did, you can add 2 inches to one side and 4 to the other (which, to be fair, is how most shams are made: one side longer than the other to make cramming your pillows in easier). Either way, once you've found the right length, cut out your back pieces and hem the edges that will form the sham opening.
Next up comes the ruffling! I know some people are intimidated by the idea of ruffling, thinking you need a special foot for your sewing machine or something, but nah, screw that noise. We're doing this old school. All you need to do is set your sewing machine to a nice long stitch length and sew right down the middle of each ruffle. Then grab the bobbin thread (I actually used a white bobbin and pink thread on top, which made it easy) and gradually work the fabric down the thread until you achieve your desired level of ruffle-tude. It's kind of a pain at first, but once you get into a groove it goes quickly. Just don't get too handsy and break your thread.
Then sew the ruffles onto the front piece in whatever configuration your heart desires. All you need to do for this is pin them in place, then hold the ruffles flat on each side of the presser foot as you sew straight down the middle of the ruffle.
![]() |
| Always a cat in my process pictures, never the same cat twice. |
Then it's time to sew the back pieces to the front! This is my favorite part of any project: the part where it starts to look like the object it's supposed to look like. My least favorite part is the bit about 20 minutes in where I start to second-guess myself and want to cry because surely I have somehow ALREADY RUINED EVERYTHING. I have sewing anxiety. I'm working on it. Anyway, pin the pieces in their proper configuration, right sides together...
Then sew all the way around and turn it rightsies outsies to reveal your lovely pillow sham! I decided to add some ribbon ties to the back, more for looks than actual function. I just sewed one piece of ribbon to each side of the pocket, then tied 'em up all pretty (lies, my mom tied them up all pretty. When I try to make nice bows they end up looking like a kindergartener tied them, then Death himself came along and tried to fix them but when he touched the bows they got even wiltier and sadder).
Then floof it up and put it in a place of prominence and pride to take a picture and pretend like you're not in fact going to put your nice pretty shams behind the one gross but super-comfy pillow you drool all over every night!
Sweet dreams!
Labels:
Decorating,
DIY,
Home,
How to,
I made this,
pillow shams,
pink,
Projects,
ruffles
Monday, August 12, 2013
Strawberry Shortcut Cheesecake!
Confession time: I hate baking cheesecake. It's one of the only things in the whole world that makes me grimace a bit when someone asks me to make it (the other thing is fried chicken -- I'm a bad Southerner, ok?). It's just so fussy and time-consuming and then if it cracks at the very end I have all the bad feelings in the world.
But I had been getting requests to make cheesecake from a certain very-pregnant sister of mine, and cheesecake did sound pretty good. So on Sunday I whipped up this amazing, super-delicious shortcut cheesecake! It had all the cream-cheesy tastiness of cheesecake, and a lovely light texture, but it only took me about 15 minutes to put together!
Here's how I threw this thing together:
1. Crushed up a decent amount (half a package, at least. Always better to err on the side of having too much!) of Oreo cookies, then stirred in about half a stick's worth of melted butter to make a nice crumbly crust that just barely held together when I shaped it with my hands. Dumped it into a springform pan and smooshed it around the bottom and up the sides of the pan to form the crust.
2. Mixed together a package and a half (about 12 ounces) of cream cheese (I had let it soften for a while first to make the mixing easier), a cup of confectioner's sugar, and a tub of good old fashioned Cool Whip! Once it was all smooth, I plopped it in the pan and spread it out all nice-like.
3. Then I just topped the whole thing with a can of pre-made strawberry pie filling (obviously if you're in the mood for cherry or blueberry or blackberry or what have you, follow your heart) and stuck it in the fridge until it was time to eat.
And it was that easy! This dessert was a big hit, too; everyone had seconds. I think the Oreo crust is what makes it. Seriously, if you're looking for a way to make a dessert, any dessert, taste better, add Oreos and butter. It's a Law of Baking.
But I had been getting requests to make cheesecake from a certain very-pregnant sister of mine, and cheesecake did sound pretty good. So on Sunday I whipped up this amazing, super-delicious shortcut cheesecake! It had all the cream-cheesy tastiness of cheesecake, and a lovely light texture, but it only took me about 15 minutes to put together!
Here's how I threw this thing together:
1. Crushed up a decent amount (half a package, at least. Always better to err on the side of having too much!) of Oreo cookies, then stirred in about half a stick's worth of melted butter to make a nice crumbly crust that just barely held together when I shaped it with my hands. Dumped it into a springform pan and smooshed it around the bottom and up the sides of the pan to form the crust.
2. Mixed together a package and a half (about 12 ounces) of cream cheese (I had let it soften for a while first to make the mixing easier), a cup of confectioner's sugar, and a tub of good old fashioned Cool Whip! Once it was all smooth, I plopped it in the pan and spread it out all nice-like.
3. Then I just topped the whole thing with a can of pre-made strawberry pie filling (obviously if you're in the mood for cherry or blueberry or blackberry or what have you, follow your heart) and stuck it in the fridge until it was time to eat.
And it was that easy! This dessert was a big hit, too; everyone had seconds. I think the Oreo crust is what makes it. Seriously, if you're looking for a way to make a dessert, any dessert, taste better, add Oreos and butter. It's a Law of Baking.
Labels:
cheesecake,
Cooking,
Food,
How to,
I made this,
quick fixes,
recipes
Friday, August 9, 2013
The things we do for our feline overlords.
Bessie and I have been having a disagreement. Namely, she thinks it's fun to get all up in these boxes on the bottom shelf of my bookcase and nose around, pawing at them and picking them up and dropping them (with her FACE) so they make an unholy racket at ridiculous hours of the early morning. I disagree. I don't find that fun at all.
I couldn't just put the boxes somewhere else because they were keeping all those cords back there out of Bessie's reach. Originally I had books and dvds there, but I replaced them with boxes when she started chewing on them, figuring I'd rather have her chew up the corners of a few storage boxes than chew on wires and either electrocute herself or start a house fire (she hasn't chewed on the boxes after all, but as I said, the face-bulldozing is quite noisy). So I had to get creative. Here's what I ended up doing:
1. First I grabbed some fabric that matches my room nicely, namely a blue and white striped seersucker fabric that my grandma had given my mom out of her stash. Then I got to measuring. I measured the inside width and height of the dresser, because I planned to hold the fabric in place with tension rods at the top and bottom of the second and third shelves. I added two inches to the height measurement to allow for the rod pockets, and decided to just use the width of the fabric for the width of the curtain, because I wanted it to be gathered.
2. Then I cut it to the appropriate size...
3. Then I ironed in a seam allowance on each of the vertical edges, as well as folding the top and bottom edges in 1/4 inch, then another inch, to create the rod pockets.
4. Next I sewed the vertical edges with the pockets (but not the 1/4 inch inside the pockets) unfolded.
5. Finally, the rod pockets got sewn shut horizontally along the top and bottom edges.
Then it was just a matter of slipping the tension rods in and putting the whole shebang into place!
If you're super observant you might be able to tell from the clock in the before and after pictures that this whole thing took almost exactly an hour, and really only that long because I dilly-dallied a lot. Hopefully it will solve the Bessie-the-Destructor problem and let me get some sleep!
I couldn't just put the boxes somewhere else because they were keeping all those cords back there out of Bessie's reach. Originally I had books and dvds there, but I replaced them with boxes when she started chewing on them, figuring I'd rather have her chew up the corners of a few storage boxes than chew on wires and either electrocute herself or start a house fire (she hasn't chewed on the boxes after all, but as I said, the face-bulldozing is quite noisy). So I had to get creative. Here's what I ended up doing:
1. First I grabbed some fabric that matches my room nicely, namely a blue and white striped seersucker fabric that my grandma had given my mom out of her stash. Then I got to measuring. I measured the inside width and height of the dresser, because I planned to hold the fabric in place with tension rods at the top and bottom of the second and third shelves. I added two inches to the height measurement to allow for the rod pockets, and decided to just use the width of the fabric for the width of the curtain, because I wanted it to be gathered.
2. Then I cut it to the appropriate size...
3. Then I ironed in a seam allowance on each of the vertical edges, as well as folding the top and bottom edges in 1/4 inch, then another inch, to create the rod pockets.
4. Next I sewed the vertical edges with the pockets (but not the 1/4 inch inside the pockets) unfolded.
5. Finally, the rod pockets got sewn shut horizontally along the top and bottom edges.
Then it was just a matter of slipping the tension rods in and putting the whole shebang into place!
If you're super observant you might be able to tell from the clock in the before and after pictures that this whole thing took almost exactly an hour, and really only that long because I dilly-dallied a lot. Hopefully it will solve the Bessie-the-Destructor problem and let me get some sleep!
Labels:
Animals,
before and after,
Cats,
Decorating,
DIY,
Home,
How to,
I made this,
Projects,
quick fixes
Wednesday, July 31, 2013
Mathematical!
I'm gonna keep the intro to this super short: I love Adventure Time (it's a cartoon, in case you're better at being an adult than me and don't watch cartoons anymore). I love it enough to advertise my love on a pair of shoes. Those shoes are not hypothetical. These are those shoes.
Now for the details. I painted these with acrylic paint. I chose BMO for the front of the right shoe, Lumpy Space Princess for the front of the left, Finn and Jake for the outside panels, and the simple grass from the closing credits for the inside panels. The only one I'm not 100% satisfied with is Jake, and I may yet go back and fix that panel, but I finished these super late and couldn't bring myself to take it on yet. I may also just leave it as is, because I'm no perfectionist, and let's be honest: they're a pair of cheapie Walmart shoes, I'm going to destroy them with wear anyway. In the morning (the actual morning, not the super-late-at-night-technically-morning-hour that I'm writing this at) I'll take a Magic Eraser to the parts of the white soles that got paint on them to clean them up a bit, and put the laces back in, of course.
But for now, I'm gonna go have myself some Adventure Time themed dreams.
Now for the details. I painted these with acrylic paint. I chose BMO for the front of the right shoe, Lumpy Space Princess for the front of the left, Finn and Jake for the outside panels, and the simple grass from the closing credits for the inside panels. The only one I'm not 100% satisfied with is Jake, and I may yet go back and fix that panel, but I finished these super late and couldn't bring myself to take it on yet. I may also just leave it as is, because I'm no perfectionist, and let's be honest: they're a pair of cheapie Walmart shoes, I'm going to destroy them with wear anyway. In the morning (the actual morning, not the super-late-at-night-technically-morning-hour that I'm writing this at) I'll take a Magic Eraser to the parts of the white soles that got paint on them to clean them up a bit, and put the laces back in, of course.
But for now, I'm gonna go have myself some Adventure Time themed dreams.
Labels:
accessories,
Adventure Time,
clothes,
Cute,
DIY,
Drawings,
I made this,
Projects,
shoes,
style
Subscribe to:
Posts (Atom)