Showing posts with label baking. Show all posts

Monday, August 25, 2014

There's a party in my tummy!

     (So yummy. So yummy.) Ok, if you didn't go youtube Yo Gabba Gabba like I told you to on Friday then that will have made no sense to you, but you're here, so things making no sense is probably nothing new to you. So the plan for the kids' birthday party cake got changed a bit along the way. Namely, the idea to do Brobee's whole body was scrapped when I realized I wouldn't be able to fit his arms and legs on the slab of cardboard I was using to transport the cake unless I seriously wonked up the proportions. Since I didn't want to do that, I decided to just do a headshot instead! Here's some pictures of how it turned out (if you're wondering why the pictures in this post look five hundred times better than normal, it's because my very talented friend Stephen took them -- that link goes to his photography site, in case you're interested -- and he's profesh as hell).


     As far as the smash cakes go...


     I'd say they were a pretty big hit with the kids. 


Wednesday, July 23, 2014

How about we just do this like NORMAL PEOPLE instead?

     I made chocolate madeleines the other day from a cookbook I picked up at the Green Valley Bookfair, called "Baking Style" by Lisa Yockelson. I won't lie, half the reason I bought it is because it has a pink cloth cover with swirly silver lettering and I imagined it looking right at home sitting on the shelf of my magical little benevolent-witch cottage where I will bake things and learn to whittle. But I did also think the recipes all looked pretty tasty. I didn't take any process shots, though, because this lady cray. Like I respect the commitment to the art and methodology of baking, but there are some things that I just -- come on, NO ONE IS GOING TO DO THAT. Like she wants you to clarify your butter and only use alkalized cocoa powder (the eff even is that? Cocoa powder should have no words on it that sound like battery terminology) and sift everything together onto a sheet of wax paper (why wax paper, Lisa? WHY WOULD YOU NOT USE A BOWL? We didn't even roll anything in it or do something that makes that make sense, you just wanted me to, what, destroy the kitchen when a stray breeze caught my DUNES of sifted sugar and cocoa?). 

     All that said, they did turn out very tasty, even though I didn't do any of the fancy-lady shit she told me to do. I just mixed things together all higgledy-piggledy and hoped for the best, cause I'm a normie like that. I also made the chocolate dipping sauce, but I only had half the required amount of chocolate and forgot to half the recipe (somewhere in the world, Lisa groans and holds her head like Harry Potter when Voldemort approaches. "Some plebeian ruined my recipe somewhere," she mutters). So I just made it up as I went and it turned out fine. Anyway, here's some pretty food pics to drool over before I get outta here. 


Monday, May 26, 2014

Yellowcake Uranium.

     Cool, now that I'm moving up on a couple government watchlists, let me show you the cake I made for my brother-in-law's birthday over the weekend, which is like the real-life word puzzle version of that title. 


     For it is a cake. That is yellow. And radioactive. Well, not really. But then everything is a little radioactive. Anyway, I whipped this baby up real quicklike by frosting my usual white cake with yellow cream cheese frosting, then using a stencil to add the symbol for radioactivity on top with black sprinkles. It got a little outside the edges, but hey, maybe it's disintegrating in the midst of a nuclear meltdown. Who knows. Run with the theme. Oh, and I guess it's not entirely just my regular white cake, because obviously I had to make it nuclear-waste green on the inside. It just felt right. 

Evie is making that forlorn face because she BADLY wanted some. Like, crawled across the table with her tongue hanging out wanted some. 

     I'm kind of hoping we'll all develop radiation-induced superpowers, but failing that, at least it was super delicious. 

Wednesday, January 29, 2014

Painted Puppy Cake!

     Now for the second of those custom cake orders I mentioned on Monday: the Painted Puppy Cake! This one was for a little girl's birthday party at a pottery painting place. She wanted a fluffy white puppy, with rainbow layers and a bow. Beyond that, Amanda had the idea to make paint splotches on the pup, like it had gotten into the paint at the party location. I loved the idea, so I ran with it! 


     If you're thinking "Hey, that reminds me of the Kitty cake you did recently!" that's because the birthday girl was there when that cake was presented, and decided she wanted one like it, but a dog instead of a cat. So I went for the same general style (piped white "fluffy" looking frosting all over, cute cartoony eyes), just with some more canine features. The white is my usual favorite buttercream recipe, and the eyes, nose, bow, brush, and paint splotches are all shaped from hand-made fondant. The inside was made of five different colored layers: pink, purple, green, teal, and yellow. I'd show you a picture, but obviously I couldn't slice into it to snap a photo! 

     This one was so fun to make -- with the rainbow layers inside and the splashes of color on top, it was the cake-making equivalent of getting to use all the crayons in the box! 


Monday, January 27, 2014

Thomas the...Cake?

     Today I shall share with you the first of two custom cakes I made recently. I actually had two orders due on the same day, so it was a baking marathon. Many eggs were slain that day, and much food coloring was spilt upon the land. Anyway, this first one was for a first birthday party, and the request was "Thomas the Tank." (Sidenote: is it Thomas the Tank or Thomas the Train? I always thought train, but google says tank, so I guess I'm just stupid? Whatever, it's not like that's technically wrong, he is a train.) 


     This guy is the main reason I was practicing my fondant coloring skills last weekend; I wanted to make sure I'd be able to get that blue just right. The inside is the white cake that I always recommend for large groups, because it's super delicious and hard not to like.  Then I frosted it with white buttercream and piped on red and yellow accents around the top and bottom edges to play off of the red and yellow fondant in the...lights? and...bottom train-y part? I dunno, I never got into trains. The decorations on the top are entirely  made-from-scratch fondant, except the tiniest bit of black icing piped on for some definition in a few places. I just pieced it together in sections, using a picture for reference. 

     This one was a lot of work (any time there's multiple colors of fondant involved, it's gonna be a long day -- so much kneading! -- but it's good for the arms, so I ain't mad), especially because I was working on a second cake that same day (so lots of "bake this, cool it while that bakes, crumb-coat this, chill it while you crumb-coat that" back and forth) but I'm really pleased with how it turned out and, more importantly, the client was super happy with it! It makes me so happy to think that I contributed in some small way to people making happy memories.


Monday, January 20, 2014

I'm not overly...fond...of fondant. Ba-dum-chhhh.

     Since I've got a few custom cake orders coming up that are going to involve a fair amount of fondant-ing, I thought I'd get some practice in this weekend with making marshmallow fondant from scratch (rather than buying it pre-made, which I've done when I only needed one color) and coloring it myself. I wanted to do a test run for a few particular colors because I have very specific hues in mind, so I figured if I tried them out ahead of time I could get the color ratios right ahead of time so I wouldn't have to experiment and end up with weird gray slabs of sugary ick when it's go time for the real cakes. Let's see how it turned out! 

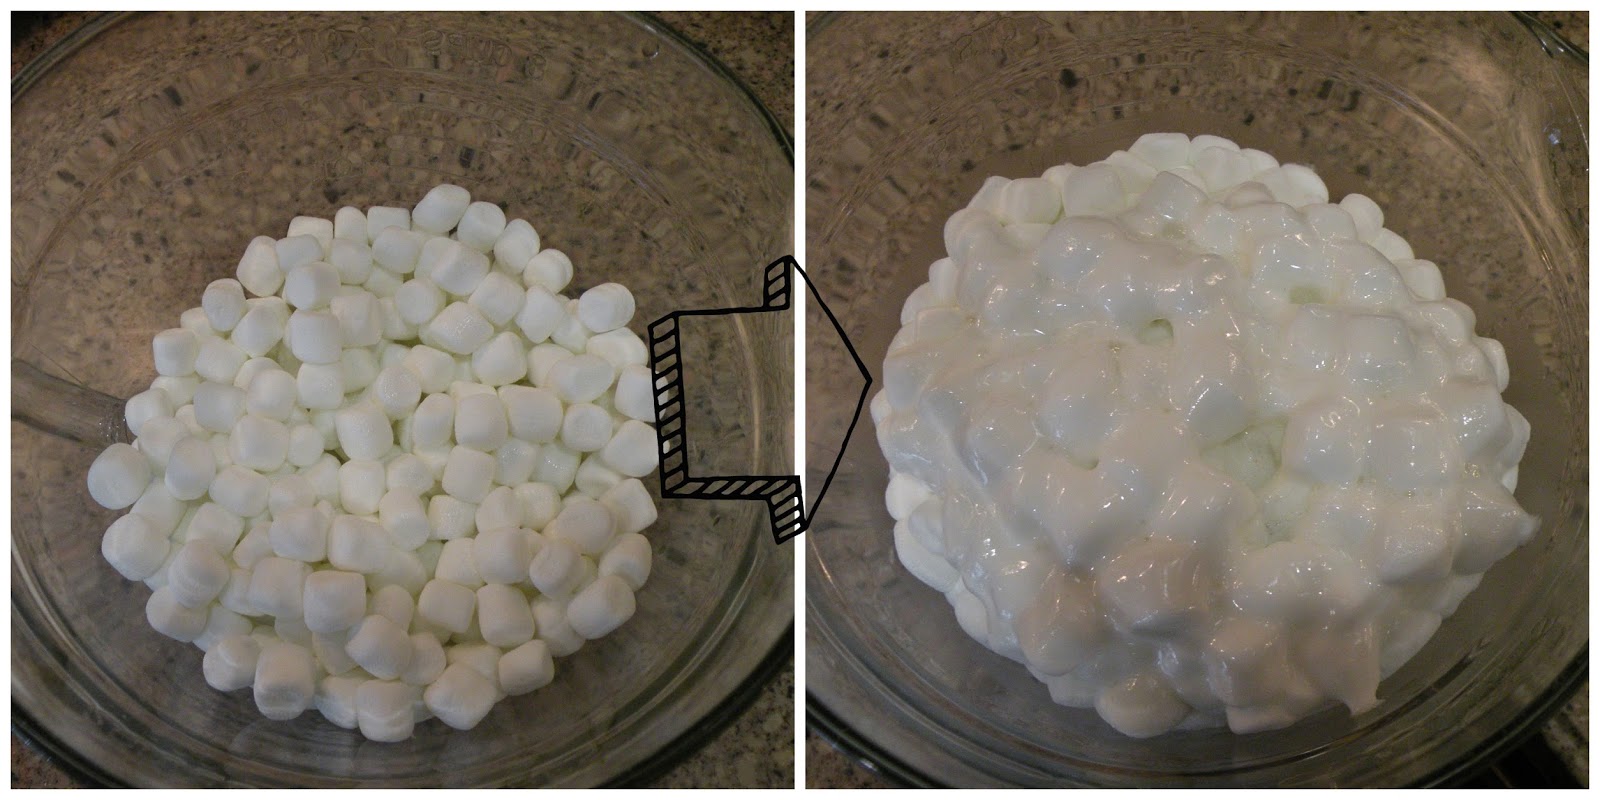
     First thing's first: I melted about 4 cups of marshmallows with two tablespoons of water in the microwave. This part's fun, because it's like you're exploding Mr. Staypuft. I mean, hopefully not actually exploding, the marshmallows should just puff up and then melt together into sweet sugary goo. 


     Then I added 4 cups of powdered sugar, one cup at a time, and stirred it up until I couldn't stir no' mo'. Once I had a big sugary sticky mess that I couldn't do a damn thing with, I dumped it out onto a cutting board and kept kneading until I'd incorporated all the sugar. It took a while, but eventually I just looked down at it and said "Holy crap, that's beautiful!" 


     Then comes the fun-but-also-a-little-miserable part: adding color. It's fun in that it's cool to see the colors develop as you knead; they come through in streaks so the fondant gets kind of marbled before it gets fully colored. It just takes a LOT of kneading. I mean a lot. So this was the part where I always think that fondant is kind of a bitch. 


     That one ended up being black; you can see the coloring folded into the inside at the top left of the...glob? What's a nicer-sounding word for glob? I dunno, you think of one and pretend I wrote that. 

     Here's the colors I ended up with, including the finished black fondant on the right.  


     I don't know why I didn't think to take this picture before I wrapped them up in plastic wrap, but here we are. No regrets. Ok, some, but minimal. Minimal regrets! Anyway, you can see that the black actually turned out delightfully dark, which pleasantly surprised me. I wrapped them up and vacuum sealed them, since I have no real use for them but didn't want to throw all my hard work away, but who knows if they'll even keep overnight. It's all just practice anyway, so I'm not too worried. And in case you were wondering, they did turn out tasting much better than the store-bought pre-made stuff! Taste is my highest priority when I make cakes (obviously I want it to look amazing, too, but if it looks amazing and tastes weird, what was the point?), so I'm quite pleased! 


Friday, January 3, 2014

Amanda's Favorite Cookies

     This post is exactly what it claims to be: the recipe for Amanda's favorite cookies. I don't make them that often because I prefer drop cookies to cutout cookies, but sometimes she gets to pestering me about it and won't stop until I make them. So I figured I'd share them with you! They're kind of a strange cookie: chocolatey through and through, but very light and flaky in texture, almost closer to a pastry than a cookie. 


     The original recipe is out of a book my friend Elise gave me once (it's this one right here, if you're curious). They're called "pressed chocolate cookies" in the book, but I always call them chocolate envelopes, because that's more descriptive. Read on and I'll show you how I make them! 

     First up, gather your ingredients. 


     You'll need:

     1 1/3 cups flour

     2 tablespoons cocoa powder
     2/3 cup softened butter
     3/4 cup sugar
     1 egg yolk
     chocolate discs, chunks, or whatever else you want to cram inside the cookies

     First up, preheat the oven to 375 degrees, and grease a baking sheet with butter or cooking spray. Then mix the flour and cocoa together in a medium bowl. In another bowl, a large one this time, beat together the sugar and butter, then add in the egg yolk and beat some more. When it's all combined, add the dry ingredients from the medium bowl to the large bowl and beat until everything is nicely mixed up. The dough will look really crumbly. Like this!  


     Now, the original recipe says to refrigerate for at least 30 minutes, but I think they put that in there just to screw with everybody. Don't do that. This dough is so crumbly and dry that if you chill it, it will never, ever roll out without cracking apart. You have to do the opposite and warm it up a bit by kneading it and squishing it with your hands until it starts to hold together. Once it holds its shape, throw down some flour and start rolling it out. It's very important to also flour your rolling pin, because the dough can start to pull up and tear if you're not very gentle with it. It's kind of a pain in the tush, but suffering makes the cookies taste better. Once the dough is rolled out pretty thin (1/8 of an inch if you can get it there, thicker if you get tired of rolling and decide where it's at is good enough), cut a whole bunch of circles out with the cookie cutter/glass of your choice. I use a little biscuit cutter. 

See how the dough stuck to the counter a little in the missing cookie's spot? Flour, flour, flour your surfaces, friends. Don't be like me! 

     Once they're all cut out, it's assembly time! Just place your chocolate disc (or whatever else you're using) in the center, put another cut-out on top, then press the edges together with a fork to seal them. 


     Plop 'em on the prepared baking sheet and bake them for about 8 minutes. I always start with 7 and then keep a close eye on them, because I like my cookies to essentially just be heated-up dough, but if you like a crisper cookie, let them go a little longer. When they've spread out just a bit and the edges start to set, take them out and let them cool on a wire rack. They'll still seem a little underdone when you first take them out, but they'll continue to set juuuuust enough while they cool, which is what makes their divinely odd gooey-but-kind-of-crispy texture. 

     Then they're done! Enjoy them while you can, because a batch only makes about a dozen, so they go fast.